Senstar Installer Configuration
This guide provides step-by-step instructions for configuring Senstar perimeter security devices to integrate with GCXONE. Follow these steps to ensure proper video streaming, event detection, and alarm management.
Configuration
Step-by-Step
Prerequisites
Before You Begin
- ✅ Administrator privileges on your system
- ✅ System meets minimum hardware and OS requirements for the Senstar installer
- ✅ Network access to the target Senstar device is available
- ✅ Senstar Symphony Server installer downloaded
Step 1: Install Senstar Software
Step 1: Install Senstar Software
Download Installer
- Download Senstar Installer (Senstar Server) from the official website
Run the Installer
- Double-click the downloaded .exe file
- Proceed with default options unless specified by IT policies
- Finish installation and launch the application
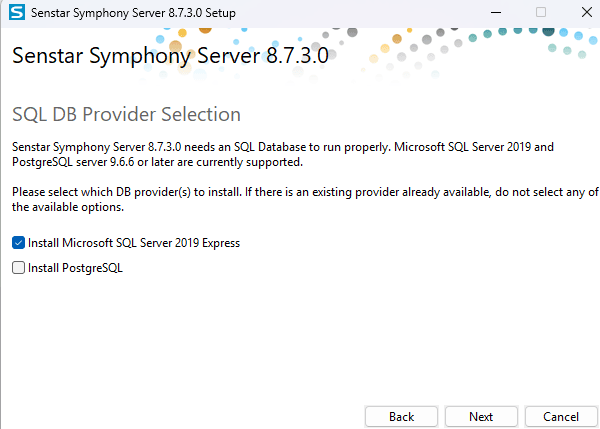
Installation Note
Upon installation, a pop up will be displayed. Uncheck the selected checkbox and click on "Next" button to continue the installation
Post Installation
- Once installed successfully you will be able to see the client in your desktop (or mentioned in your path)

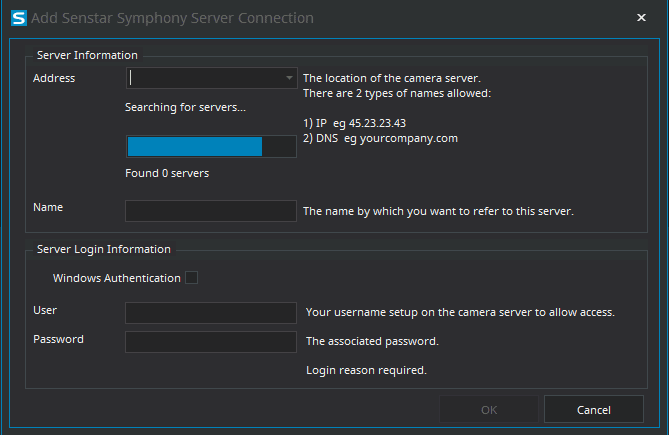
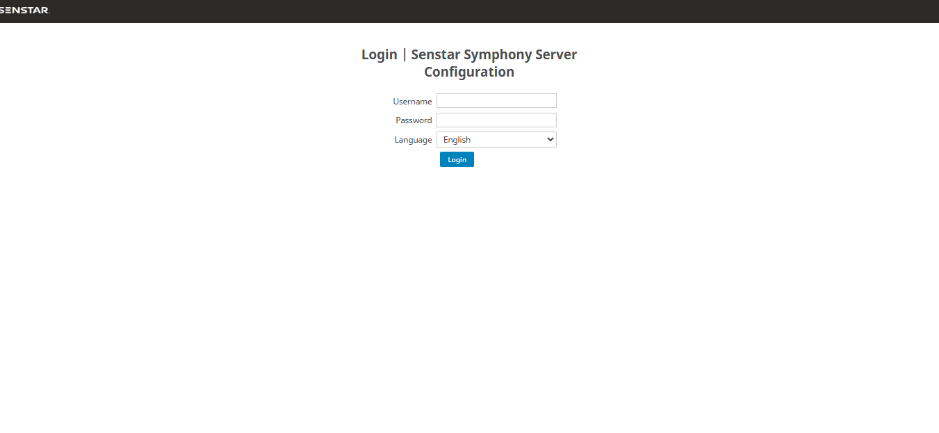
Upon opening the client you will be asked for the authorization with IP address, username, password and able to see the live stream
Expected result: Senstar client installed and accessible
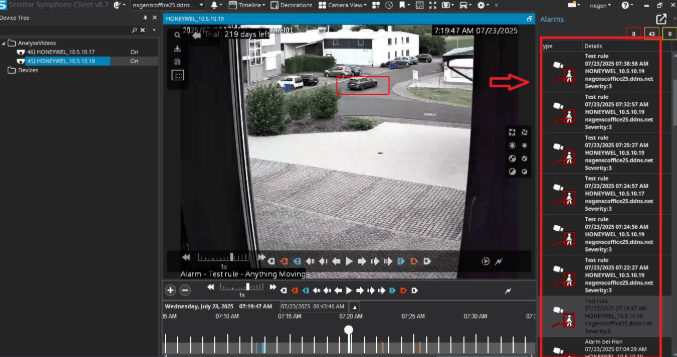
Step 2: Verify Streaming and Events in Senstar Client
Step 2: Verify Streaming and Events in Senstar Client
UI path: Senstar Client
Configuration Steps
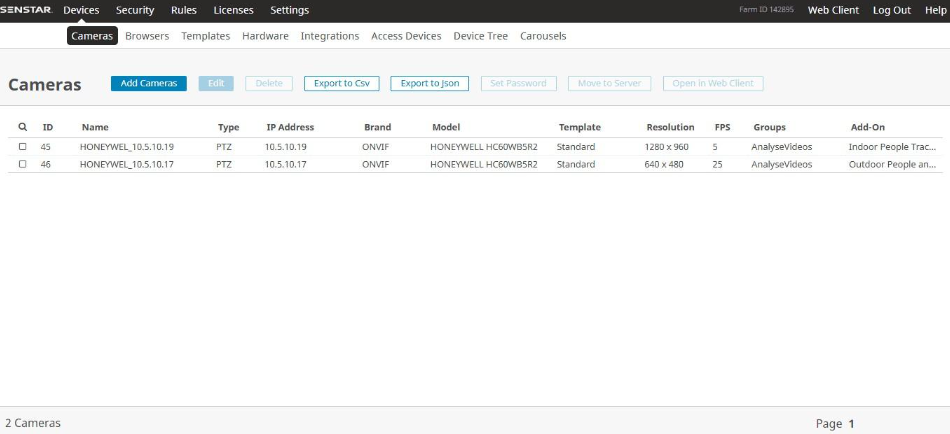
- Open the installed Senstar client from your desktop or start menu
- Enter the IP address, username, and password of the Senstar unit
- Click Connect
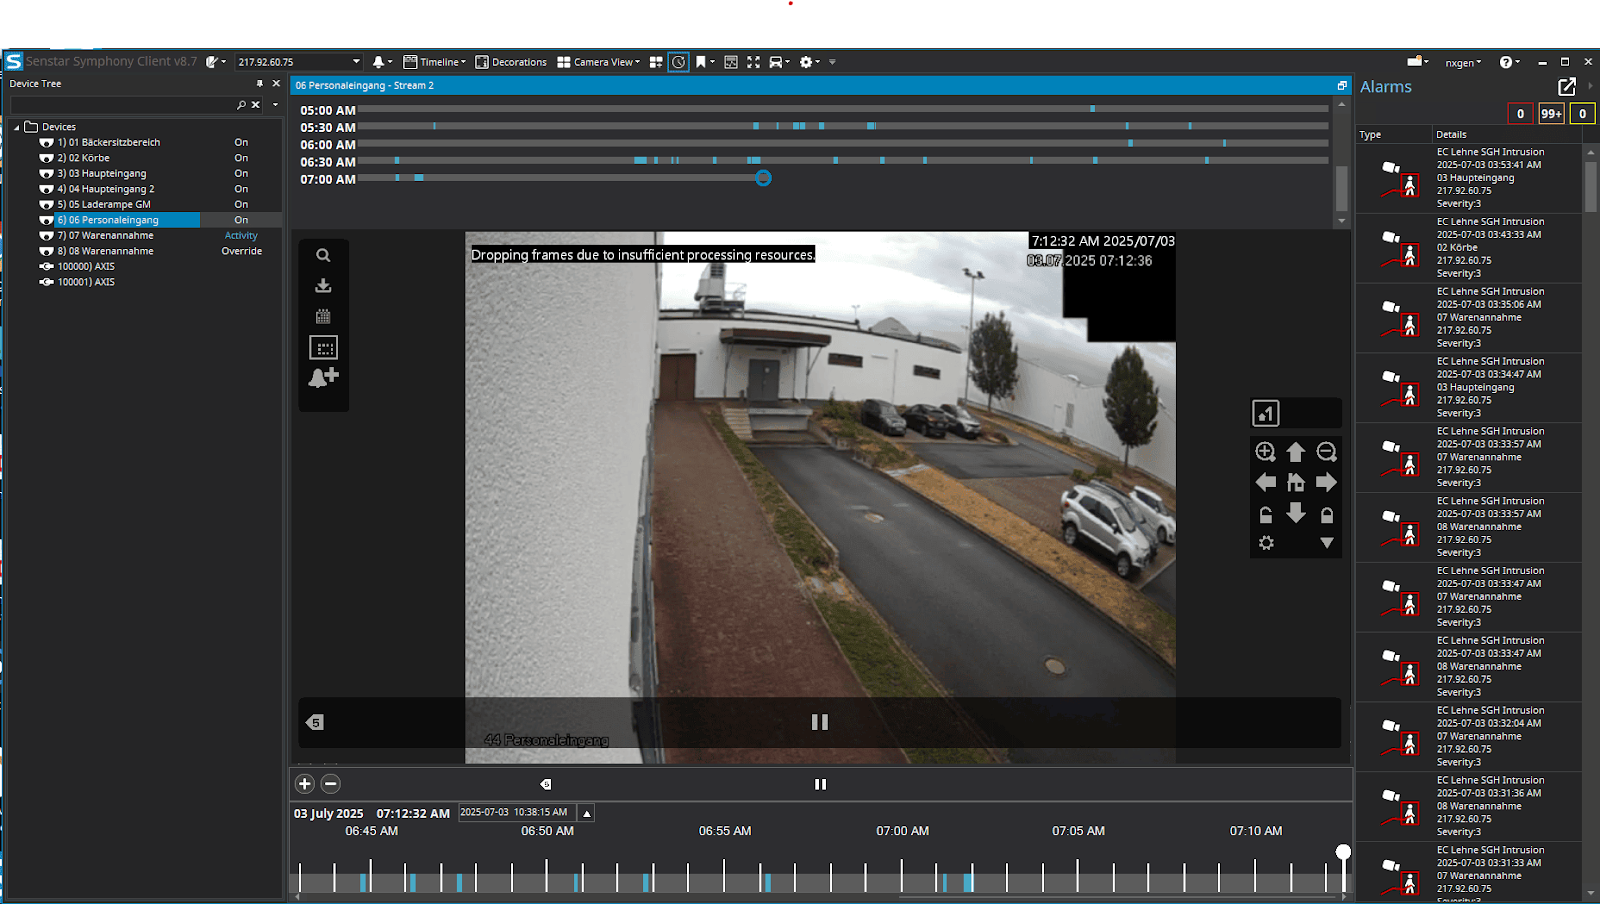
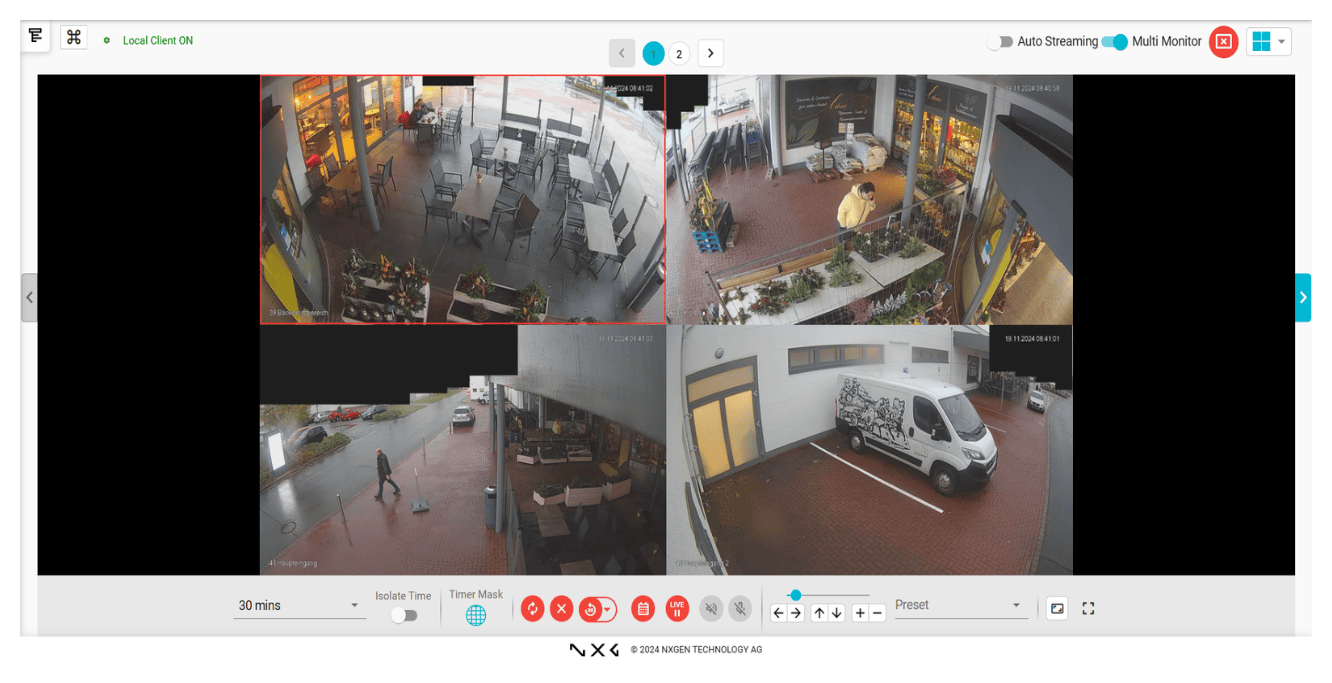
- Navigate to the Live View tab
- Confirm the live video feed is working as expected
- Go to the Events or Logs section
- Confirm that real-time motion or intrusion events are being logged correctly
Expected result: Device is online and in working state
Step 3: Add Senstar Parameters to GCXONE
Step 3: Add Senstar Parameters to GCXONE
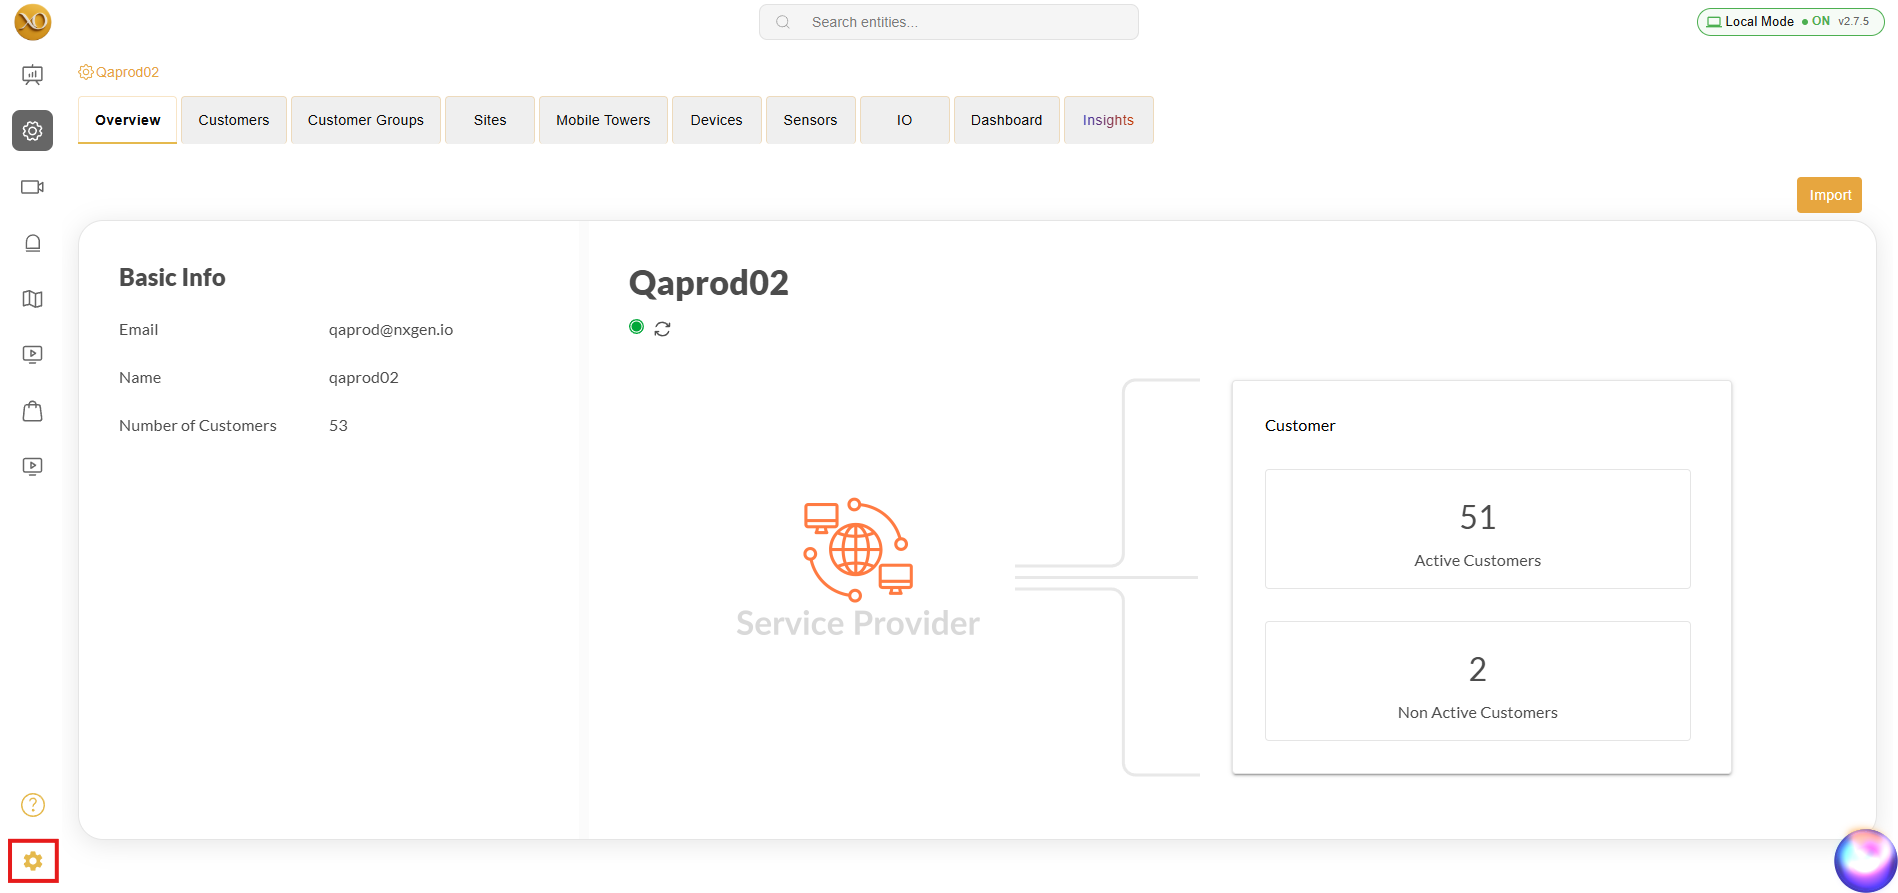
UI path: GCXONE → Configuration App → Service Provider → Overview → Edit → Additional Settings → Custom Property
Configuration Steps
- Login to GCXONE
- Navigate to configuration app
- At service provider level, click on edit button under overview tab
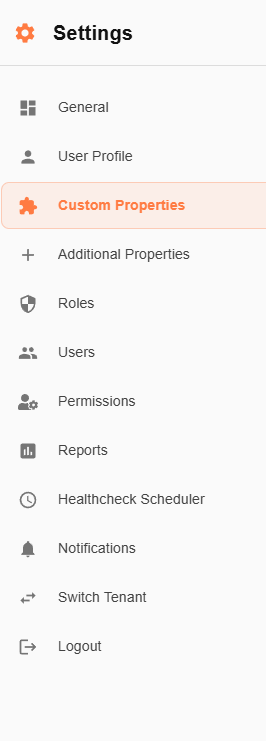
- Click on additional settings tab → Custom property
- Scroll down and click on "Add +" button
Enter parameter details:
- Parameter Type: string
- Parameter Name: SenStar_Device_Custom_baseUrl
- Parameter Value: https://universalproxy.nxgen.cloud/
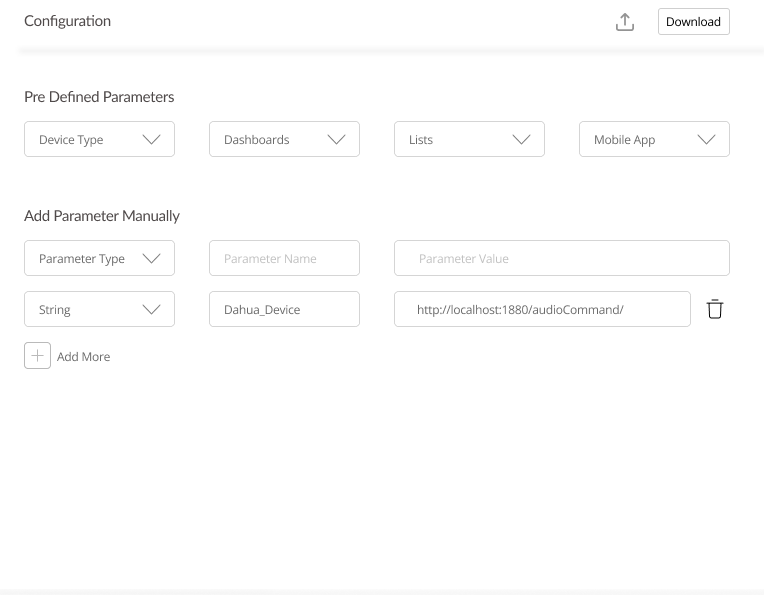
Expected result: Custom property added successfully
Step 4: Add Senstar Device Under the Required Site
Step 4: Add Senstar Device Under the Required Site
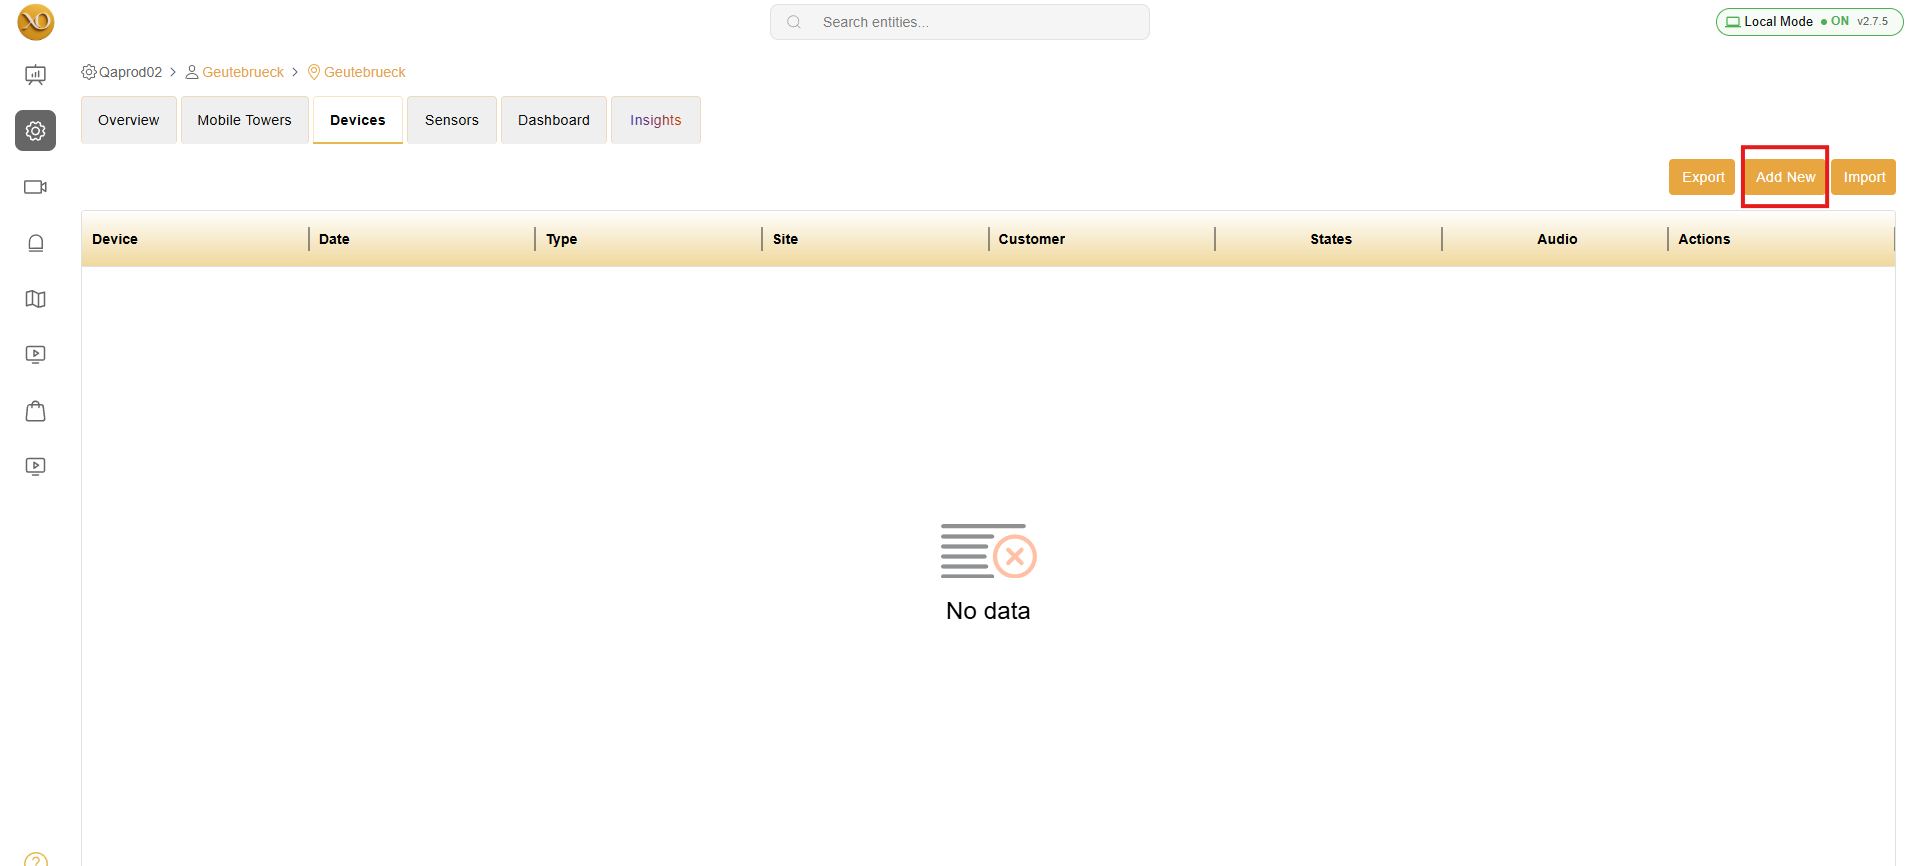
UI path: GCXONE → Configuration → Site → Devices → Add New Device
Configuration Steps
- Go to the Configuration section in GCXONE
- Select the target site under which the Senstar device should be registered
- Navigate to Devices → Add New Device
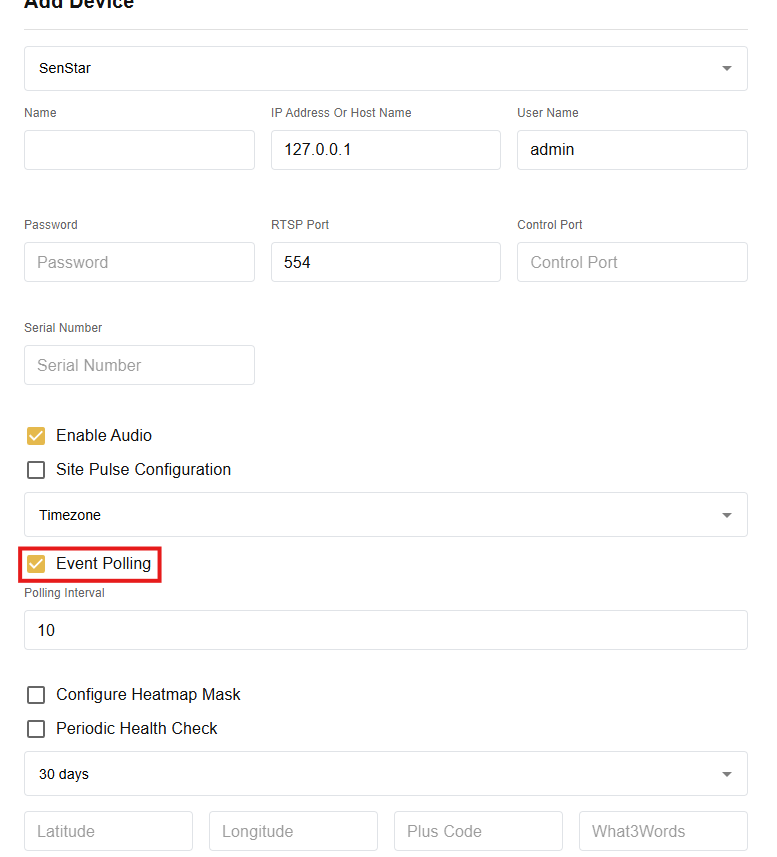
Fill in the following details:
- Device Name: e.g., "Senstar Camera - Gate A"
- Device Type: SenStar
- IP Address/Host: xxx.xxx.xxx.xxx
- Http/s Port: Default or customized (e.g., 5000)
- Enable HTTPS: switch ON the toggle if the device supports HTTPS, If not it can be in OFF
- Username: xxx
- Password: xxx
- RTSP Port: for streaming
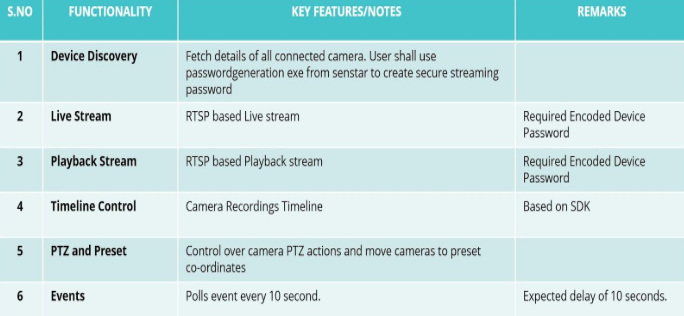
- Enable event polling check box for events to flow with 10 sec interval
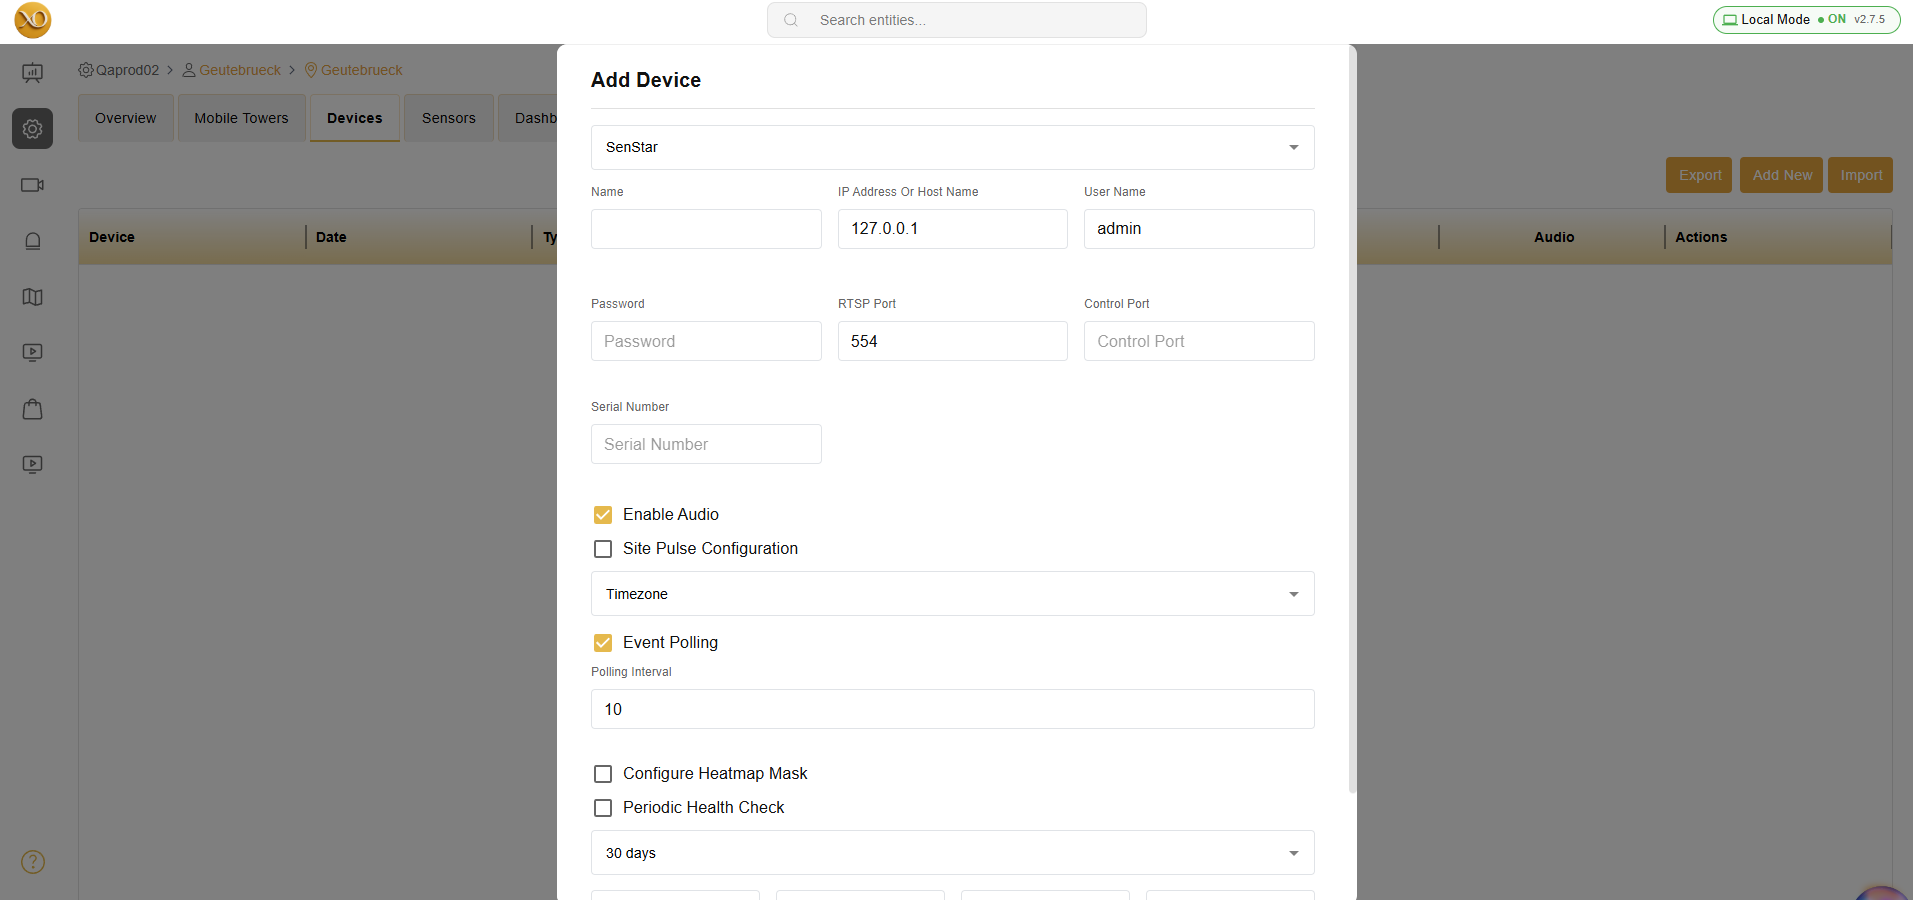
Important: Streaming Key: The protected RTSP password should be provided in this field. See Step 5 for how to generate the encoded password.
Expected result: Device configuration page ready for password encoding
Step 5: Generate Streaming Password
Step 5: Generate Streaming Password
Background
The Senstar device requires an encoded password to access the RTSP-based live stream. The encoder cannot be downloaded and installed directly. You need to install the Senstar server exe in your machine as mentioned in prerequisite conditions.
Steps to Get Encoded Password
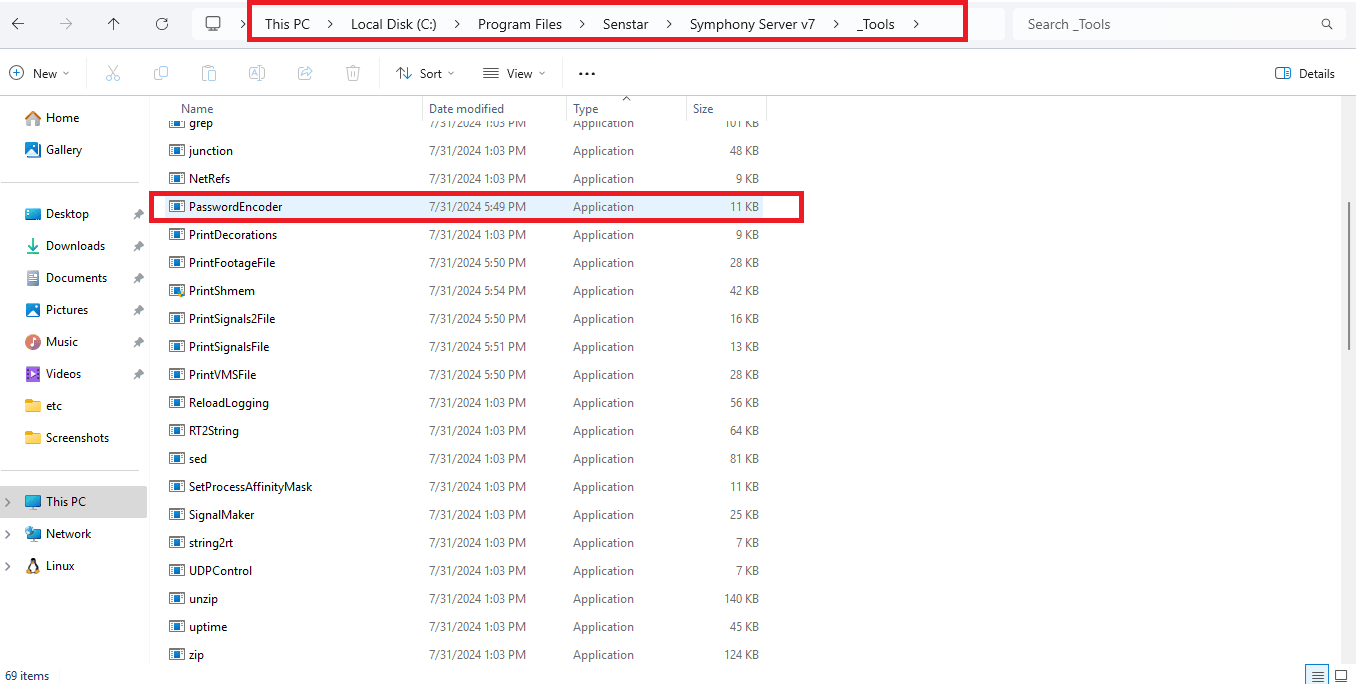
Access the Password encoder from your system in the following path:
- PATH: Local disk C → Program files → Senstar → Symphony server V7 → _Tools → PasswordEncoder (File type - Application)
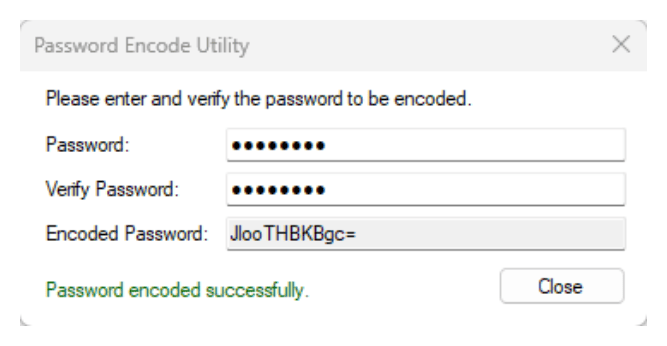
- Run PasswordEncoder.exe
- Enter device password
- Copy and paste the Encoded Password in Device Configuration page
Info: The note above is needed to stream the live via VLC media player and is not required in GCXONE.
Enable Events
Check the event polling enabled checkbox
Click Save & Verify to confirm that the device is reachable and data (stream/events) is being received
Note: Make sure RTSP URL works in VLC media player for testing purposes.

Expected result: Device added successfully with live stream and events
Step 6: Configuring Senstar for Alarms
Step 6: Configuring Senstar for Alarms
Background Information
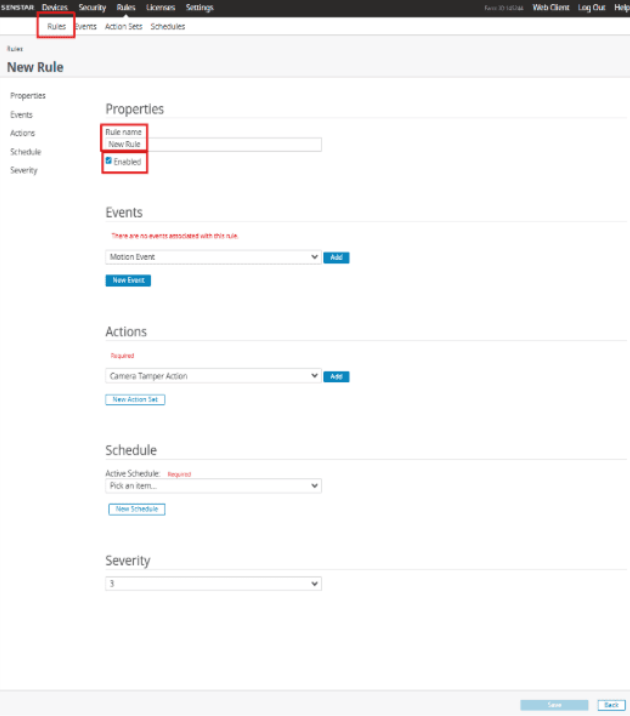
The Senstar Symphony Server can generate alarms from rules. Rules include events, action sets, and schedules:
- Event: Triggers a rule. Examples include events from video analytics, camera inputs, and access devices
- Action Set: Defines the actions that the Senstar Symphony Server takes when an event triggers a rule
- Schedule: Defines when a rule is active. An event must occur during an active time in the schedule to trigger a rule
When a rule is enabled, the occurrence of an event associated with the rule during an active period in the rule's schedule causes the Senstar Symphony Server to perform the actions defined in the rule's action set.
Reference: Please refer to Senstar Webhelp on how to create new rule.
Steps to Add Rule in Senstar Client
Note: The below configuration should be configured by admin user.
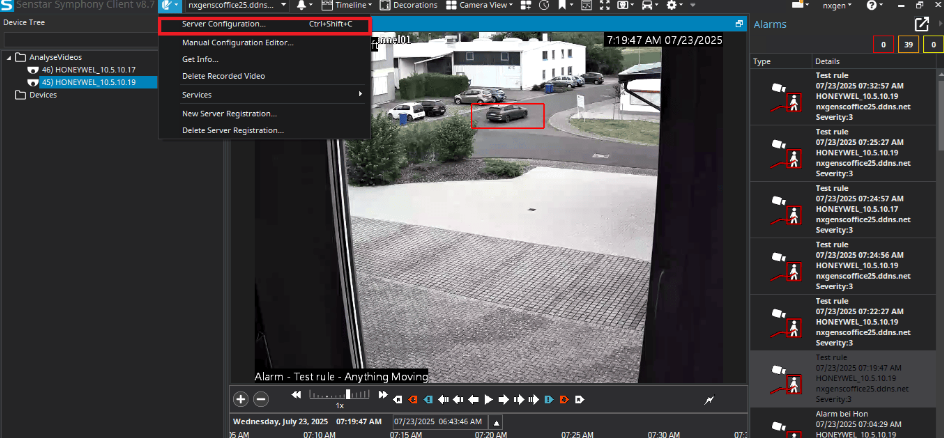
- Step 1: Open the symphony client from your machine
- Step 2: Login to the device in the symphony client
- Step 3: Click on the server configuration option
- Step 4: User will be redirected to the Senstar portal
- Step 5: Login to the portal with username and password
- Step 6: User will be landed up in the configuration
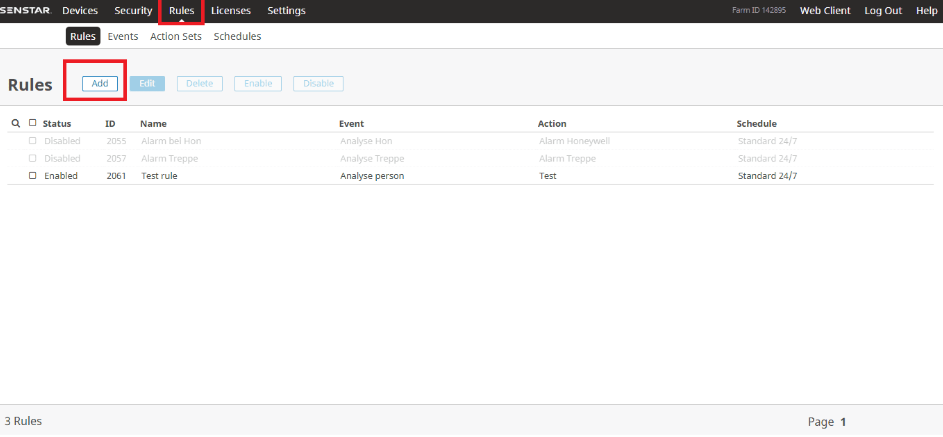
- Step 7: Click on the Rules tab
- Step 8: Click on the add button
- Step 9: Provide the mandatory fields required to add a rule
- Step 10: Click on save
- Step 11: The added rule will be listed under rules tab
- Step 12: Now the events should flow according to the rule set in client
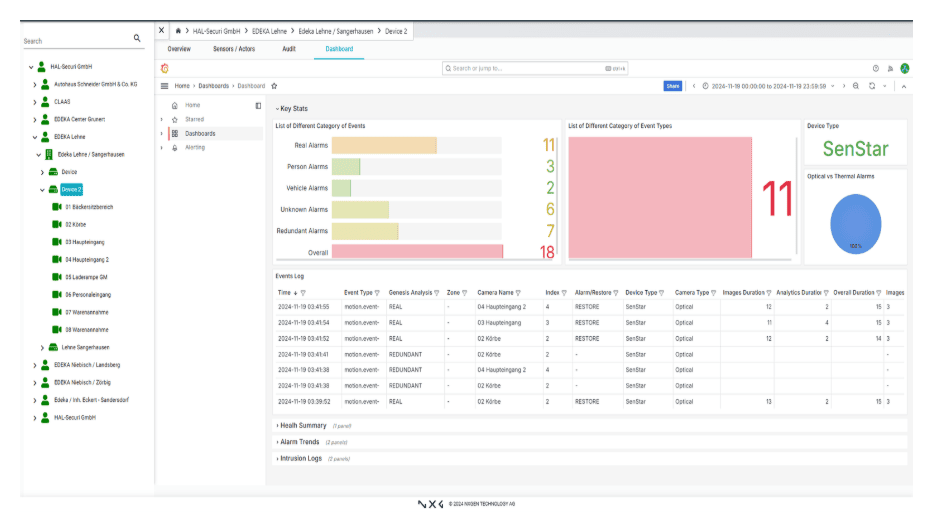
- Step 13: The event generated in client will be received in GCXONE

Important: Rules should be enabled for the alarms to be generated in client. Alarms will not be generated if no rules is enabled in client.
Expected result: Rules configured and events flowing to GCXONE
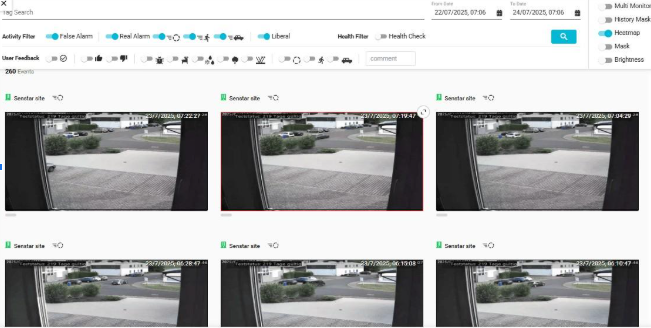
Step 7: Verify Integration
Step 7: Verify Integration
Verification Checks
- ✅ Live Stream appears in GCXONE
- ✅ Events appear in Video Activity Search and Device Dashboard
- ✅ Make sure RTSP URL works in VLC media player
- ✅ Rules are enabled and generating alarms
Expected result: Full integration working with live stream and events
Troubleshooting
Common Issues and Solutions
- Streaming Issues
- No Events Received
- Password Encoding Issues
- Rules Not Working
- Verify RTSP URL works in VLC media player
- Check that encoded password is correctly generated and entered
- Verify RTSP port is correct and accessible
- Ensure network connectivity to device
- Verify event polling is enabled in device configuration
- Check that rules are created and enabled in Senstar Symphony Server
- Confirm rules have active schedules
- Verify events are being generated in Senstar client
- Ensure Senstar Server is installed to access PasswordEncoder
- Verify password encoder path: C:\Program files\Senstar\Symphony server V7_Tools\PasswordEncoder
- Check that encoded password is copied correctly without extra spaces
- Verify rules are enabled in Senstar Symphony Server
- Check that events are associated with rules
- Confirm schedules are active for rules
- Ensure action sets are properly configured
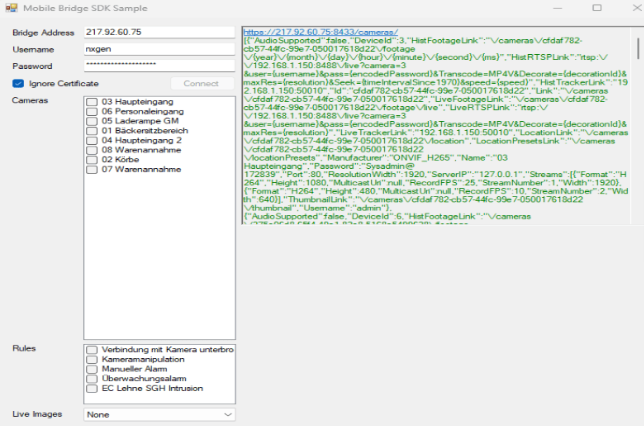
Troubleshooting Tools
Additional Tools
Senstar SDK Mobile: Mobile Bridge application is used to get connected sensors lists
Related Articles
Need Help?
If you're experiencing issues during configuration, check our Troubleshooting Guide or contact support.