🛡️ ADPRO Honeywell Integration
This guide provides the technical steps required to link ADPRO (Honeywell) security control panels to the GCXONE cloud platform. High-density alarm transmission, real-time analytics, and automated schedules are all supported.
📋 Prerequisites
Before starting, ensure you have the following:
- ADPRO XO Client: software installed on your local workstation.
- Dedicated Virtual Receiver IP: Provided by your GCXONE onboarding team.
- Network Access: UDP/TCP ports must be whitelisted for the receiver IP.
🚦 Device Profile
| Feature | Support Level | Notes |
|---|---|---|
| Alarm Transmission | ✅ Primary & Backup | High-availability redundancy supported. |
| Event Types | ✅ Analytics & Motion | Intrusion, Loiter, Sabotage traces. |
| Arm/Disarm | ✅ Schedule-based | Can be synchronized with GCXONE schedules. |
| Live View | ✅ Supported | RTSP/Encrypted streaming available. |
| Time Sync | ✅ NTP Supported | Recommended: time1.nxgen.cloud. |
🛠️ Configuration Steps
- 1
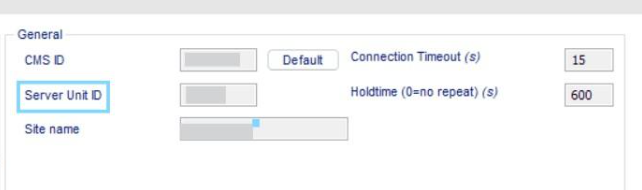
1. Global CMS Settings
- 2
Navigate to ADPRO XO Client → CMS Alarm Transmission.
- 3
- Enter your Server Unit ID.
-
Each device MUST have a unique ID. Duplicates will cause signal collisions.
- 4
- 5
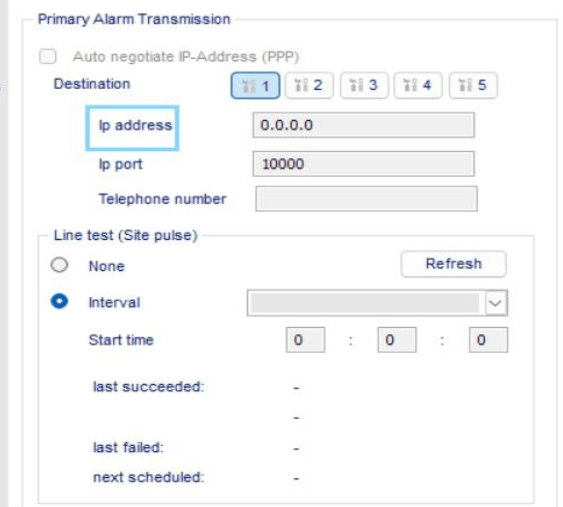
2. Primary Transmission Path
- 6
In the Primary Alarm Transmission section:
- 7
- Enter the GCXONE Virtual Receiver IP provided to you.
- Enable Site Pulse (Lifecheck). Set the interval (recommended: 60s) to monitor heartbeats in GCXONE.
- 8
- 9
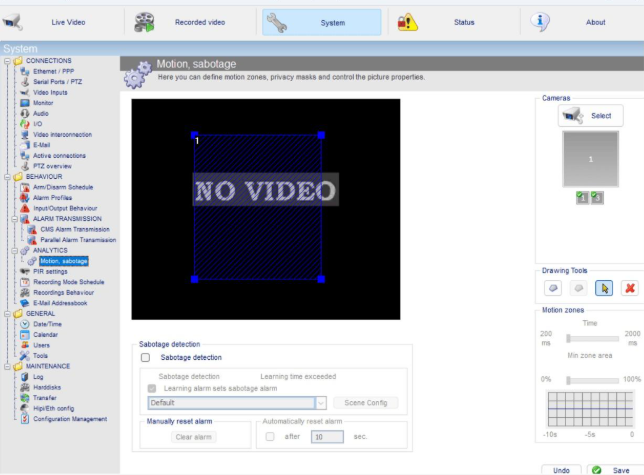
3. Analytics & Detection
- 10
Navigate to Analytics. Define your detection zones and sensitivity parameters:
- 11
- Intrusion Trace: Unauthorized entry monitoring.
- Loiter Trace: Detection for prolonged presence.
- Motion Sabotage: Alerts if the camera is obstructed or tampered with.
- 12
- 13
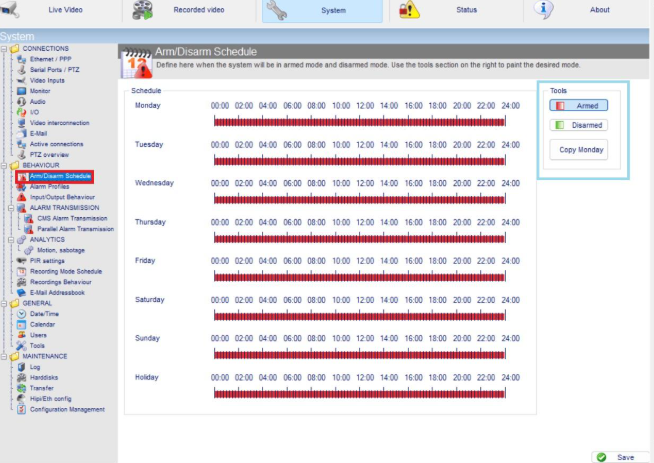
4. Arm/Disarm Scheduling
- 14
Navigate to Arm/Disarm Schedule. Define the automated operational windows. This prevents "false positives" during business hours while ensuring peak security at night.
- 15
- 16
5. Camera View Style
- 17
Navigate to Input/Output Behavior. Link events to specific cameras and select a view style:
- 18
- Live View: Real-time stream on both XO Client and GCXONE.
- Quad/Duress: Snapshot-based reporting for high-latency environments.
- 19
6. Final discovery in GCXONE
- 20
- Log in to GCXONE → Sites → Devices.
- Click Add Device and select ADPRO.
- Enter the Host/Serial and credentials.
- Click Discover to pull in all configured sensors and I/Os automatically.
💡 Troubleshooting
- Duplicate ID: Ensure the
Server Unit IDis not reused elsewhere. - Firewall: Verify outbound traffic to your virtual receiver IP is allowed.