Avigilon
Summary
This documentation provides a comprehensive guide for integrating Avigilon Video Management System (VMS) with the GC-X-ONE platform for enhanced video surveillance and analytics.
Purpose: Configure Avigilon Video Management System (VMS) to integrate seamlessly with GC-X-ONE platform for enhanced video surveillance and analytics.
Outcome: Enhanced functionality with analytics, user management, and alarm configuration enabling robust management and monitoring capabilities through GC-X-ONE integration.
Audience: System administrators / IT professionals / Field engineers.
Prerequisites
Before starting the integration, ensure the following are available:
- Avigilon ACC client software
- ACC 7 Web Endpoint Service
- IT team responsible to set up port forwarding on their firewall or router
- Administrative access to Avigilon system
Avigilon Configuration
Device Profile
- Type: Video Management System (VMS)
- Discovery: WebAPI Endpoint
- Events: Motion detection, analytic events, alarm triggers
- Ports: Custom (configured via port forwarding)
- Known quirks: Requires WebAPI Endpoint installation for external communication. User group setup mandatory for GC-X-ONE access. Analytics configuration at camera level needed for event detection.
- Live: Supported
- Analytics: Supported (Motion Detection, Object Detection)
- Alarm Management: Supported
- User Management: Supported
- PTZ Controls: Supported
Avigilon Config Guide with GC-X-ONE
Step 1 — Install Essential Software Components
Install WebAPI Endpoint
In case of having Avigilon VMS, install the WebAPI Endpoint by following the instructions provided in the Avigilon WebAPI Endpoint Quick Start Guide. This endpoint facilitates communication between the VMS and external applications.
Ensure ACC Server Accessibility
Confirm that the ACC (Avigilon Control Center) server is properly installed and operational. The ACC server communicates with the external world through the configured server port, ensuring that the VMS can send and receive data as needed.
Expected result: WebAPI Endpoint installed and ACC server accessible.
Step 2 — Login to Avigilon ACC Client
UI path: ACC Client → Login
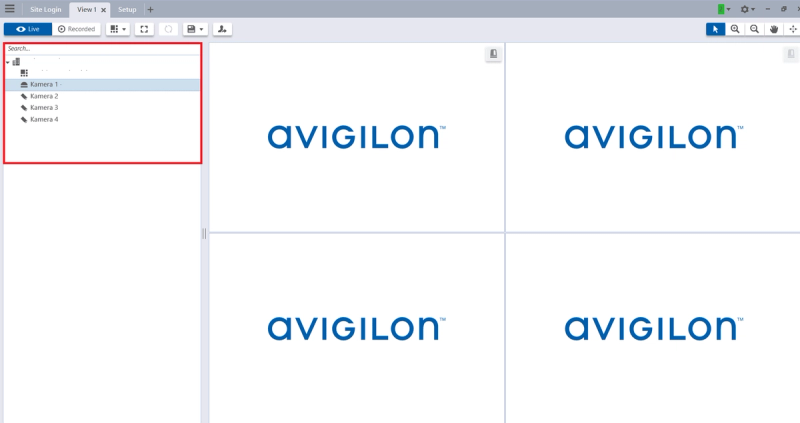
In the ACC client login screen, locate the field to enter the device's IP address in the search bar. Enter your username and password for the ACC client.
Expected result: Successfully logged into ACC client.
Step 3 — Navigate to Camera Configuration
UI path: ACC Client → Camera Selection
Once logged in, use the client interface to navigate to the specific camera or device you need to configure.
Expected result: Camera interface accessible for configuration.
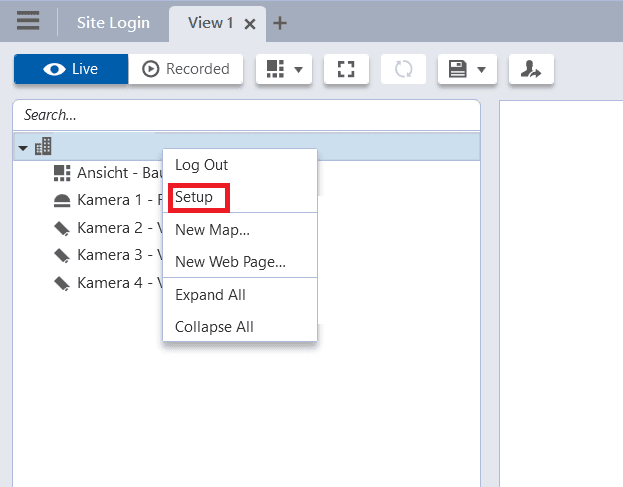
Step 4 — Access Camera Setup
UI path: Camera → Right-Click → Setup
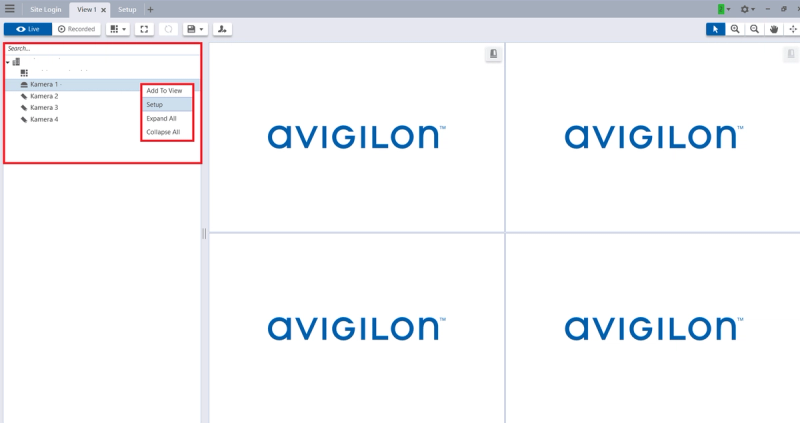
- Right-click on the camera you want to configure
- In the context menu that appears, click on Setup
- This will open the camera's configuration page
Expected result: Camera configuration page opened.
Step 5 — Configure Motion Detection Analytics
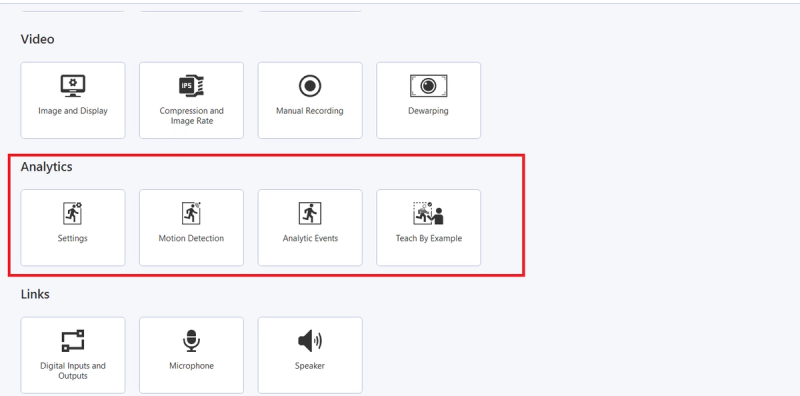
UI path: Camera Setup → Analytics → Motion Detection
Choose and configure the type of analytics. After selecting the desired analytics type, you will be able to adjust various settings and parameters specific to that type.
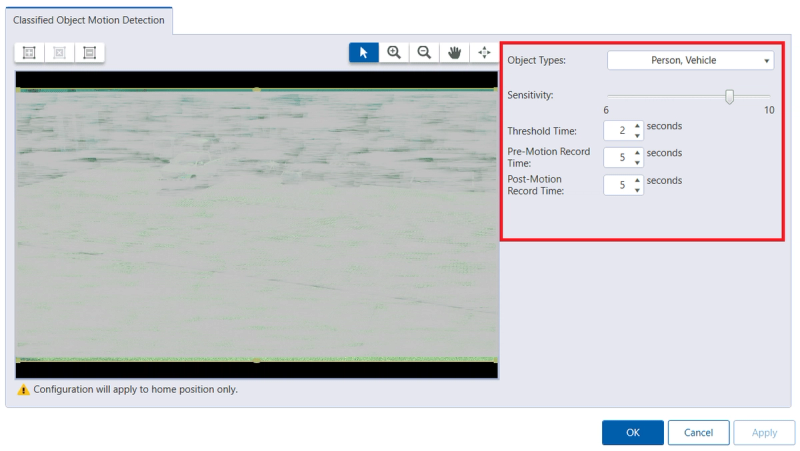
Configure Motion Detection parameters:
- Object Types: Select types of objects (Person, Vehicle)
- Sensitivity: Set sensitivity level (recommended 8–10)
- Threshold Time: Set minimum duration (recommended 2 seconds)
- Pre-Motion Record Time: Set recording time before event (recommended 10 seconds)
- Post-Motion Record Time: Set recording time after event (recommended 10 seconds)
Expected result: Motion detection analytics configured.
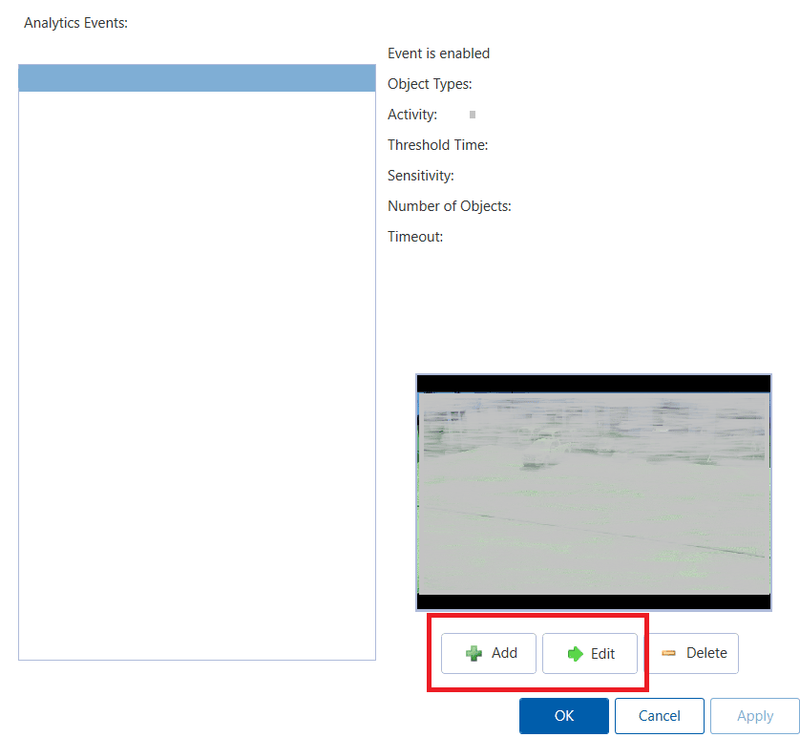
Step 6 — Configure Analytic Events
UI path: Camera Setup → Analytics → Analytic Events
Analytics process the video feed in real-time to detect and respond to specific activities or conditions.
- Click on the button Add
- Define your Area of Interest by clicking the icon on the top left of the screen
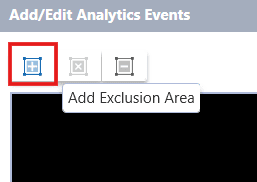
Configure Event Parameters
After you add the area of interest, setup the following:
- Enabled Checkbox: Check to enable the analytic event
- Activity: Select the type of activity to monitor within the defined zone
- Object Types: Specify what kinds of objects the system should detect
- Sensitivity: Set sensitivity level (recommended 8–10)
- Threshold Time: Set minimum duration (recommended 2 seconds)
- Number of Objects: Specify number of objects required to trigger event
- Timeout: Set wait time before resetting (recommended 10 seconds)
- Distance (feet): Set minimum distance an object must travel
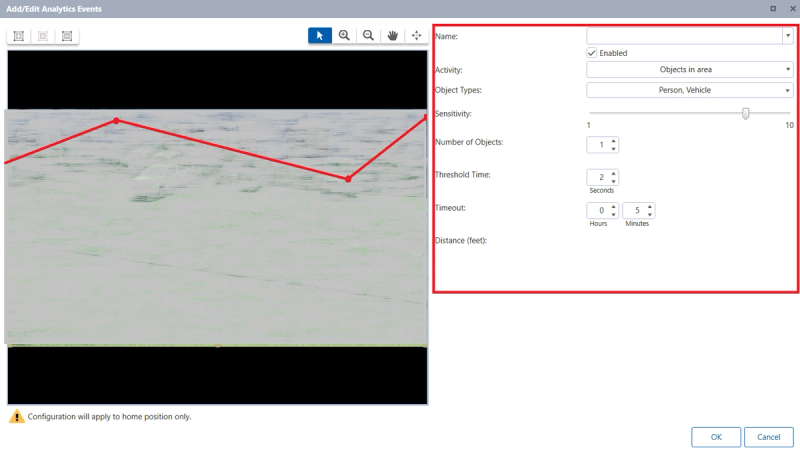
Expected result: Analytic events configured with area of interest.
Step 7 — Setup User Group for GC-X-ONE
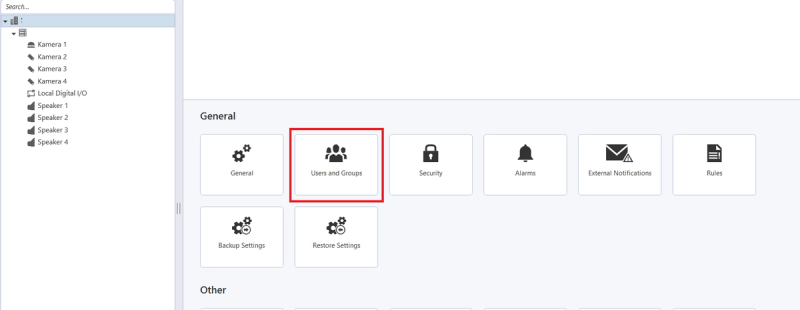
UI path: Site → Right-Click → Setup → User and Groups
-
Right-click on the Site you want to configure
-
In the context menu that appears, click on "Setup"
-
This will open the Site's configuration page
-
Navigate to Users and Groups

Expected result: User and groups configuration accessed.
Step 8 — Create User Group
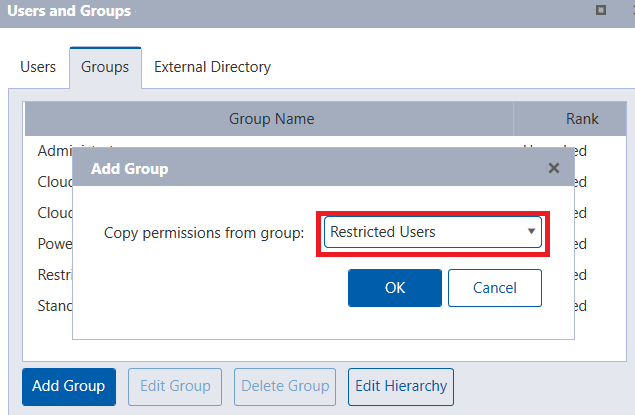
UI path: Groups → Add
Navigate to Groups and then click Add Group. When prompted, set Copy permissions from group to Restricted Users.
Expected result: New user group created.
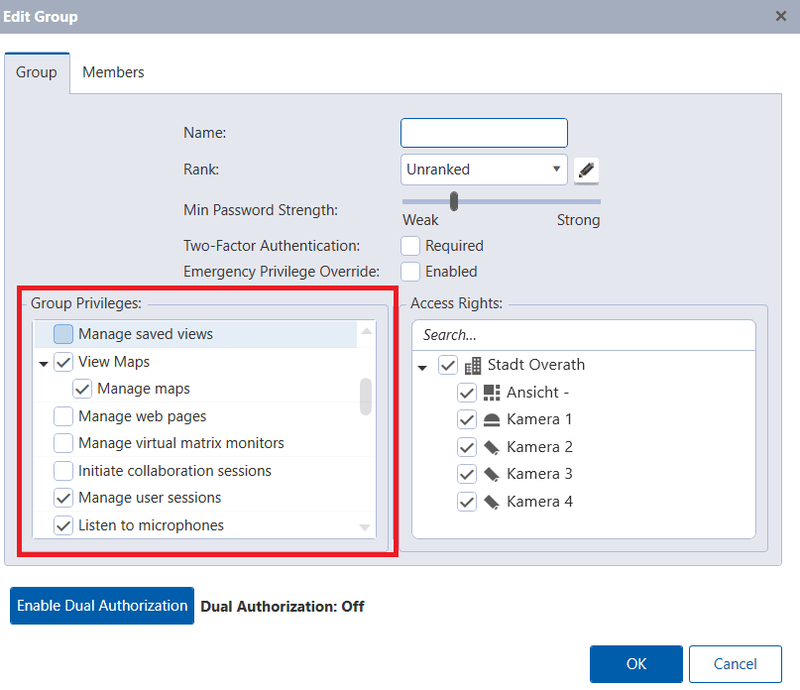
Step 9 — Configure Group Settings
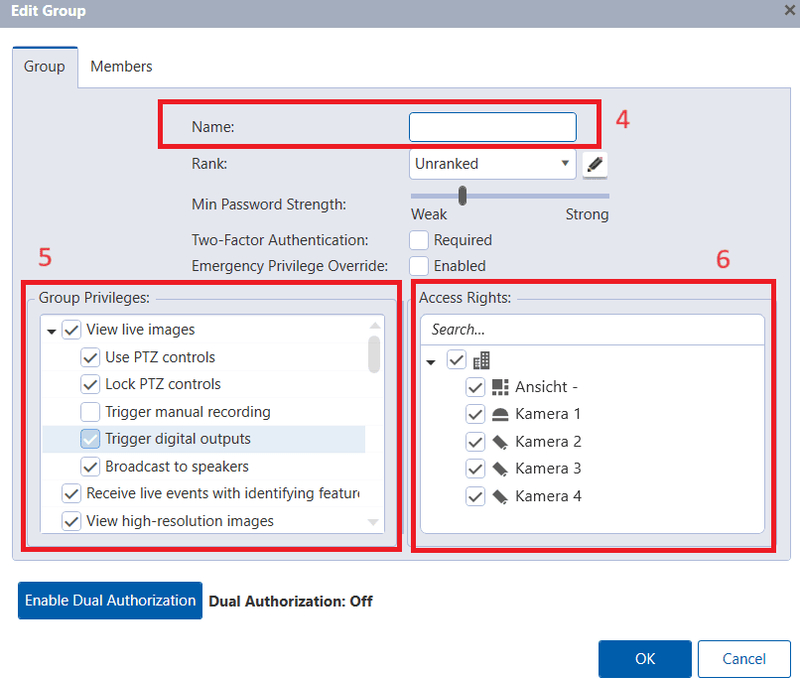
In the Edit Group dialog, configure the following details:
Name: Use NXGEN or NXG in the Name field (recommended).
Group Privileges — View Live Images:
- Use PTZ controls
- Lock PTZ controls
- Trigger Digital Outputs
- Broadcast to speakers
- Receive live events with identifying features
- View high-resolution images
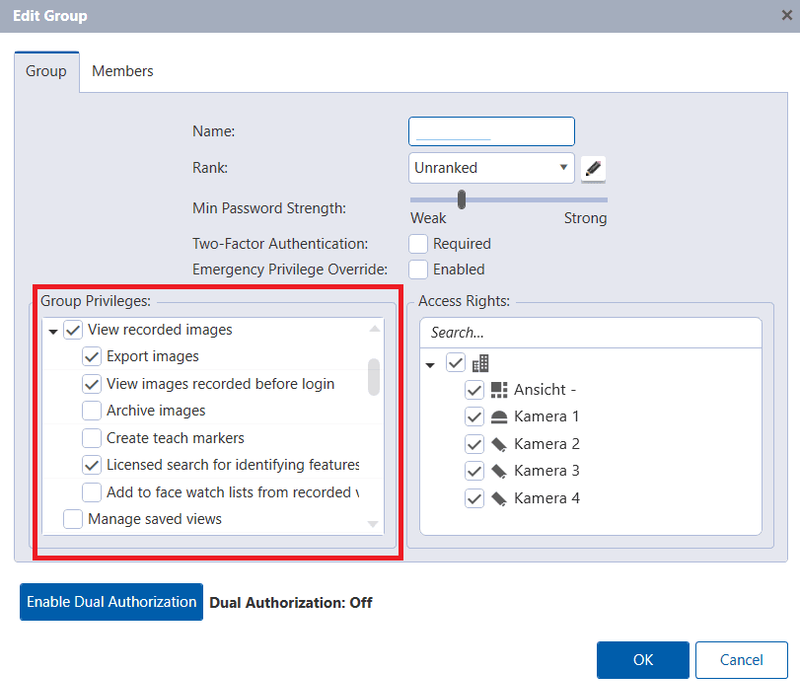
Group Privileges — View Recorded Images:
- Export images
- View images recorded before login
- Licensed search for identifying features
Group Privileges — View Maps:
- Manage Maps
- Manage user sessions
- Listen to microphones
Expected result: Group privileges configured.
Step 10 — Add Cameras to Group
In the Access Rights section of the Edit Group dialog, check all cameras you want to appear on the GC-X-ONE platform. Click OK to save the changes.
Expected result: Cameras assigned to user group.
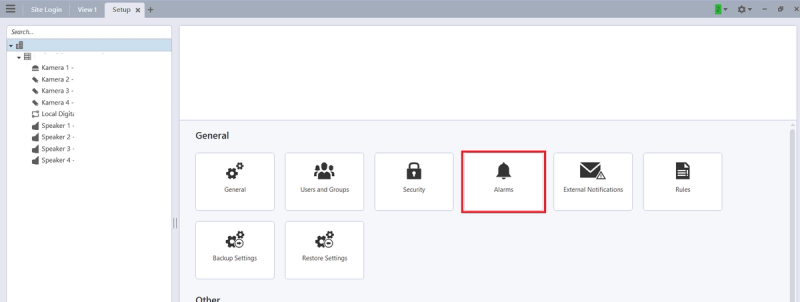
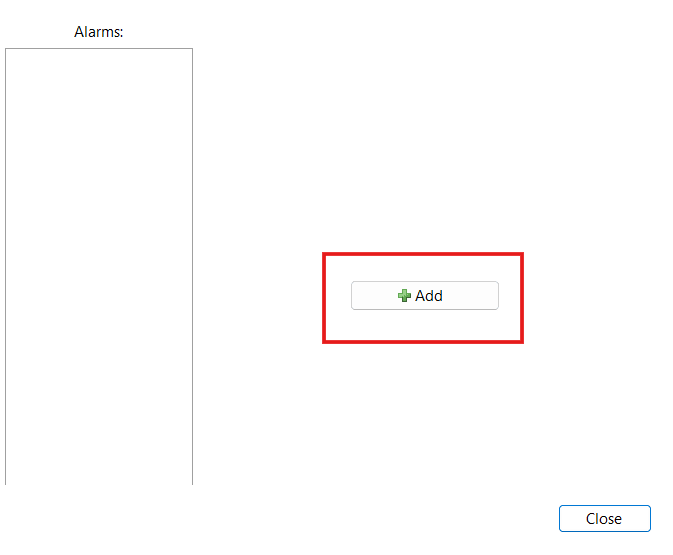
Step 11 — Configure Alarms
UI path: Setup → Alarms
Return to the Setup page from the previous step and navigate to Alarms. Click Add to create a new alarm.
Expected result: Alarm configuration page accessed.
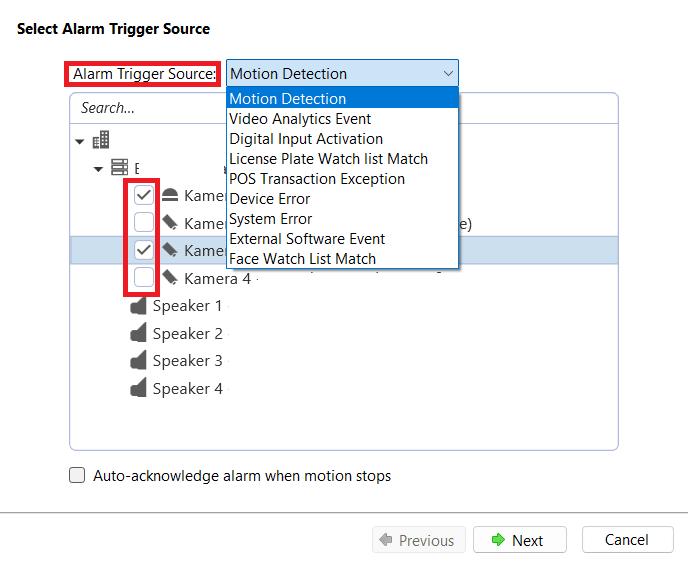
Step 12 — Set Alarm Trigger Source
Set the alarm trigger source from the dropdown. Available options include:
- Motion Detection
- Video Analytics Event
- Digital Input Activation
- License Plate Watch List Match
- POS Transaction Exception
- Device Error
- System Error
- External Software Event
- Face Watch List Match
Select the cameras you are interested in, then click Next.
Expected result: Alarm trigger source configured.
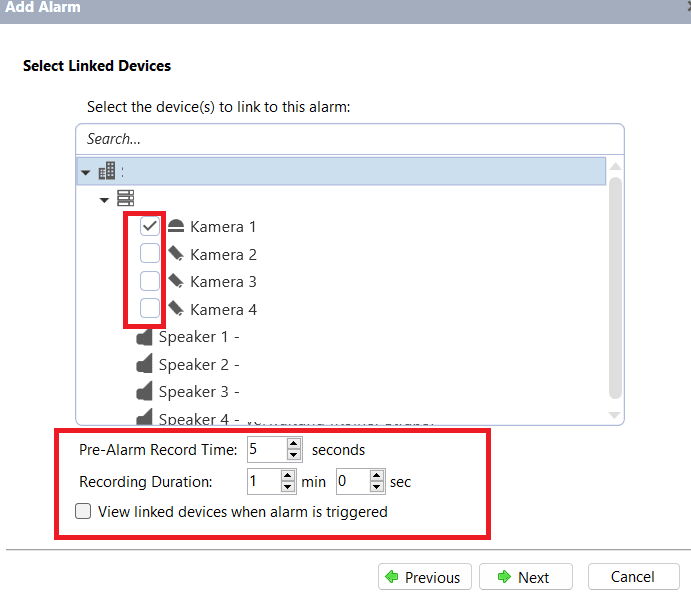
Step 13 — Configure Alarm Recording Settings
- Select the devices you want to associate the alarm with
- Set the Pre-Alarm Record Time (recommended 10 seconds)
- Set the Recording Duration
- Click Next
Expected result: Alarm recording settings configured.
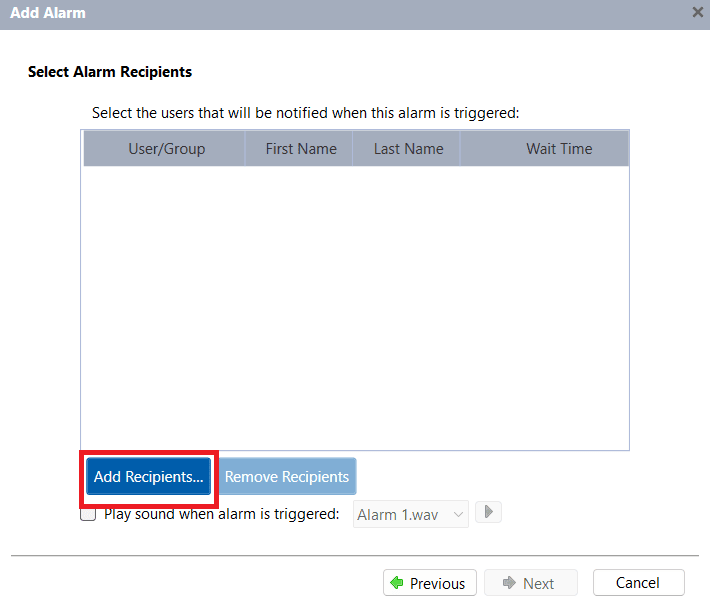
Step 14 — Configure Alarm Recipients
UI path: Alarm Recipients → Add Recipients
-
Select alarm recipients
-
Click on Add Recipients and ensure to select the user group you configured earlier (NXGEN/NXG)
-
Click Next
Expected result: Alarm recipients configured.
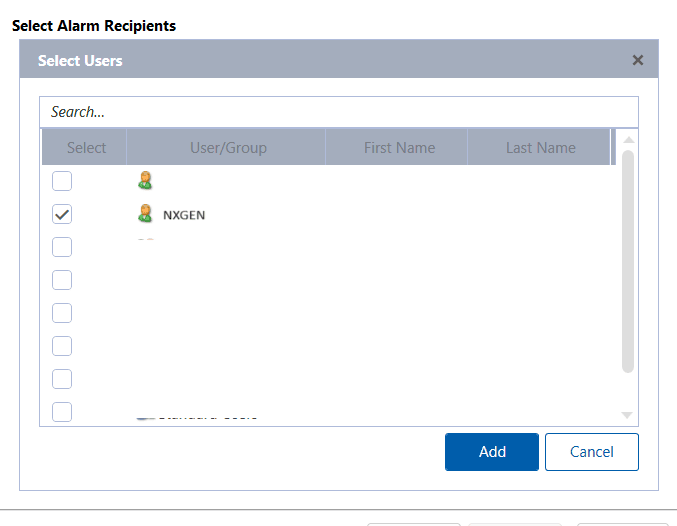
Step 15 — Finalize Alarm Configuration
-
Select the NXGEN user/group as configured
-
Click Add
-
Select the duration needed to notify the recipient when an alarm is triggered
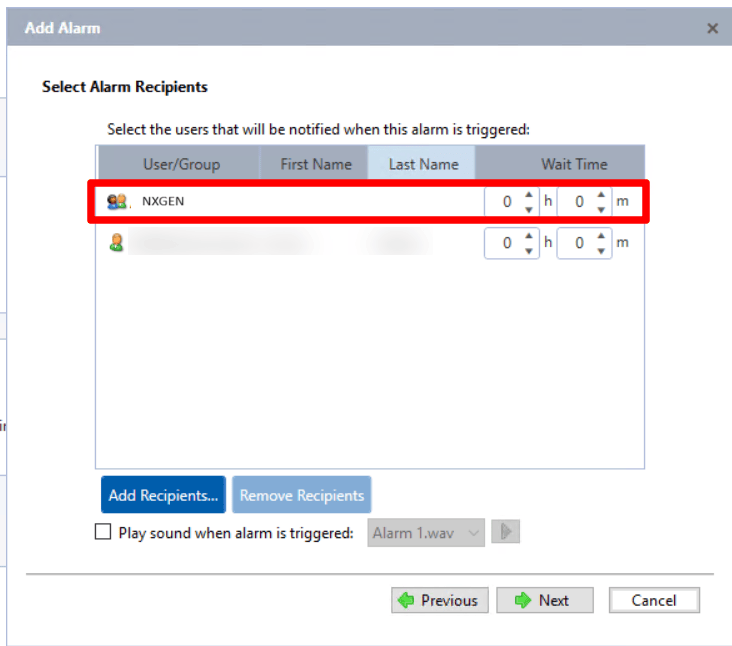
-
Don't forget to Save the changes
Expected result: Alarm configuration completed and saved.
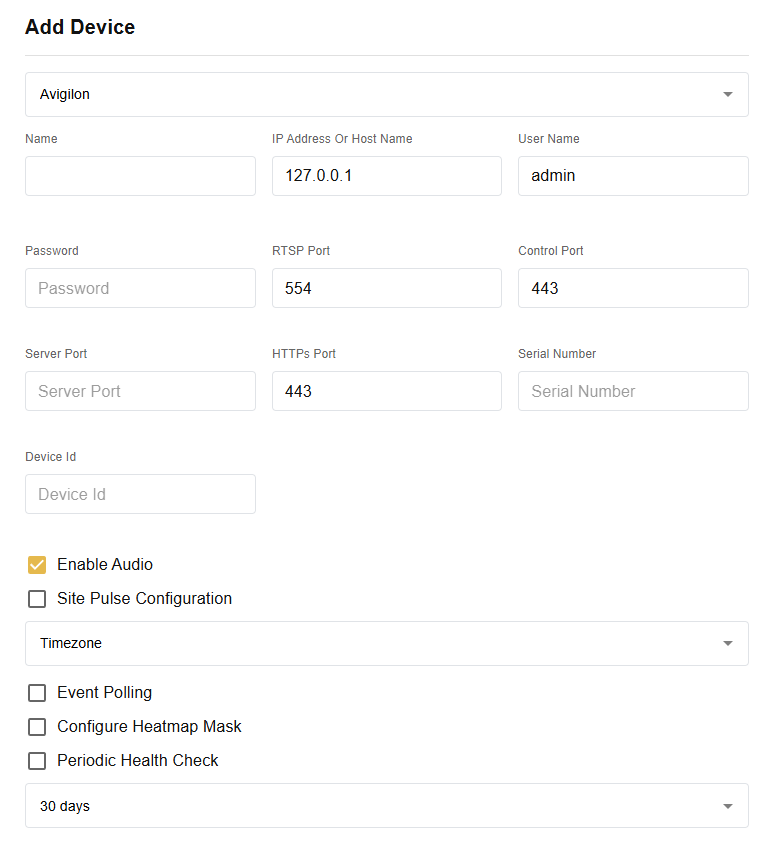
Step 16 — Configure Device in GC-X-ONE
UI path: GC-X-ONE → Site → Configuration App → Devices
In the GC-X-ONE Configuration App, navigate to the Site where you want to add the device. Select Avigilon as the device type and fill in the following fields:
- Name
- IP Address or Host Name
- User Name
- Password
- RTSP Port (default: 554)
- Control Port (default: 443)
- Server Port
- HTTPs Port (default: 443)
- Serial Number
- Device Id
- Timezone
Optional settings:
- Enable Audio
Note: Audio is disabled by default in ACC. To enable it: (1) open ACC settings and activate the speaker, and (2) assign the camera to that speaker. Both steps are required — enabling the audio toggle in GCXONE alone will not activate audio.
- Site Pulse Configuration
- Event Polling
- Configure Heatmap Mask
- Periodic Health Check (default: 30 days)
Step 17 — Verify Integration
Once all details are filled in, click Discover. You should see the sensors discovered.
Expected result: Sensors discovered successfully in GC-X-ONE.
Verification Checks:
- Verify WebAPI endpoint is functional
- Test user group access and permissions
- Confirm analytics are generating appropriate events
- Test alarm notifications
- Verify camera access through configured user group
Expected result: Complete Avigilon integration with GC-X-ONE platform.
Troubleshooting
WebAPI endpoint issues
- Verify WebAPI Endpoint is properly installed
- Check port forwarding configuration
- Ensure ACC server is accessible externally
User access problems
- Verify user group permissions are correctly configured
- Check camera assignments to user group
- Ensure proper privileges are granted
Analytics not working
- Check sensitivity settings (recommended 8–10)
- Verify area of interest is properly defined
- Confirm threshold time and timeout settings
Alarm configuration issues
- Verify alarm trigger sources are correctly selected
- Check recipient configuration matches user group
- Ensure recording settings are properly configured
Notes
- WebAPI Endpoint installation is mandatory for external communication
- User group setup is required for GC-X-ONE access
- Analytics configuration at camera level needed for event detection
- Recommended settings: Sensitivity 8–10, Threshold Time 2 seconds, Timeout 10 seconds
- Pre-alarm and post-motion recording recommended at 10 seconds
- Proper port forwarding setup required by IT team