EagleEye Installer Configuration
This guide provides step-by-step instructions for configuring EagleEye Bridge devices to integrate with GCXONE. Follow these steps to ensure proper bridge connectivity, camera network management, and device registration.
Configuration
Step-by-Step
Prerequisites
Before You Begin
- ✅ Administrative access to EagleEye Bridge configuration
- ✅ Network connectivity to bridge device
- ✅ Active internet connection for cloud system integration
- ✅ ESN (Equipment Serial Number) from bridge device
Step 1: Obtain Bridge Information
Step 1: Obtain Bridge Information
UI path: EagleEye Bridge → Bridge Settings
Collect Bridge Details
- Access EagleEye Bridge configuration interface
- Navigate to Bridge Settings section
Record the following hardware and network information:
- SSN: Serial number of the bridge
- IP Address: Local IP address assigned to the bridge on internal network
- ESN: Equipment Serial Number (Required for GCXONE registration)
- GUID: Unique global identifier for the device in cloud system
- WAN: 1000Mb/s - WAN (uplink) connection supports gigabit speeds
- CamLan: 1000Mb/s - Bridge's camera network interface supports gigabit speeds
- CamLan+: Confirms camera LAN supports up to 1000Mb/s (Gigabit) for high-throughput support
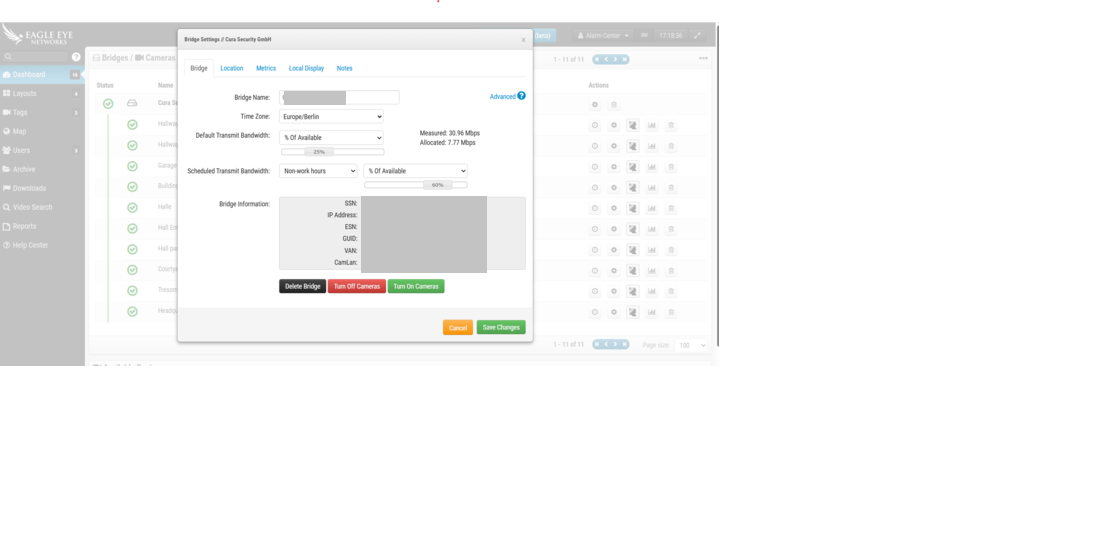
Important: ESN (Equipment Serial Number) is required for GCXONE registration. Make sure to copy it exactly as shown.
Expected result: Bridge information collected for registration and configuration
Step 2: Configure User Settings
Step 2: Configure User Settings
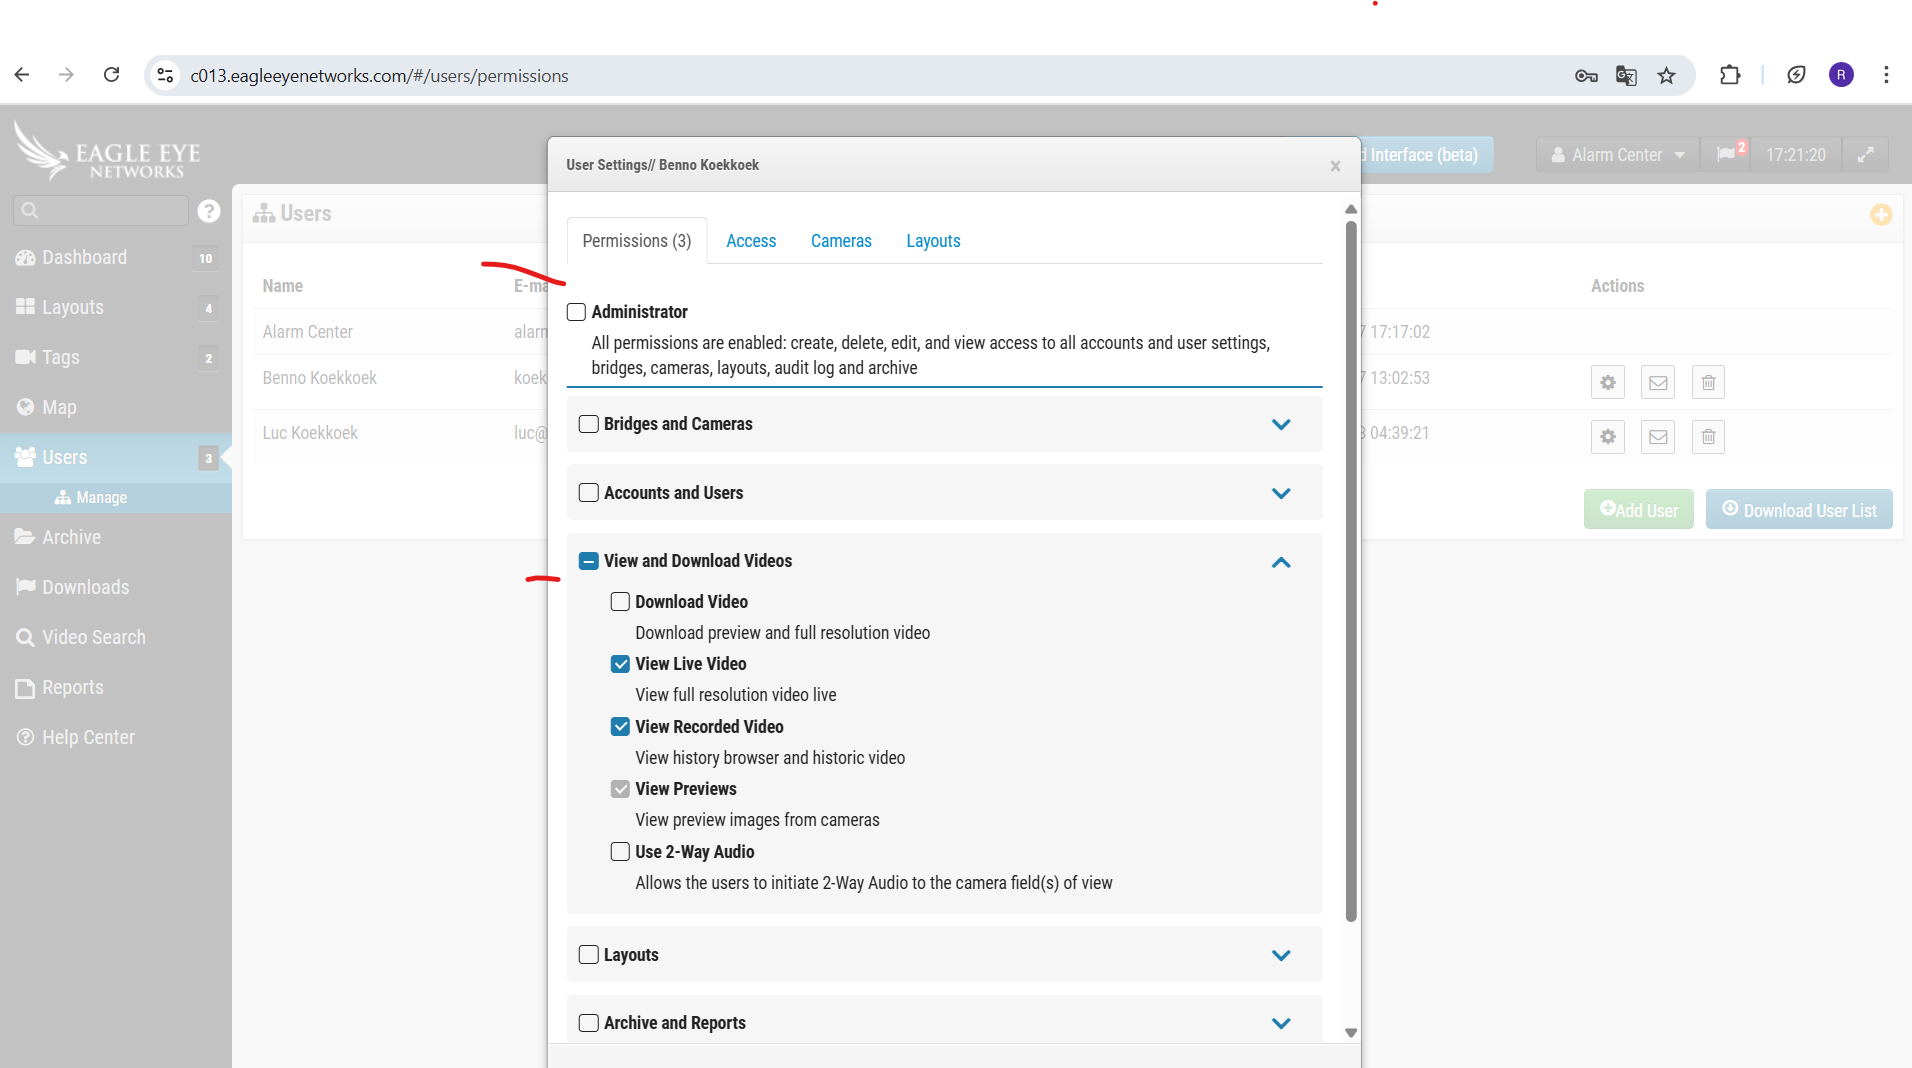
UI path: EagleEye Bridge → User Settings
Configuration Steps
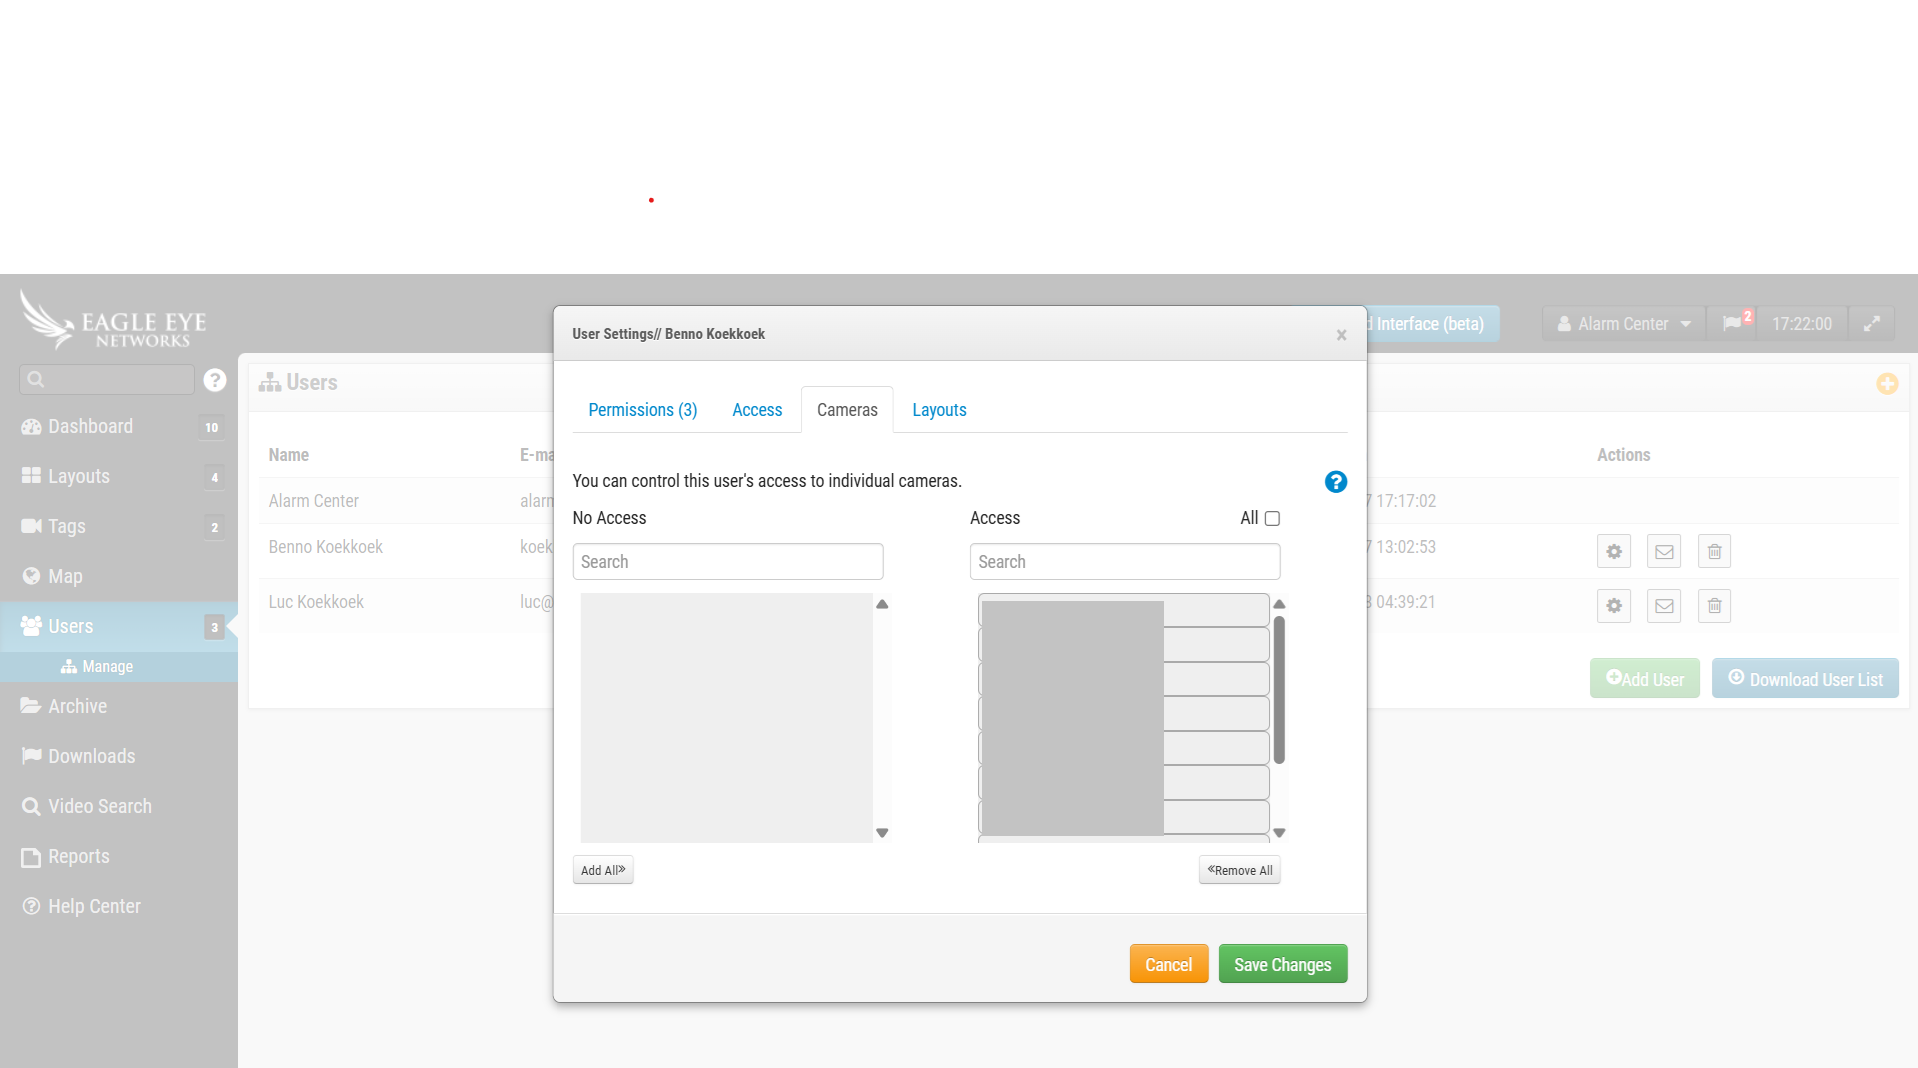
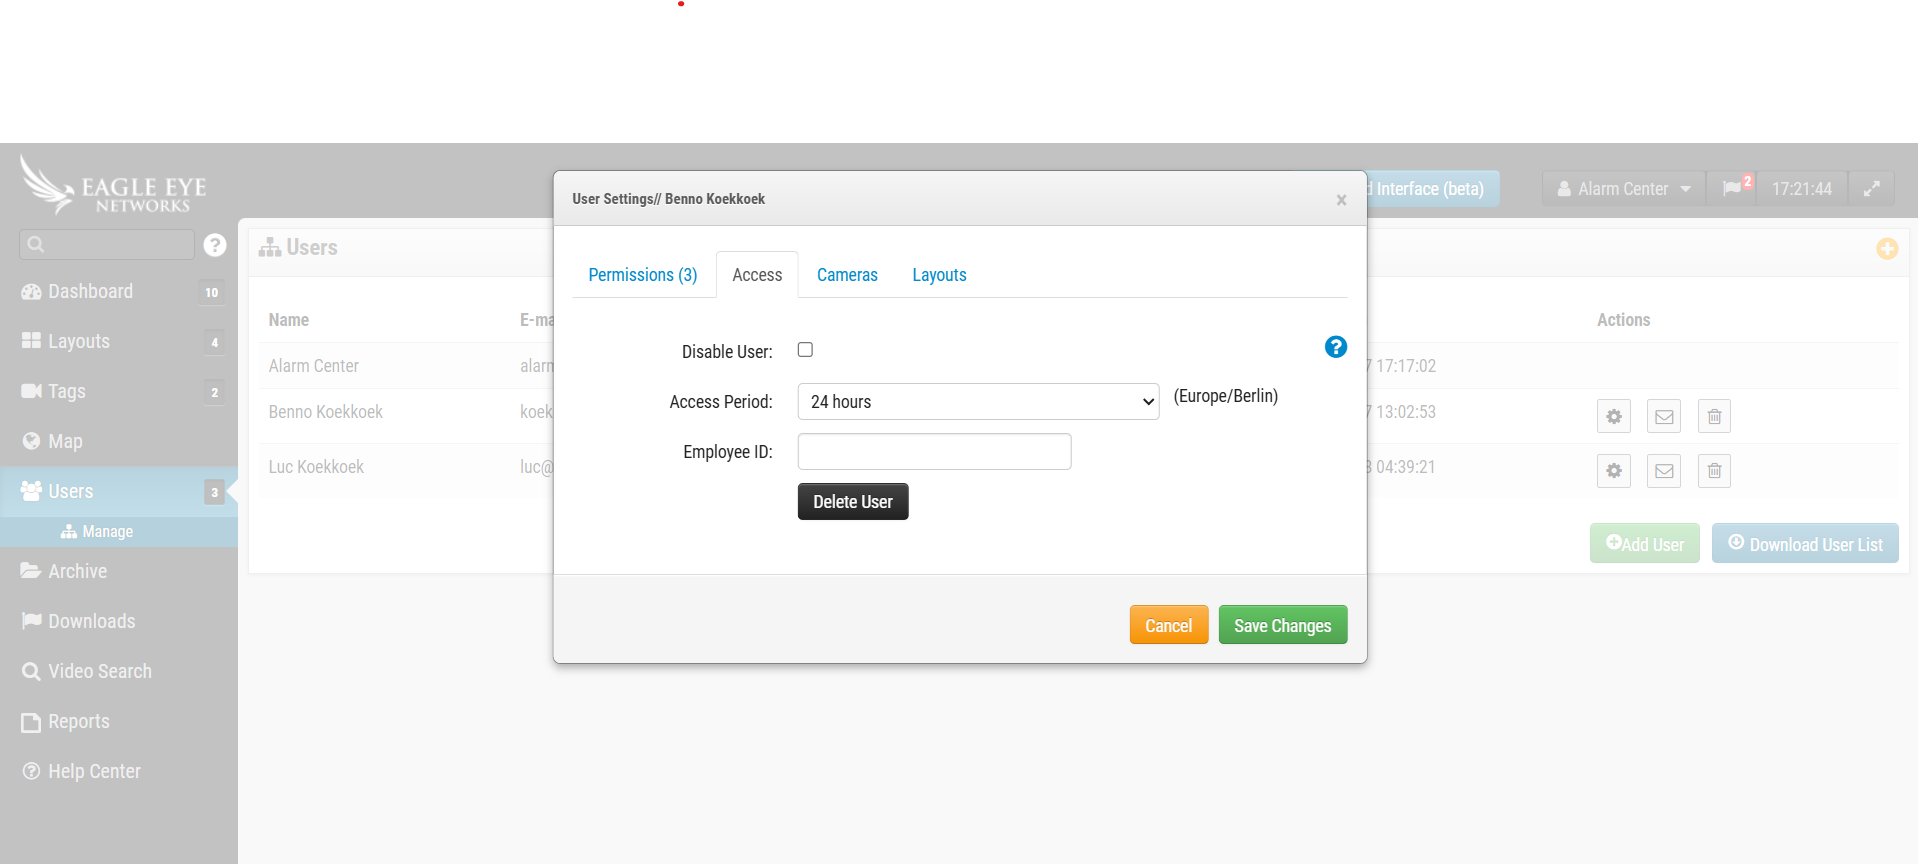
- Navigate to User Settings section in bridge interface
- Configure user accounts and permissions as required
- Set up authentication parameters
- Configure access levels and security settings
- Ensure proper user management for system access
Expected result: User settings properly configured for bridge access and management
Step 3: Add Device in GCXONE
Step 3: Add Device in GCXONE
UI path: GCXONE → Configuration App → Site → Devices → Add → EagleEye
Configuration Steps
- Login to GCXONE platform
- Navigate to configuration app
- Go to Site → Devices → Add → EagleEye
Provide the mandatory details:
- Device Name: Descriptive name for the bridge
- ESN: Equipment Serial Number obtained from Step 1
- IP Address: Bridge IP address
- Authentication credentials: As configured in user settings
- Click on "Discover" to detect the device
- Verify device discovery is successful
- Click "Save" to complete registration
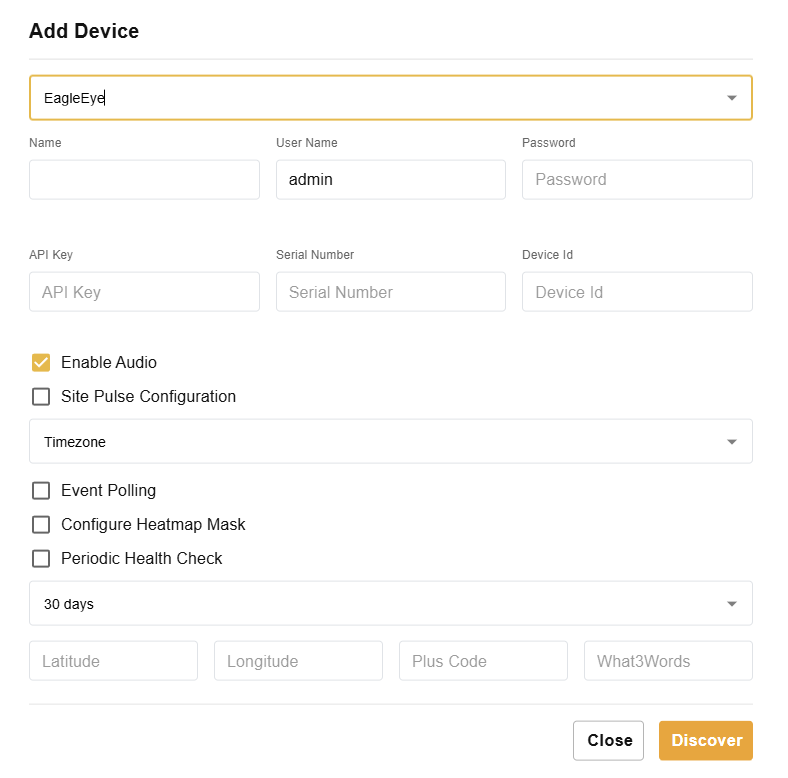
Expected result: EagleEye bridge successfully added and discovered in GCXONE
Step 4: Verify Integration
Step 4: Verify Integration
Verification Checks
- ✅ Verify bridge appears in GCXONE device list
- ✅ Confirm network connectivity is established
- ✅ Test camera network functionality (CamLan)
- ✅ Verify WAN connection is operational
- ✅ Check GUID registration in cloud system
- ✅ Confirm user authentication is working
- ✅ Test high-throughput camera support
Expected result: Complete EagleEye integration with GCXONE platform
Troubleshooting
Common Issues and Solutions
- Bridge Connectivity Issues
- ESN Registration Problems
- User Authentication Failures
- Camera Network Issues
- Cloud Integration Problems
- Verify IP address configuration is correct
- Check WAN connection supports gigabit speeds
- Ensure proper network routing and firewall settings
- Confirm internet connectivity for cloud integration
- Verify ESN is copied correctly from bridge settings
- Ensure no extra characters or spaces in ESN entry
- Check device type selection matches EagleEye in GCXONE
- Confirm ESN is valid and active
- Verify user settings are properly configured
- Check authentication credentials are correct
- Ensure user accounts have appropriate permissions
- Confirm access levels are set correctly
- Verify CamLan interface supports 1000Mb/s
- Check camera connections to bridge
- Ensure adequate bandwidth for multiple cameras
- Test high-resolution camera support
- Verify GUID is properly registered
- Check internet connectivity for cloud services
- Ensure firewall allows cloud communication
- Confirm bridge is properly authenticated with cloud system
Related Articles
Need Help?
If you're experiencing issues during configuration, check our Troubleshooting Guide or contact support.