Genesis VMS Configuration
Overview
This guide covers the simplified configuration of Genesis VMS with GCXONE, leveraging native integration features for streamlined setup including auto-discovery and one-click configuration.
What you'll accomplish:
- Configure Genesis VMS network and GCXONE integration settings
- Enable auto-discovery or manually add Genesis VMS to GCXONE
- Select and configure integration profile (Basic, Basic+, Advanced)
- Configure cameras, events, and advanced features
- Verify successful integration and test all features
Estimated time: 20-30 minutes (faster with auto-discovery)
Prerequisites
Ensure you have completed the prerequisites listed in the Overview:
- Genesis VMS installed on server (Windows or Linux)
- Administrative access to Genesis VMS management interface
- Network connectivity established between server and GCXONE
- GCXONE account with device configuration permissions
- Static IP or DDNS configured for Genesis VMS server
- Cameras configured and recording in Genesis VMS
Configuration Workflow
The configuration process consists of 2 main parts (simplified for native integration):
- Genesis VMS Setup - Configure network and enable GCXONE integration (Steps 1-3)
- GCXONE Platform Setup - Auto-discover or manually add Genesis VMS, configure profile and features (Steps 4-6)
- Verification - Test live streaming, playback, timeline, events, and PTZ features
Part 1: Genesis VMS Setup
Step 1: Access Genesis VMS Management Interface
UI Path: Web Browser → https://[Genesis-VMS-IP]:8080
Objective: Access Genesis VMS management interface to begin configuration.
Configuration Steps:
- Open a web browser and navigate to Genesis VMS management interface
- Log in with administrative credentials
- Verify Genesis VMS version is up to date
- Check that cameras are discovered and recording
![]()
Expected Result: Successfully logged into Genesis VMS with admin access.
Step 2: Configure Network and Cloud Settings
UI Path: Genesis VMS → Settings → Network / Cloud Integration
Objective: Configure network settings and enable GCXONE cloud integration.
Configuration Steps:
- Navigate to Settings → Network
- Configure Network Settings:
- Server Name: Descriptive name (e.g., "Site A Genesis VMS")
- IP Address: Verify server IP (static recommended)
- Ports: Verify ports 443, 554, 8080, 8081 are configured
- External Access: Enable if using DDNS
- Navigate to Settings → Cloud Integration
- Configure GCXONE Integration:
- Enable GCXONE Integration: ✓ Checked
- Auto-Discovery: ✓ Enable (recommended for automatic detection)
- Cloud Service: ✓ Enable cloud streaming
- Integration Mode: Native (default for Genesis VMS)
- Click Save and Apply settings
![]()
Expected Result: Network configured, GCXONE integration enabled, auto-discovery active.
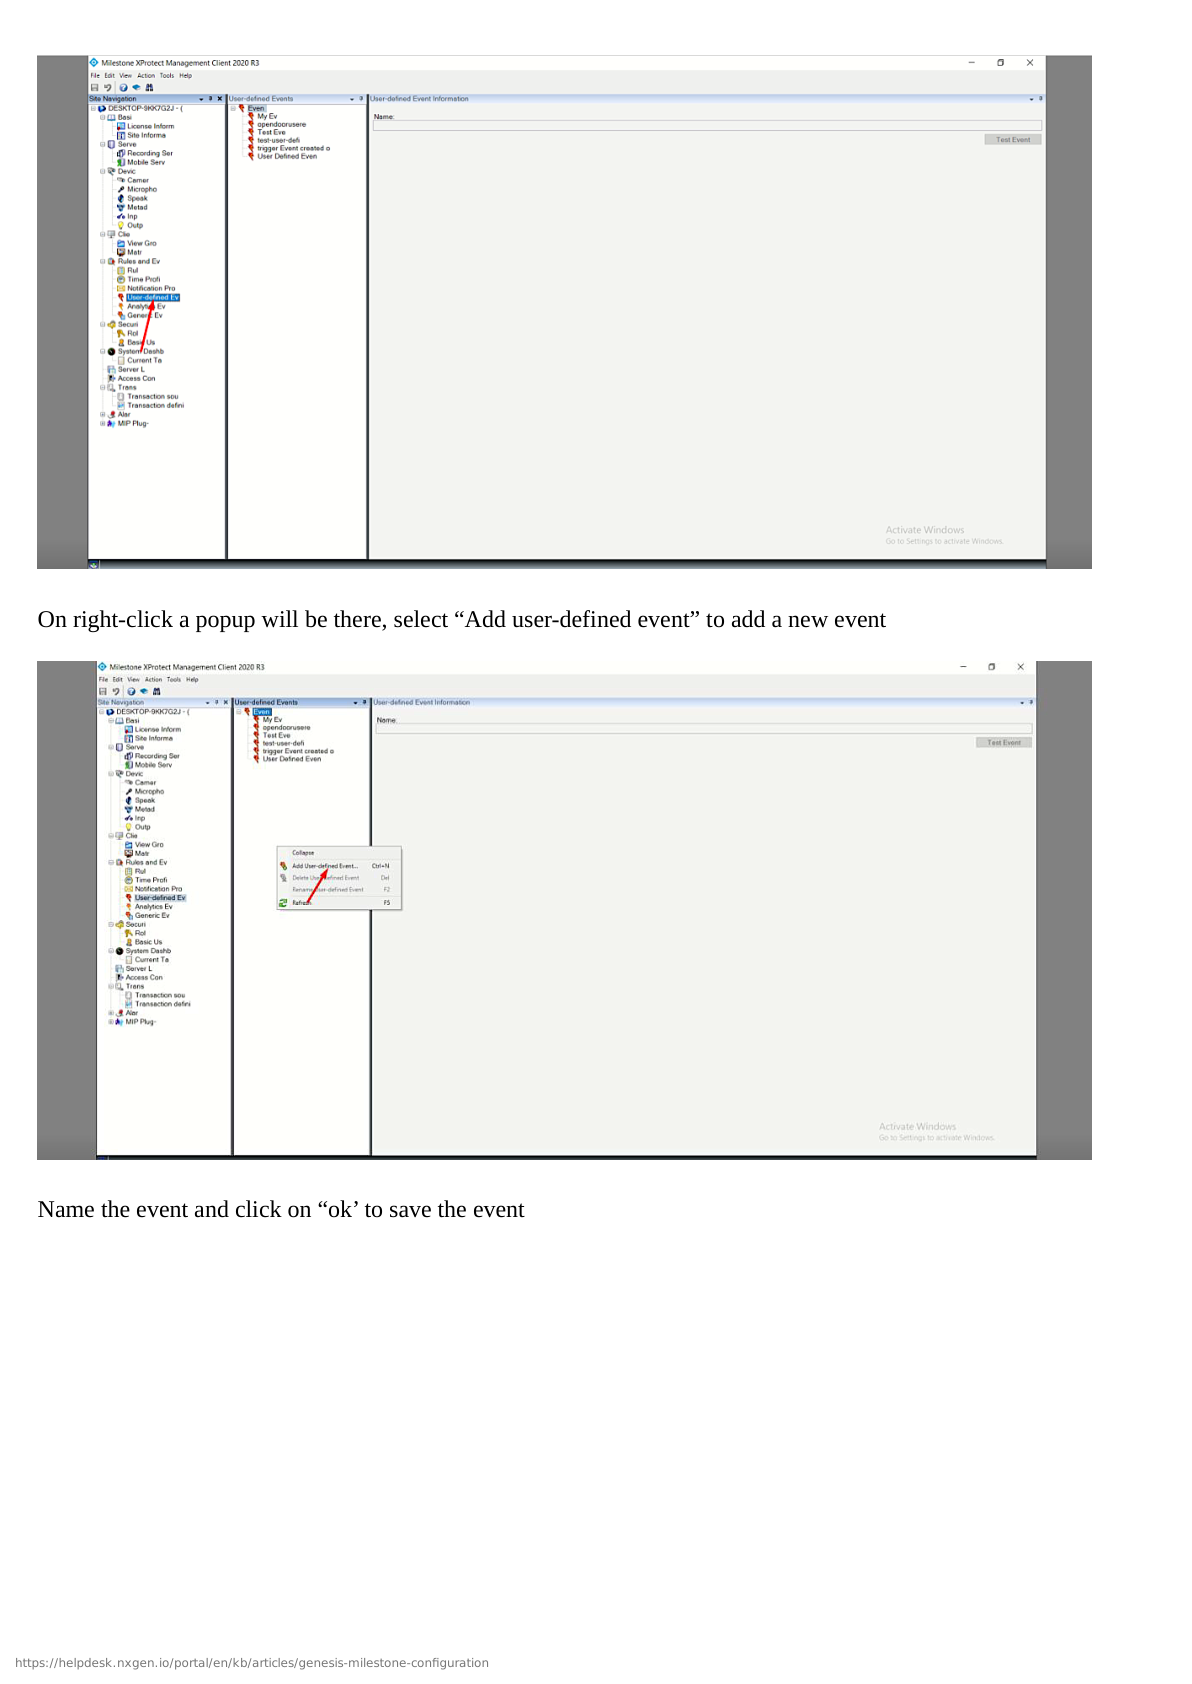
Step 3: Create Integration User (Optional for Manual Setup)
UI Path: Genesis VMS → Settings → Users
Objective: Create dedicated user for GCXONE integration (only if not using auto-discovery).
Configuration Steps:
- Navigate to Settings → Users
- Click Add User
- Configure the integration user:
- Username:
gcxone_integration(or use default) - Password: Create strong password (save for manual setup)
- Role: Administrator
- Permissions: All permissions enabled (default for admin)
- Username:
- Click Save
Note: When using auto-discovery, Genesis VMS automatically creates integration credentials.
![]()
Expected Result: Integration user created (or auto-configured credentials ready).
Part 2: GCXONE Platform Setup
Step 4: Auto-Discover or Add Genesis VMS in GCXONE
UI Path: GCXONE Web Portal → Devices → Auto-Discover or Add Device
Objective: Register Genesis VMS in GCXONE using auto-discovery or manual setup.
Configuration Steps (Auto-Discovery Method - Recommended):
- Log into the GCXONE web portal with admin credentials
- Navigate to Devices → Auto-Discover
- Click Scan Network or Discover Devices
- Wait for GCXONE to discover Genesis VMS server (usually less than 30 seconds)
- In discovered devices list, locate your Genesis VMS server
- Click Add next to the Genesis VMS entry
- Verify auto-populated information:
- Device Name: Auto-detected name (edit if needed)
- IP Address: Auto-detected
- Credentials: Auto-configured (native integration)
- Click Add Device
Auto-discovery dramatically simplifies Genesis VMS integration:
- Zero credential entry: Native integration auto-configures authentication
- Instant detection: Discovers Genesis VMS servers in under 30 seconds
- Error prevention: Eliminates manual IP/port/credential typos
- One-click setup: Single button click vs 8+ manual fields
- Time savings: 5 minutes vs 20+ minutes for manual method
Only use manual method if auto-discovery fails due to network segmentation or firewall rules.
Configuration Steps (Manual Method - If Auto-Discovery Fails):
- Navigate to Devices → Add Device
- Select device type:
- Type: VMS
- Manufacturer: NXGEN Genesis VMS
- Enter server details:
- Device Name: Descriptive name
- IP Address/Hostname: Server IP from Step 2
- Port: 8080 (default) or custom
- Username: Integration user from Step 3
- Password: Password for integration user
- Protocol: HTTPS
- Click Test Connection
- Click Add Device
![]()
Expected Result: Genesis VMS successfully added and shows "Online" status in GCXONE.
Step 5: Select Integration Profile and Configure Features
UI Path: GCXONE → Devices → Genesis VMS → Integration Profile
Objective: Select appropriate integration profile and enable desired features.
Configuration Steps:
- In GCXONE, navigate to the newly added Genesis VMS device
- Click Integration Profile or Configuration
- Select Integration Profile:
- Basic Profile: Essential features (live streaming, playback, events)
- Basic+ Profile: Enhanced features (event management, notifications, arm/disarm)
- Advanced Profile: Full features (AI analytics, advanced automation, timelapse) - Recommended
Which profile should you use?
- Basic: Use for sites with no alarm monitoring requirements (view-only access)
- Basic+: Use for most installations with alarm monitoring and event response
- Advanced: Use for premium installations requiring AI analytics, automation, or timelapse
Profile Migration: You can upgrade profiles anytime without reconfiguration - features are added automatically.
Recommendation: Start with Advanced profile - there's no additional cost and all features remain available for future use.
- Click Apply Profile (features are auto-configured based on profile)
- Review and customize Profile Features if needed:
- Cloud Streaming: ✓ Enabled (auto-configured)
- Local Streaming: ✓ Enabled (auto-configured)
- Cloud Polling: ✓ Enabled (auto-configured)
- Genesis Audio (SIP): ✓ Enabled (auto-configured)
- PTZ Control: ✓ Enabled (auto-configured)
- Clip Export: ✓ Enabled (auto-configured)
- Timelapse: ○ Enable if required (Advanced profile)
- Click Save Configuration
Expected Result: Integration profile applied, features auto-configured and enabled.
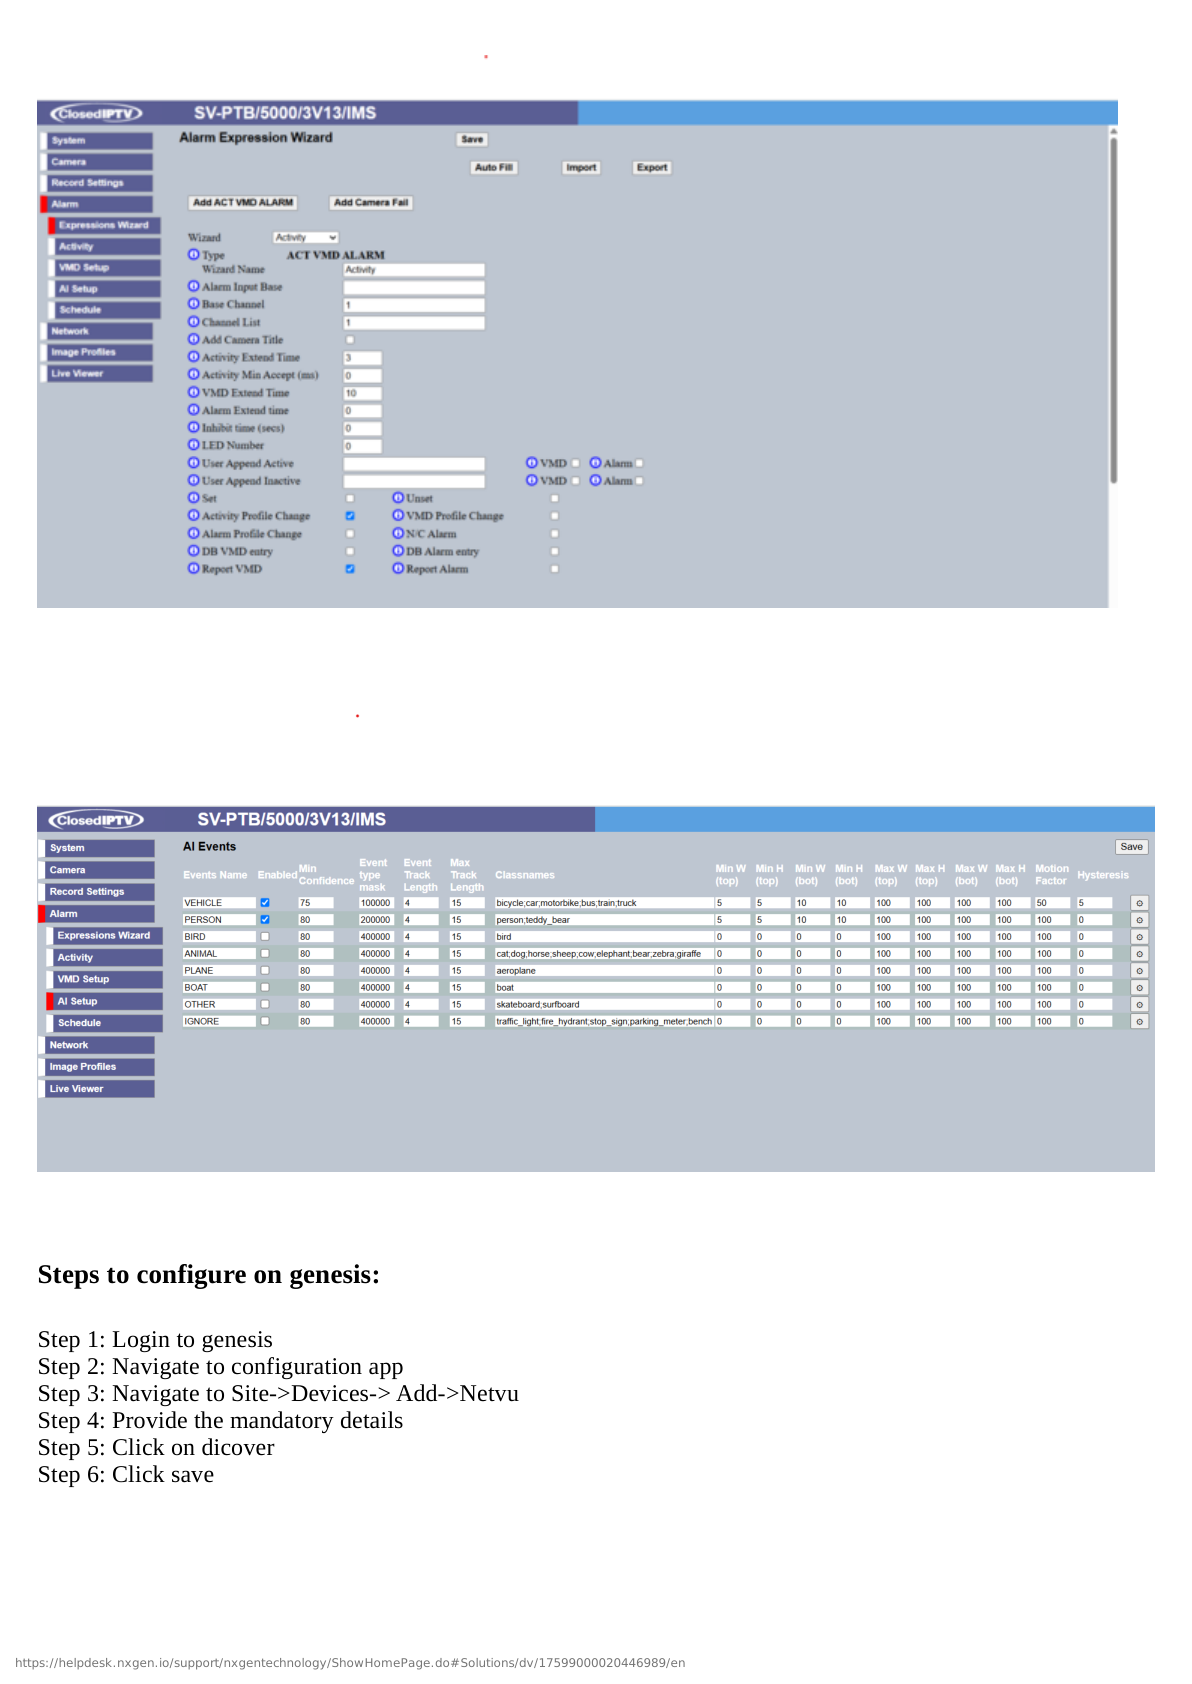
Step 6: Configure Cameras, Events, and Notifications
UI Path: GCXONE → Devices → Genesis VMS → Camera & Event Configuration
Objective: Configure camera mappings, event forwarding, and notification settings.
Configuration Steps:
- Navigate to Camera Configuration in GCXONE
- Review Auto-Discovered Cameras (Genesis VMS automatically syncs camera list)
- For each camera (or use bulk configuration):
- Assign to site/location in hierarchy
- Verify Cloud Streaming enabled
- Verify Local Streaming enabled
- Verify Timeline enabled
- Configure Stream Quality: Auto (recommended) or Manual
- Navigate to Event Configuration
- Configure Event Forwarding (auto-enabled based on profile):
- Motion Detection: ✓ Enabled
- Analytics Events: ✓ Enabled (Advanced profile)
- Camera Disconnection: ✓ Enabled
- System Events: ✓ Enabled
- I/O Triggers: ✓ Enabled if hardware present
- Configure Notifications:
- Push Notifications: ✓ Enable for mobile alerts
- Email Notifications: ✓ Enable (enter email addresses)
- SMS Notifications: ✓ Enable if required
- Notification Schedule: 24/7 or custom
- Click Save Configuration
Expected Result: Cameras auto-mapped, events forwarding, notifications configured.
Part 3: Verification and Testing
Verification Checklist
Test all core functions before completing configuration:
Live Streaming:
- Cloud live streaming works for all cameras
- Local live streaming works (when on same network)
- Stream quality is excellent with minimal latency
- Multiple concurrent streams work
- Automatic failover between cloud and local works
Playback and Timeline:
- Cloud playback works with timeline navigation
- Local playback works
- Timeline shows event markers with AI search
- Can jump to specific events
- Video export/clip download works
Events:
- Motion detection events forwarded correctly
- Event notifications received (push, email, SMS)
- Event video clips recorded
- Arm/Disarm functions work
- AI analytics events work (Advanced profile)
PTZ Control:
- PTZ controls work (pan, tilt, zoom)
- PTZ presets can be saved and recalled
- PTZ tours work
General:
- Device status shows "Online" in GCXONE
- Mobile app access works optimally
- No error messages in logs
- Cloud polling status active
Advanced Configuration
Multi-Site Deployment
For deploying Genesis VMS across multiple sites:
- Install Genesis VMS at each site
- Enable GCXONE integration on each instance
- Use auto-discovery in GCXONE to find all instances
- Organize by site hierarchy in GCXONE
- Configure site-specific integration profiles
- Set up cross-site automation rules if needed
AI Analytics Configuration
To leverage AI-powered analytics (Advanced Profile):
- Navigate to Genesis VMS → Analytics
- Enable AI Video Analytics:
- Object detection (person, vehicle, animal)
- Behavior analysis (loitering, line crossing, crowd detection)
- Facial recognition (if licensed)
- Configure Analytics Rules in Genesis VMS
- Verify analytics events forward to GCXONE
- Create GCXONE automation rules based on analytics
Genesis Audio Optimization
To optimize Genesis Audio (SIP) integration:
- Navigate to GCXONE → Genesis VMS → Audio Settings
- Verify Genesis Audio (SIP) is enabled (auto-configured)
- Configure Audio Quality:
- Codec: G.711 (default, high quality)
- Bitrate: Auto (recommended)
- Echo Cancellation: ✓ Enabled
- Test two-way audio communication
- Adjust settings based on network conditions
Troubleshooting
If you encounter issues during configuration, see the Troubleshooting Guide for common problems and solutions.
Quick troubleshooting:
- Auto-discovery fails: Verify network connectivity, check firewall allows UDP broadcast
- Connection fails: Verify IP address, port 8080, and network routing
- No video: Verify cameras are online in Genesis VMS management interface
- Poor performance: Check network bandwidth, consider using local streaming
- Events not forwarded: Verify integration profile has event forwarding enabled
- Cloud polling inactive: Check GCXONE integration enabled in Genesis VMS settings
Related Articles
Need Help?
If you need assistance with Genesis VMS configuration, contact support.