Axis Communications Family Integration Guide
Introduction
This guide describes the end-to-end integration between the NXGEN Monitoring Platform and the Axis Communications family of devices, including Axis Network Cameras (IP Cameras), Axis Network Audio Systems (Horn Speakers), Axis I/O Relay Modules, and Axis Camera Station Pro (ACS). The purpose of this integration is to enable unified monitoring, event ingestion, device control, audio actions, and simplified configuration of Axis devices from within the NXGEN ecosystem.
System Overview
Axis devices communicate using a combination of industry-standard and Axis-native protocols:
| Axis Device Type | Supported Protocols | Purpose |
|---|---|---|
| Network IP Cameras | VAPIX, RTSP/HTTPS, Webhook | Video, events, command and control |
| Network Audio such as Horn Speakers | VAPIX Audio, Action Rules, SIP | Announcements, alarms |
| Network I/O Relay Modules | VAPIX I/O, Event Framework | Sensors, relays |
| ACS Pro | REST API (internal ACS facade APIs), RTSP | NVR services, video search, playback, Videos, events, command and control |
NXGEN consumes Axis data for:
- Live video streaming
- Event/alarm notifications
- I/O status changes
- Audio announcements
- ACS stored video playback

System Architecture
Axis cameras, audio devices, ACS Pro, and I/O Modules connect locally to the site router, which securely links to the cloud via VPN (preferred) or non-VPN. NXGEN receives all video streams, alarms, and device telemetry from the cloud endpoint and presents them to monitoring operators across various applications. The architecture enables:
- Centralized management
- Unified event handling
- Real-time audio and I/O controls
- Scalable multi-site monitoring

Communication Flows
| Flow | Protocol | Direction | Notes |
|---|---|---|---|
| Live/Playback Stream | RTSP/HTTPS | CS Pro or IP Camera to NXGEN | GCX-ONE supports both cloud redirected streaming as well as local mode (bypassing cloud). |
| Events | Action Rules/Webhooks (HTTPS Push) | Axis Devices to NXGEN | Motion, Tamper, I/O, System alerts |
| Audio Announcements | SIP / GCX-ONE Audio | NXGEN to Axis | live announcements |
| I/O Control | Axis HTTPS Digital I/O | NXGEN to Axis | Trigger Relays/Virtual Inputs |
| Command and Controls | ACS Internal API | NXGEN to Axis | Queries, Command and Controls |
Axis Communications Family Configuration
Pre-Integration Requirements
- Axis device updated to latest firmware.
- HTTP enabled.
- API access user with necessary privileges.
- For ACS Pro:
- “Web Client” enabled
- Ports 29202 (TCP), 29204 (API), and 29205 (streaming) are open (depending on version),80 and 443.
-
Ensure network connectivity (either public network access or through VPN) between the Site network and the monitoring platform (GCX-ONE).
-
For IP Cameras:
- Enable VAPIX API (default enabled).
- API Port is open and accessible.
- Enable Event Service.
- Configure RTSP parameters if needed (codec, bitrate) to match your network bandwidth.
Axis Communications Family Config Guide with GCX-ONE
Please find the steps below to add Axis Camera Station (ACS) Pro, Axis I/O Modules, and Axis Network Horn Speakers into the GCX-ONE Environment.
Axis Family devices Configuration
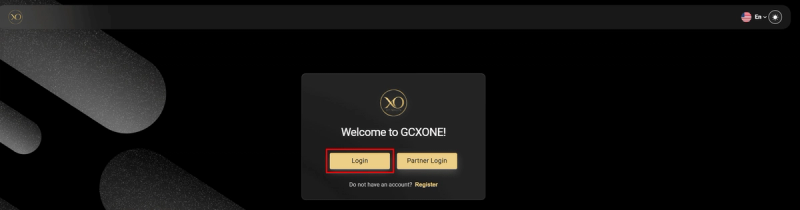
Step 1: Login to GCX-ONE Platform
- Open the (GCX-ONE Cloud Experience) URL in a browser.
- Sign in using your administrator or integrator credentials.
- After successful login, the system initializes your session and loads the environment associated with your tenant.
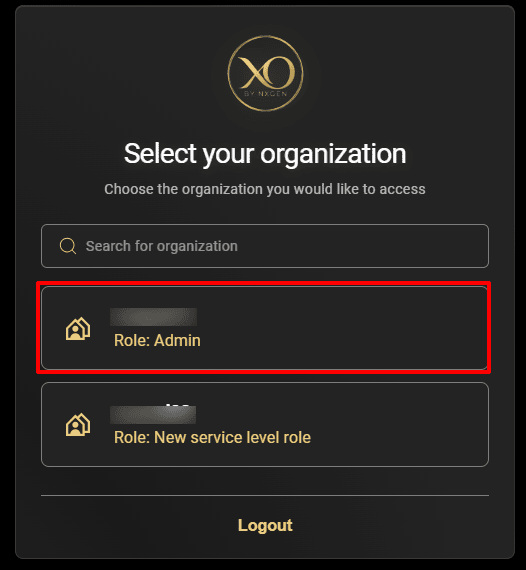
Step 2: Select Your Organization
If your tenant is configured with multiple organizations, GCX-ONE will prompt you to select the organization you want to manage.
- If multiple organizations exist: You will see an organization selector screen. Choose the correct organization to proceed.
- If only one organization exists: GCX-ONE automatically logs you into the default organization and directly loads the dashboard.
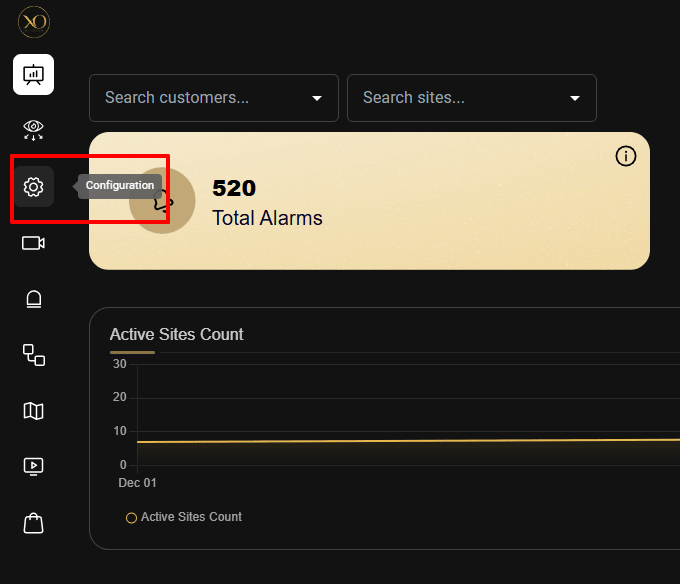
Step 3: Navigate to the Configuration App
- From the left-hand Apps panel, locate the Configuration icon.
- Click Configuration to open the configuration workspace.
- The system will load the unified configuration screen, where all customer profiles, sites, and devices are managed.
Step 4: Understanding the Configuration Hierarchy
GCX-ONE follows a strict, intuitive hierarchy to ensure clear device ownership and maintain clean data structure: Customer → Site → Device → Cameras/Sensors.
How this hierarchy works
- Customer: Represents the top-level organizational entity (e.g., a company, enterprise, or client). Each customer contains one or more physical or logical sites.
- Site: Represents a physical location or deployment area (office, warehouse, tower site, retail store, etc.). Devices deployed at the location are associated with the site for clarity and operational control.
- Device: Represents the actual hardware endpoints such as:
- Axis IP Cameras
- ACS Pro Recorders
- Axis I/O Modules
- Axis Horn Speakers
This hierarchy ensures:
- Clean configuration management
- Accurate alarm routing
- Multi-tenant separation
- Site-wise reporting and visibility
- Scalable onboarding for larger enterprise fleets
Step 5: Select or Create a Customer/Site
Once in the Configuration app:
- Choose an existing customer/Site from the list, or Click Add New to create a new top-level customer and site profile.
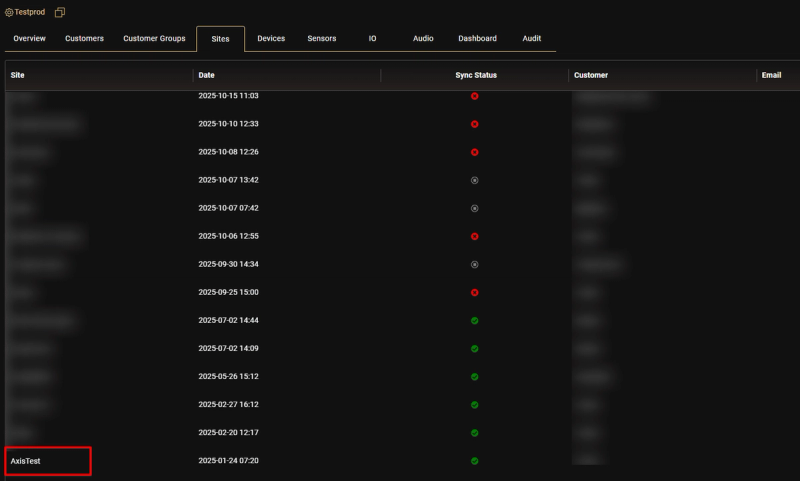
Step 6: Add Devices to the Site
Once the site is created and selected:
- Open the Devices tab under the site.
- Click Add New.
- Choose the type of Axis device you want to add:
- Axis Camera Station (for ACS Pro devices)
- Axis (for I/O Modules and IP Cameras)
- GCX-ONE Audio (for Axis Horn Speakers)
- The system will open the device configuration wizard.
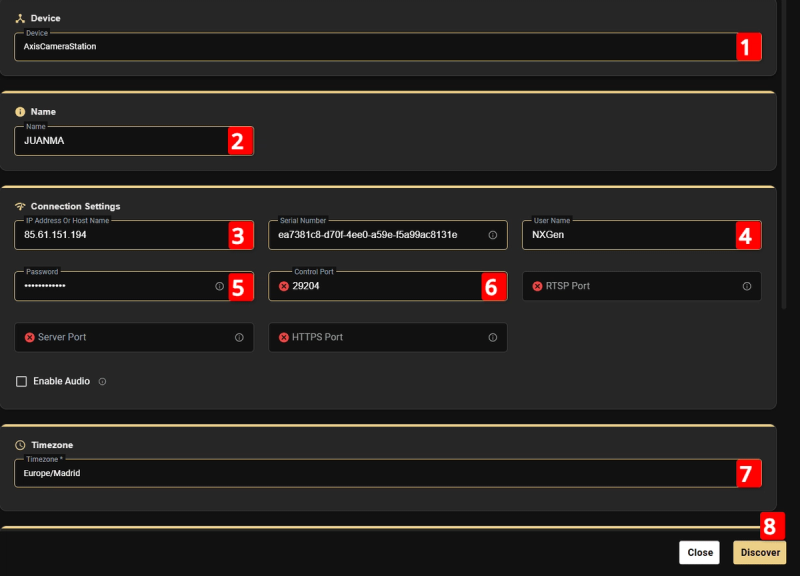
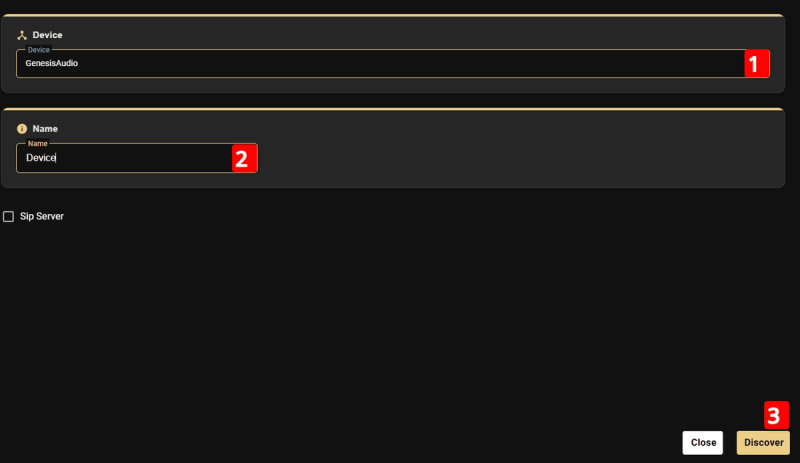
Step 7: Provide Device details
GCX will prompt for:
- Name
- IP Address / Hostname
- Control Port
- Username & Password
- Device Time zone
Once entered, click Discover.
Step 8: Camera list discovery
GCX-ONE automatically retrieves:
-
Camera list (for ACS Pro or IP Camera - if it has multiple profile/view)
-
I/O ports (for I/O modules)
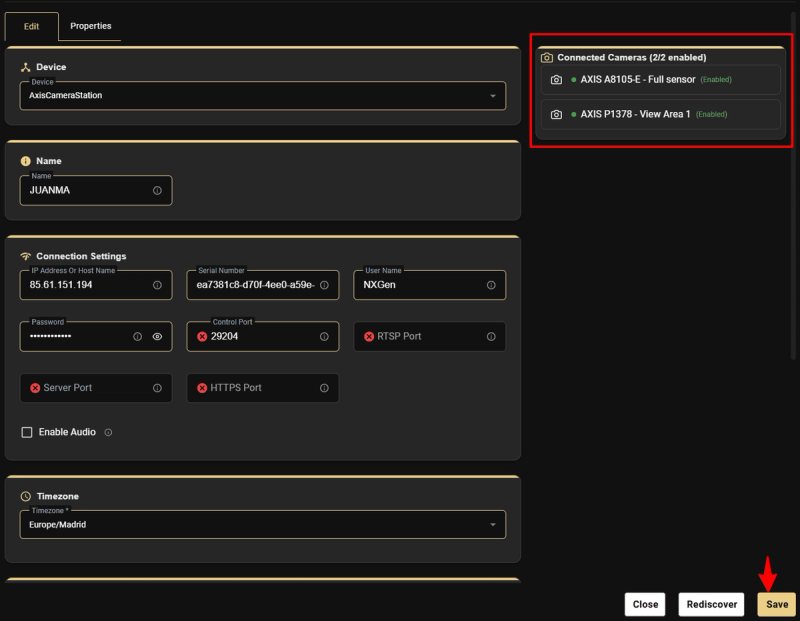
-
Click Save and complete the device addition.
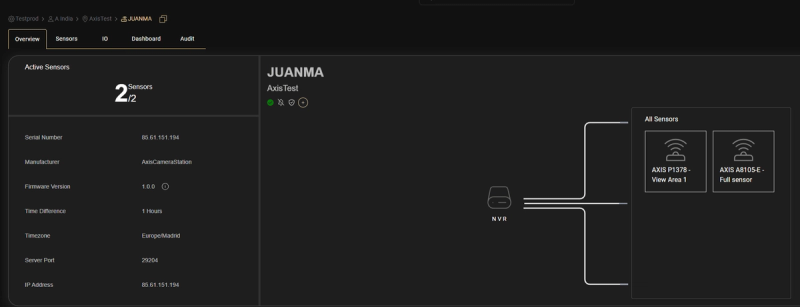
-
Device overview would be shown once the save is complete.
-
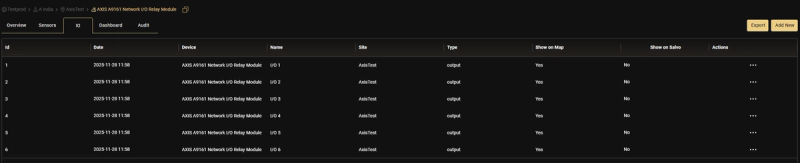
Similarly for Axis IO Modules, you can select Device Type as "Axis" and control port as the Vapix API port.
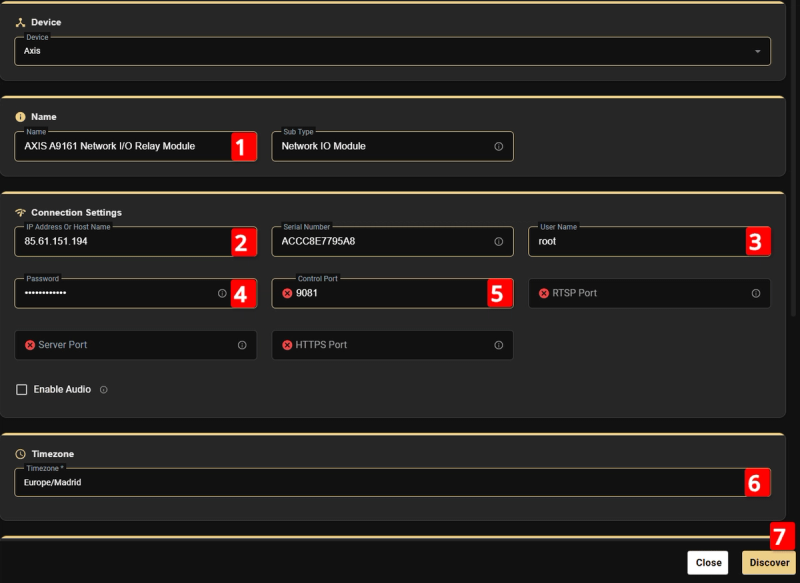
This will retrieve all available inputs and outputs and add them to the device I/O list.
For Axis Horn Speaker, you can select the Device type as "GCX-ONE Audio" and give a valid name and hit discover.
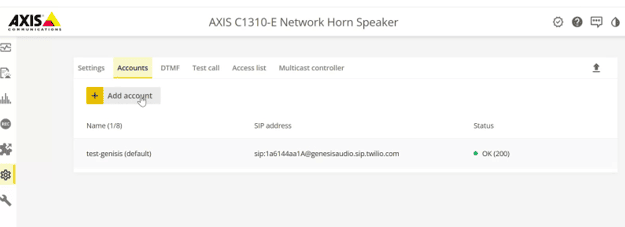
After the horn speaker is discovered and added, GCX-ONE automatically generates the SIP username, password, and domain details. These credentials must be configured on the horn speaker so it can register with the SIP endpoint and enable audio communication.
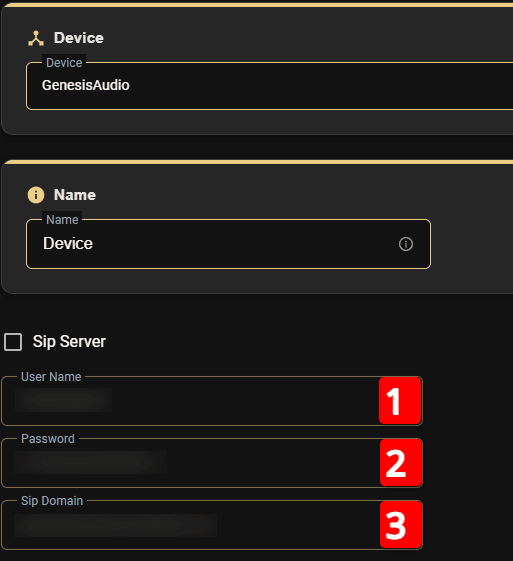
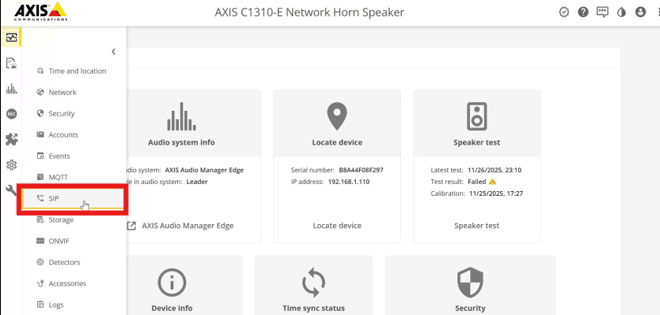
Make sure the above SIP details are configured in the horn speaker by entering the generated username, password, and domain into the device’s SIP settings page and saving the configuration. This ensures the speaker successfully registers with the GCX-ONE SIP endpoint for audio communication.

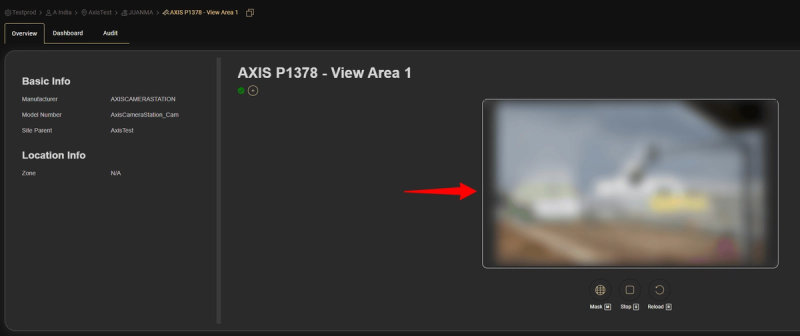
To verify that the camera is streaming correctly, open any camera from the configured device list. You should be able to view the live video stream without interruptions.
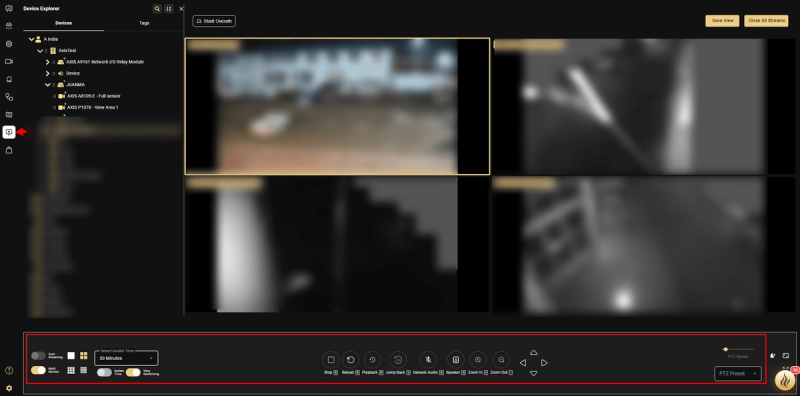
In the Video Viewer application, you can perform additional video operations such as multi-camera streaming, PTZ control, preset management, playback of recorded footage, and more. Simply drag and drop the device into the play area, and the system will begin displaying the live multi-camera stream.
Events and Rules Configuration
- GCX-ONE supports alarm forwarding from ACS pro through Action Rules. To configure this:
- Login to the ACS Client.
- Navigate to the Events section and open Action Rules.
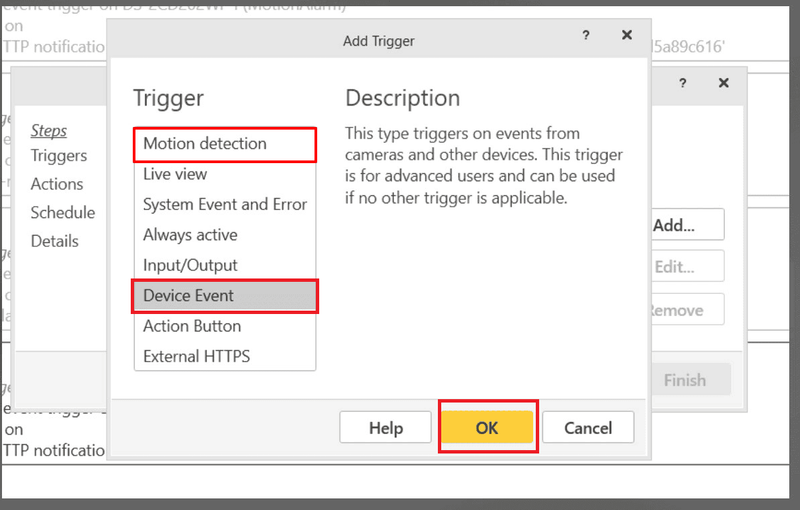
- Click New Action Rule to start the configuration wizard.
- Choose the desired alarm trigger, such as:
Motion detection
Device events
Input/Output event
-
After selecting the trigger, set the Action to “Send HTTP Notification”.
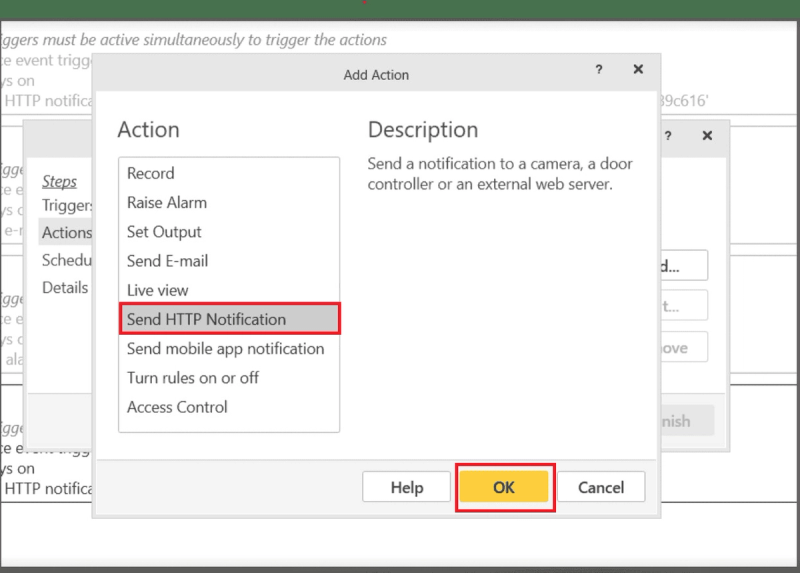
-
Proceed with the wizard to define notification details.
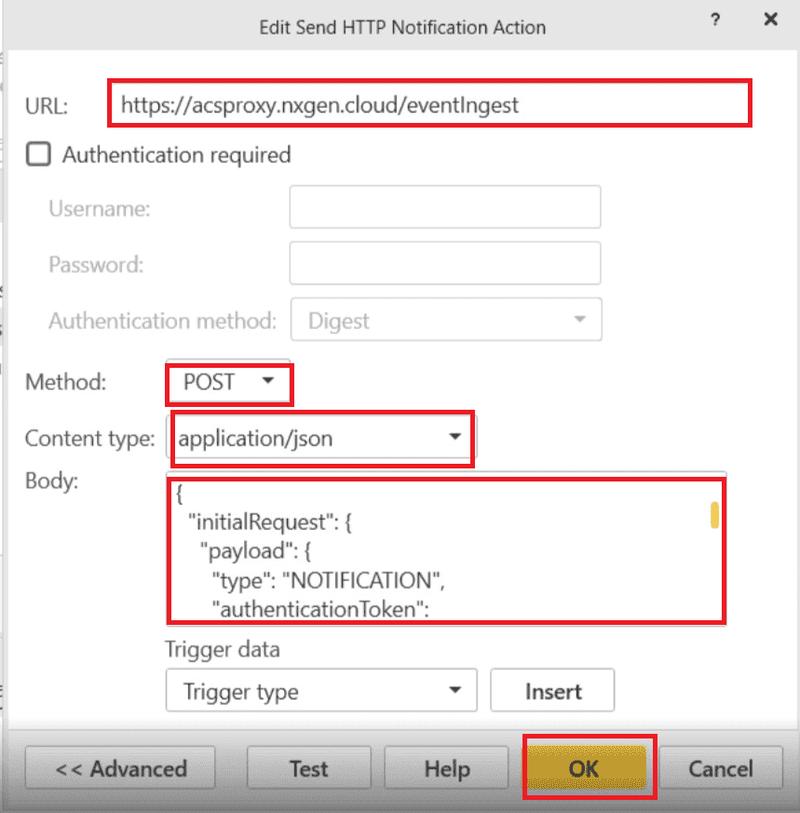
Configure the following parameters in the HTTP Notification:
| Parameter | Value | Description |
|---|---|---|
| URL | https://acsproxy.nxgen.cloud/eventIngest | genesis webhook endpoint |
| Method | POST | HTTP method |
| Content Type | application/json | Payload format |
- To configure the Request Body, Use the following JSON template. Replace the placeholder values (
<<DEVICE_ID_FROM_GENESIS>>, <<CAMERA_ID_FROM_GENESIS>>) with the actual device id and camera id which you can get it from the GCX-ONE Configuration URL.
{"initialRequest": {"payload": {"type": "NOTIFICATION","authenticationToken": "<<DEVICE_ID_FROM_GENESIS>>","notifications": [{"event": {"type": "ALARM_TRIGGERED","genesisCamId": "<<CAMERA_ID_FROM_GENESIS>>","cameraId": "$(TriggerData.SourceId)","timestamp": "$(TriggerData.TimeUtc)"}}]}}}
-
You can obtain the placeholder values directly from the configuration URL.
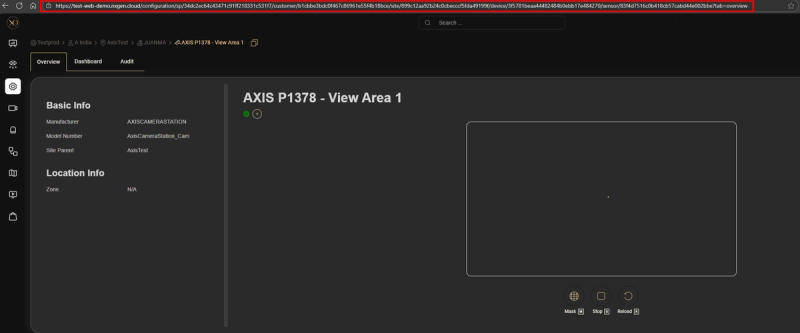
-
Here is how you can interpret the URL to extract the placeholder values for the Device ID and Camera ID.

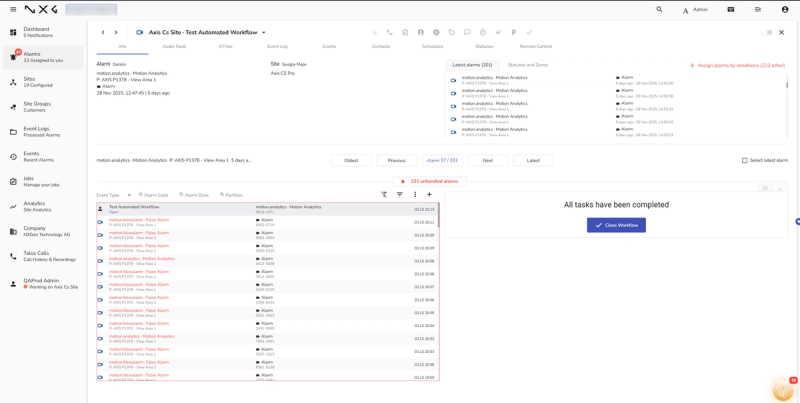
Testing and Verification
- Trigger a known rule in ACS Pro (e.g., motion or analytics alert).
- In GCX-ONE, verify that the corresponding event appears in Video activity search or device level alarm dashboard.
- If no events appear, confirm network reachability to https://acsproxy.nxgen.cloud/eventIngest and verify that the Action Set is active.
Best Practices
- Always test connectivity with https://acsproxy.nxgen.cloud/eventIngest before saving.
- Ensure firewall or outbound network policies allow TCP traffic to the GCX-ONE endpoint.
- Avoid modifying placeholder syntax — any incorrect character will break JSON parsing.
Alarm Processing Overview
GCX-ONE provides a multi-application alarm handling workflow designed for professional monitoring centers. When an alarm is received from an Axis device, three key applications work together to give operators complete situational awareness and rapid response capability.
-
Workflow Application (Alarm Handling)
-
The Workflow app (typically the Talos alarm management view) acts as the operator’s primary alarm console.
-
Alarms are listed with full details including device, site, customer, timestamps, trigger type, and severity.
-
Operators open an alarm to begin investigation, acknowledge it, add notes, assign it, or escalate it as required.
-
This application serves as the central control point for managing the entire alarm lifecycle.
-
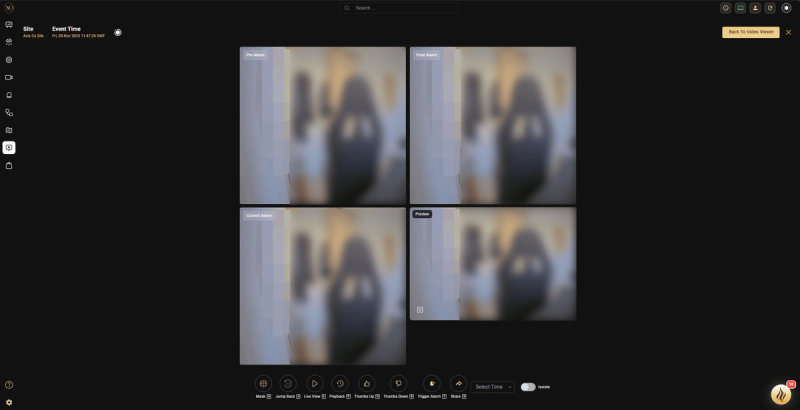
Video Viewer Application (Alarm Verification)
-
When an alarm is opened in the Workflow app, the Video Viewer automatically switches to the corresponding alarm context. It displays:
- Pre-alarm image
- Current-alarm image
- Post-alarm image.
- Operators also have access to a full suite of video tools:
- Live Video
- Playback Timeline
- PTZ Control
- Preset Navigation
- Audio Announcement/Talk-down
- Multi-camera layouts
-
This gives operators immediate visual confirmation and the ability to verify the event in real time.
-
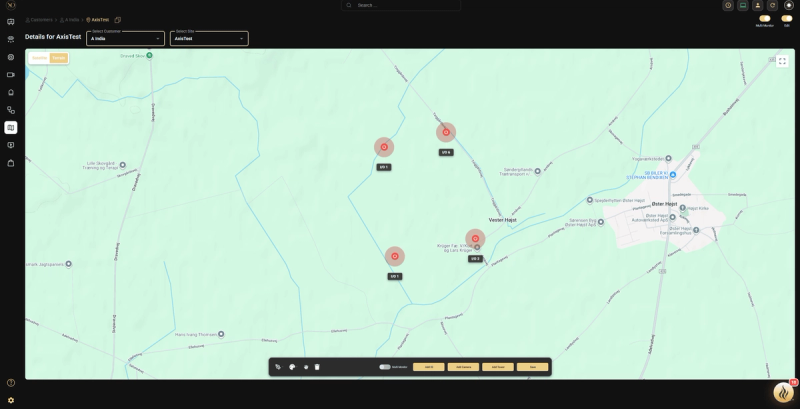
Map View (Geospatial Awareness & Output Control)
-
The Map application displays all devices and outputs positioned on an interactive site map.
-
When an alarm is selected in the Workflow app, the Map view automatically centers on the alarm location.
-
Operators can interact with devices on the map and trigger outputs such as:
- Sirens
- Strobes
- I/O Relays
- Recorder audio clip trigger through Horn Speaker.
- This gives operators fast access to response actions directly on the site layout.
Multi-Monitor Operator Workflow
In professional control room setups, operators typically use three or more monitors. GCX-ONE is designed to support this environment:
Monitor 1: Workflow application
Monitor 2: Video Viewer
Monitor 3: Map View
When the operator opens an alarm in the Workflow application:
- The Video Viewer on its dedicated monitor automatically switches to the alarm’s video source(s).
- The Map View simultaneously updates to highlight the alarm’s site and device location.
This synchronized context switching ensures that:
- The operator has a holistic, 360° view of the alarm.
- All relevant tools (video, PTZ, audio, maps, outputs) are instantly accessible.
- Response time is minimized, and situational understanding is maximized.
Integrations Features Overview
The GCX-ONE platform integrates with Axis Camera Station Pro through a combination of RESTful APIs, RTSP streaming, and webhook-based event forwarding. This integration enables unified management, monitoring, and analytics for all connected cameras.
| Feature | Description | API/Protocol Used | GCX-ONE Integration Status |
|---|---|---|---|
| Device Discovery | Automatically retrieves the list of configured cameras from the ACS Pro VMS. | API | Integrated |
| Live Stream | Provides real-time video streaming from cameras connected to the ACS Pro VMS for live monitoring. | RTSP | Integrated |
| Playback Stream | Enables access to recorded or historical footage from Axis video archive. | RTSP | Integrated |
| Timeline Control | Displays the recorded video timeline for each camera, allowing smooth scrubbing and playback control. | API | Integrated |
| PTZ and Preset Control | Allow pan, tilt, and zoom control of supported cameras, and the ability to trigger predefined PTZ presets. | API | Integrated |
| Alarms | Forwards real-time event notifications (analytics, system, or rule-based alarms) to GCX-ONE using Action Sets | HTTP Webhook | Integrated |
| Audio | Real time audio announcement through Axis Horn Speaker | SIP | Integrated |
Summary
By following this guide, you can integrate Axis Camera Station Pro and the full Axis ecosystem into your NXGEN monitoring platform. This integration unifies:
- Live and recorded video
- Alarm ingestion
- Audio announcements
- I/O control
- Multi-application operator workflows
Resulting in comprehensive, scalable, and efficient monitoring operations.