Dahua
Introduction
This guide describes the steps required to configure a Dahua device for integration with the GCX-ONE platform. It covers device onboarding, user setup, and configuration of IVS events and alarm reporting.
Prerequisites
- Whitelist the IP 52.59.60.20 (Dahua Receiver). If you don’t use NXGEN OpenVPN services.
- Local Mode is installed (For P2P streaming, Audio, Encrypted stream) in operator workstations.
- Configure the new IP address given by NXGEN in case of using NXGEN OpenVPN services.
Dahua Configuration
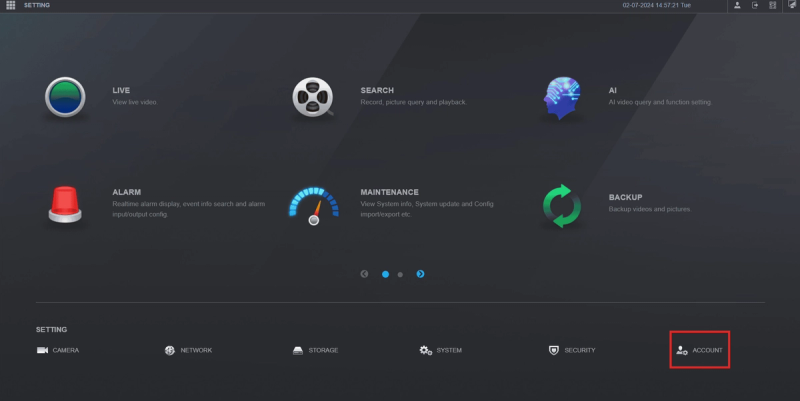
Step 1: Setting up a user:
-
Log in to your Dahua portal by providing the credentials needed.
-
From the home page, navigate to the bottom right corner and select "Accounts."
-
Click on "Add".
-
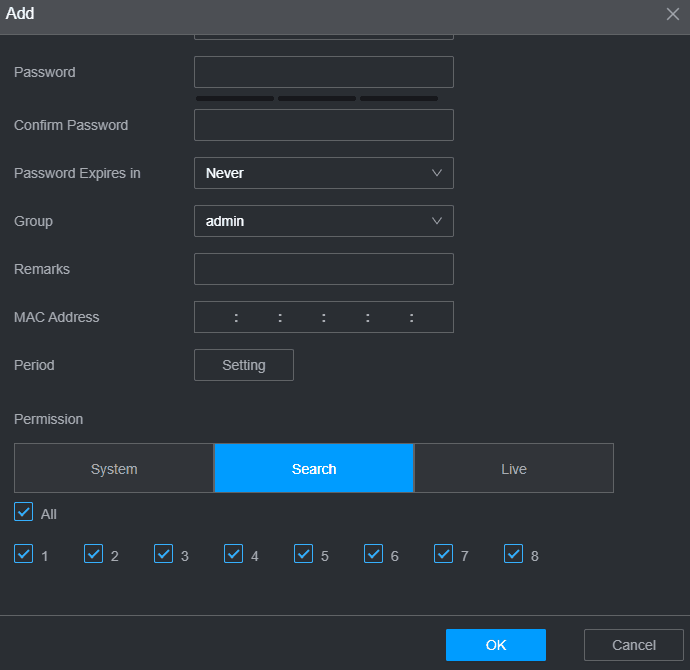
In the new window, enter your Username and Password. We recommend using "NXG" as your Username.
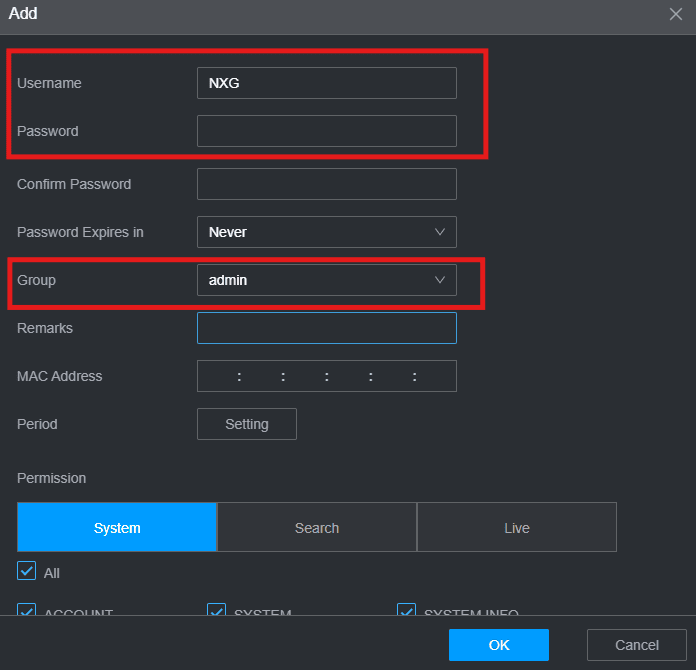
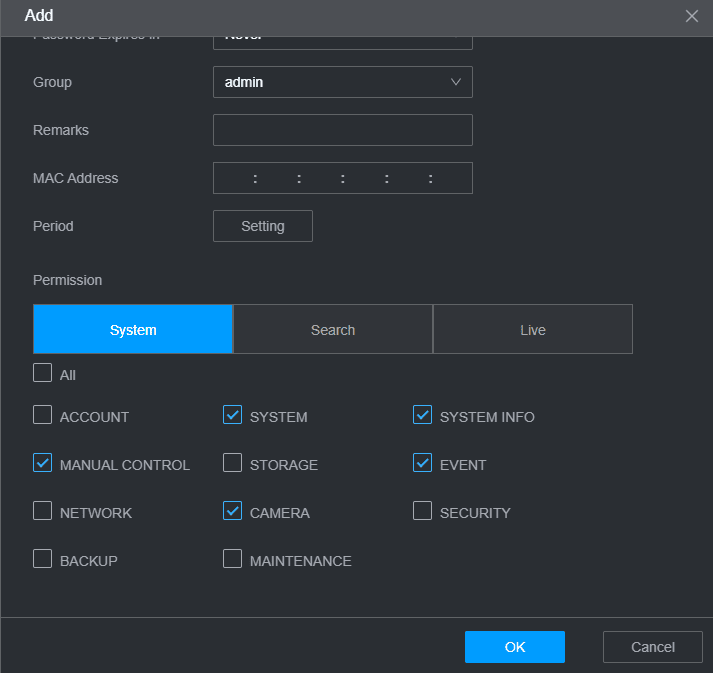
- Set the permissions below:
- Manual control.
- System.
- Camera.
- System info.
- Event.
-
For both Search and Live, choose the cameras you are interested to have on GCX-ONE.
-
Don’t forget to press OK to save the changes.
step 2: Alarm configuration (Optional)
We advise against configuring motion detection, as it can trigger numerous alarms, potentially leading to an overflow of alerts on GCX-ONE.
-
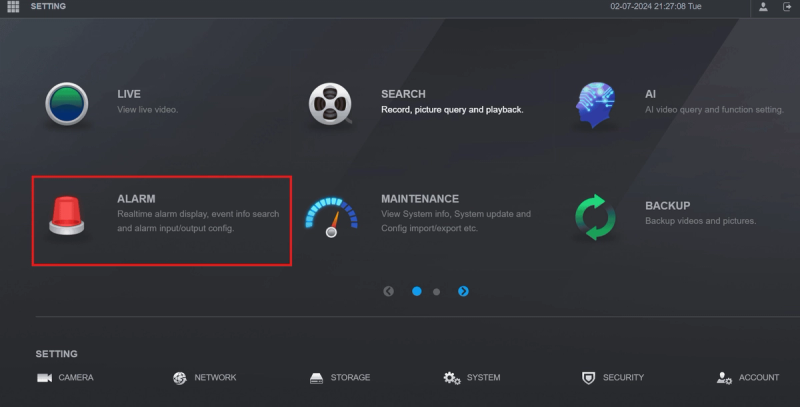
From the home page, go to the "Alarm" section.
-
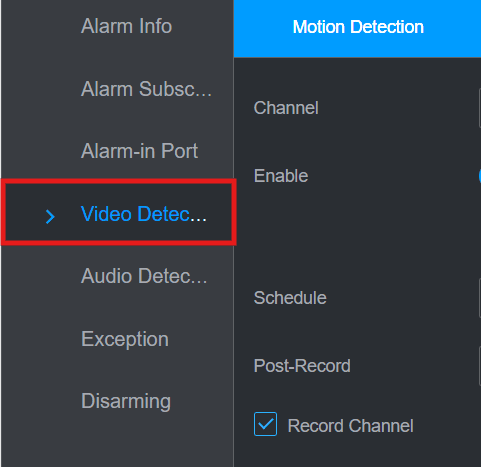
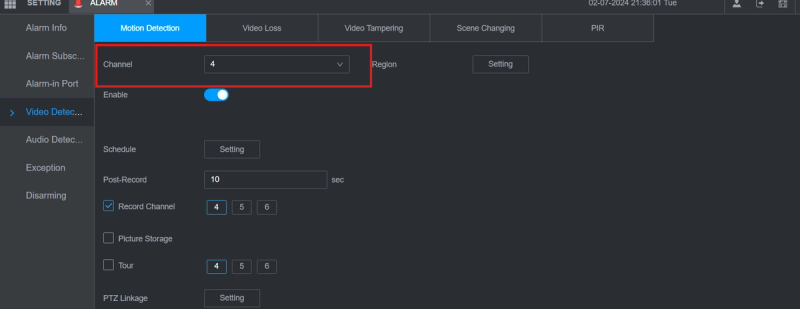
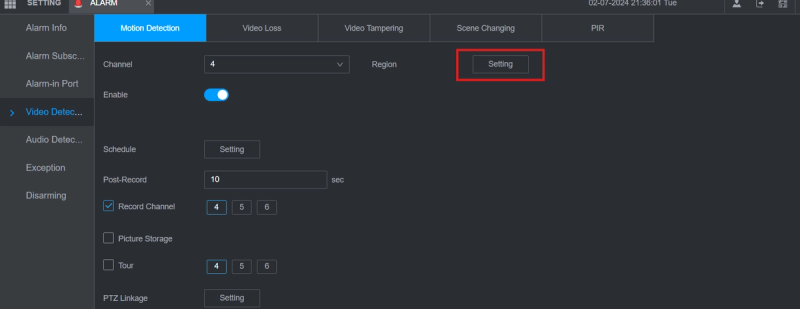
In the Alarm menu, select "Video Detection." Here, you can configure a variety of alarms, including motion detection, video tampering, video loss, and more.
The configuration steps are applicable for all types of alarms mentioned above.
-
Choose the camera you want to apply the alarm on.
-
To select the region or area of interest, click on the "Setting" button located to the right of "Channel."
-
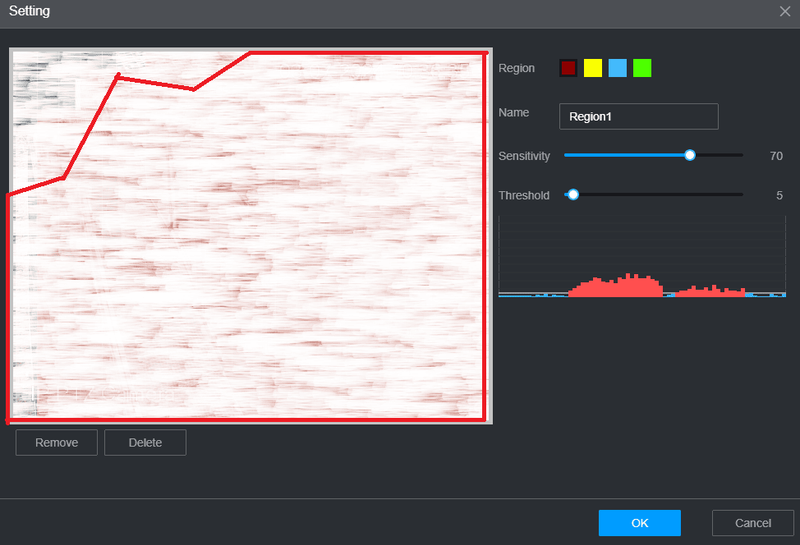
Once the settings window appears, select the region you want to monitor. We recommend setting the sensitivity to 70 and the threshold to 5.
-
Save the changes by clicking OK.
-
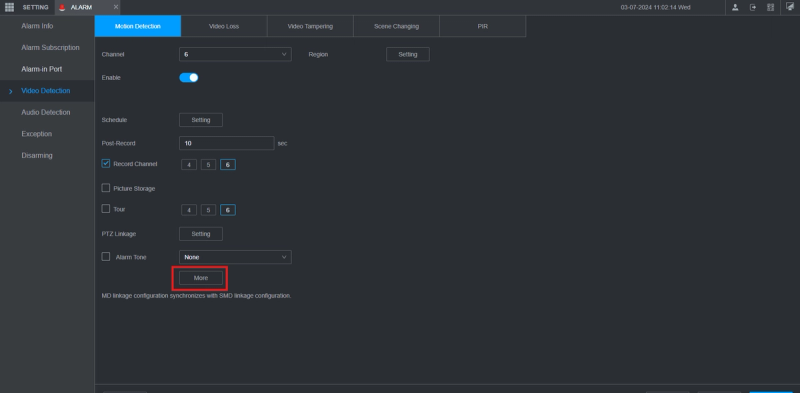
To make the alarms available on GCX-ONE, click "More," then select "Log."
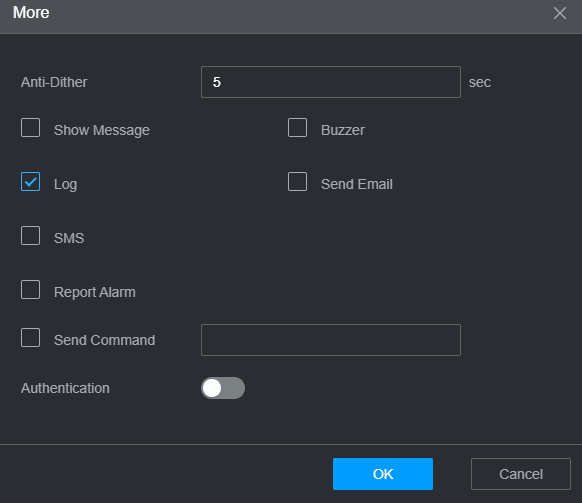
- Click on "OK" to save the changes.
Step 3: AI configuration (IVS)
-
From the home page, go to the "AI" section.

-
From the menu, navigate to Parameters. then "IVS".
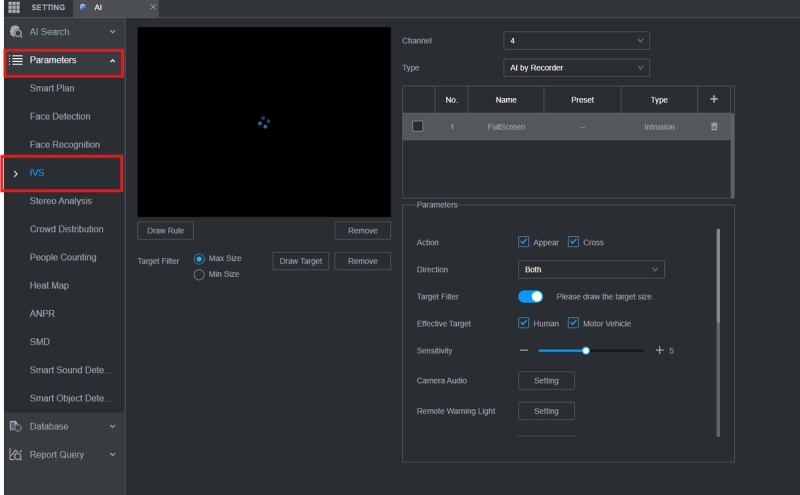
-
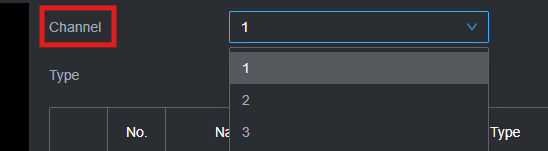
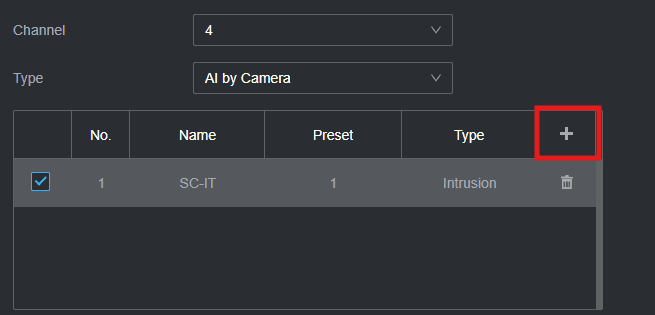
Choose the camera you want to configure.
-
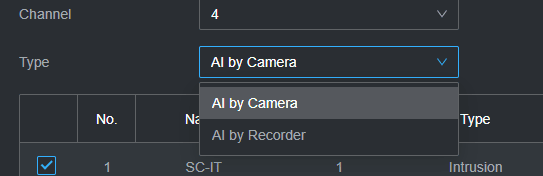
Choose the type of configuration you want to have on the camera:
AI by Recorder: This configuration offers two types of detection:
- Tripwire Detection: This feature detects objects crossing a predefined line. You can set it to monitor different directions, such as A->B, B->A, or bidirectional.
- Intrusion Detection: Similar to Tripwire Detection, this monitors for objects crossing a boundary. However, it also requires some space outside the perimeter to detect entry effectively and exit events.
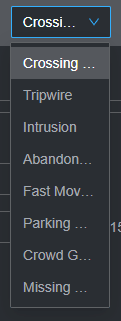
AI by Camera: This configuration Offers many options:
- Crossing Virtual Fence.
- Tripwire.
- Intrusion.
- Abandoned Object: It can be applied to the scene where the target is sparse and there is no obvious or frequent light change.
- Fast Moving: Triggers an alarm when the speed of an object exiting a defined area exceeds a specified sensitivity setting.
- Parking detection: Monitors a defined area for the presence of a vehicle that remains in the area without motion.
- Crowd Gathering Detection: Monitors a defined area for a set number of people gathering and remaining inside the defined area.
- Missing Object.
-
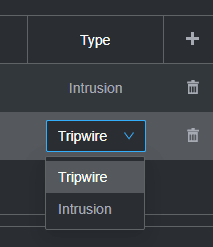
Click the plus icon after choosing "AI by Camera" for example.
-
Choose the type of detection you want to have
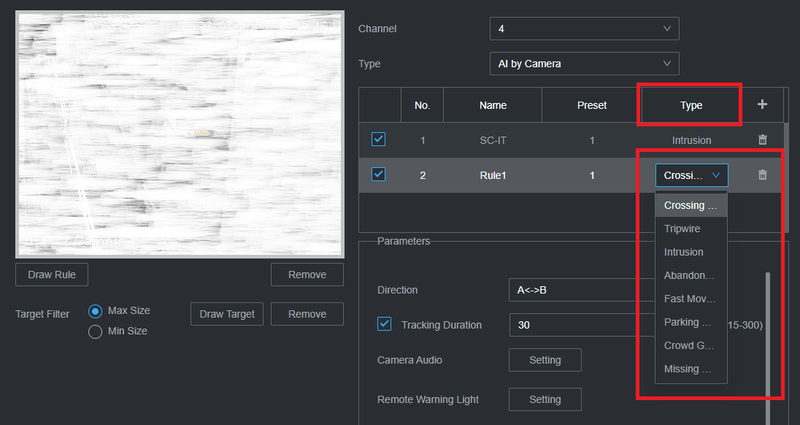
-
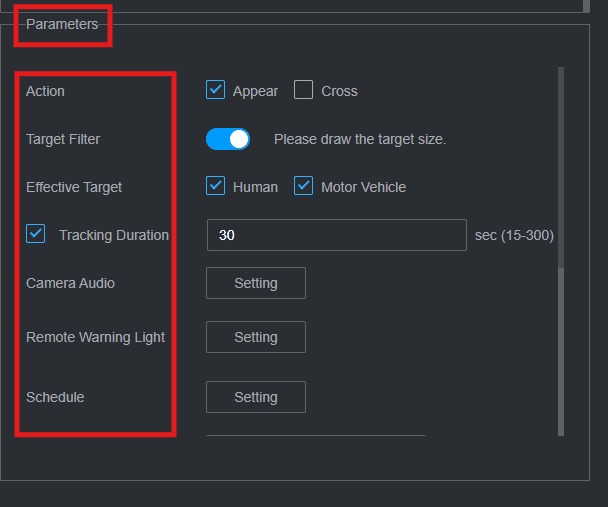
If you select "Intrusion" as an example, you will select the following parameters:
- Action: Appear or Cross.
- Target filter: draw the area of interest on the image by clicking"Draw Rule" under the picture.
- Tracking duration: We recommend setting it to 30 seconds.
- Schedule: Specify the duration for which you want to receive alarms from the camera.
- Effective Target: Human and Motor Vehicle.
- Scroll down on the parameters section, then click on "More":
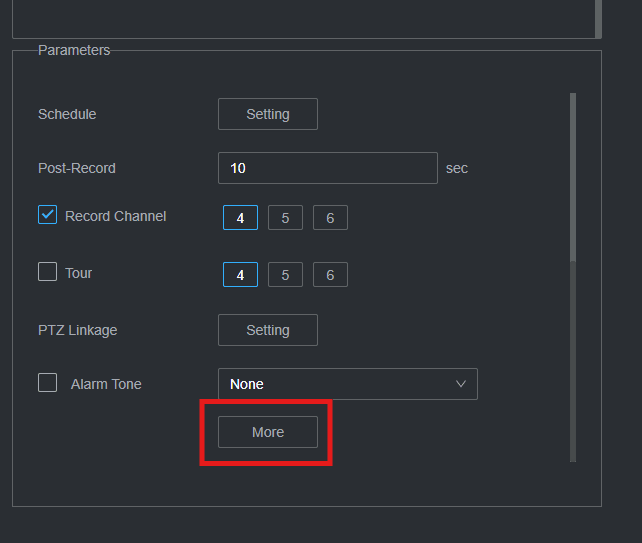
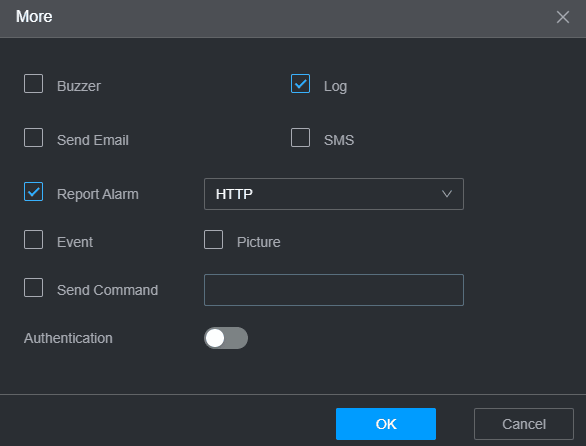
When the new window appears, click on "Log" and then "Report Alarm." This action will enable the device to push alarms to the GCX-ONE platform.
Note: The configuration steps are applicable for all types of alarms mentioned above.
These steps and explanations will help you configure the appropriate analytics on your Dahua device to enhance your security system’s effectiveness and responsiveness.
Dahua Config Guide with GCX-ONE
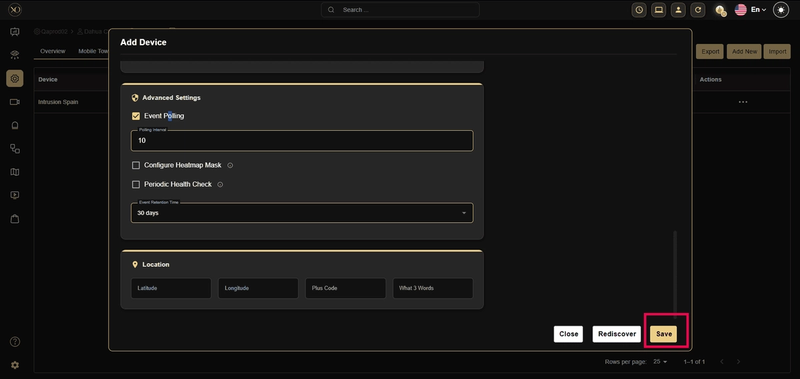
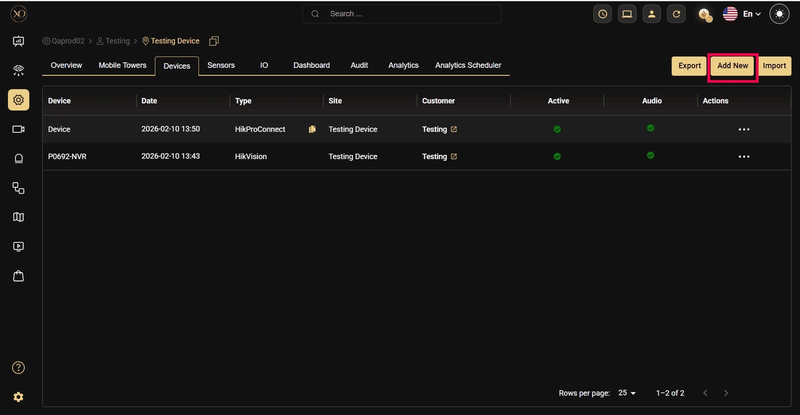
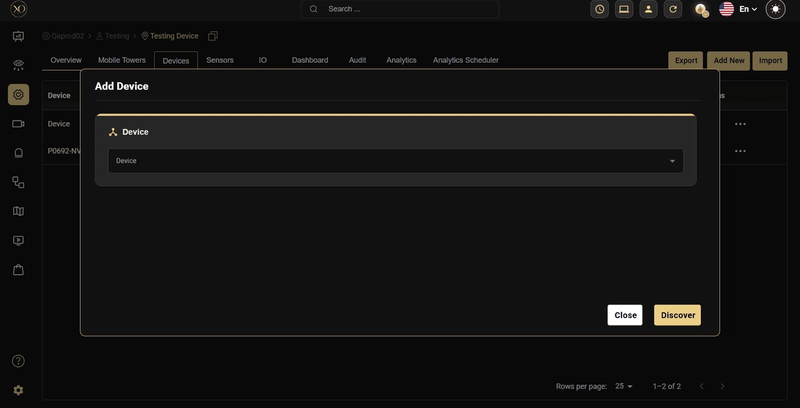
Step 1: Navigate to the Devices tab.
Step 2: Click the Add button.
Step 3: The Add Device dialog will be displayed.
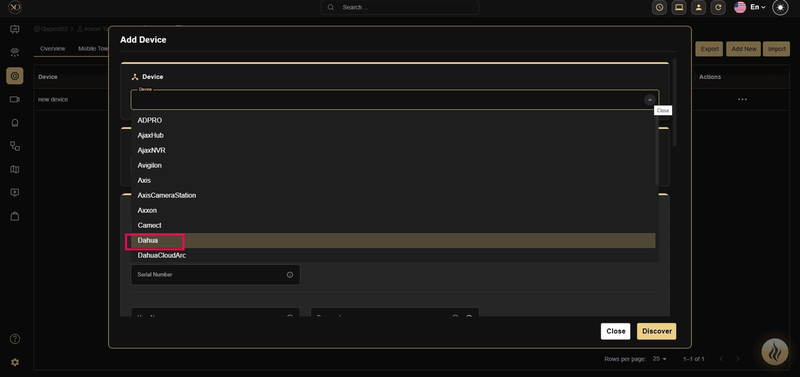
Step 4: In the dialog, open the Device dropdown and select Dahua.
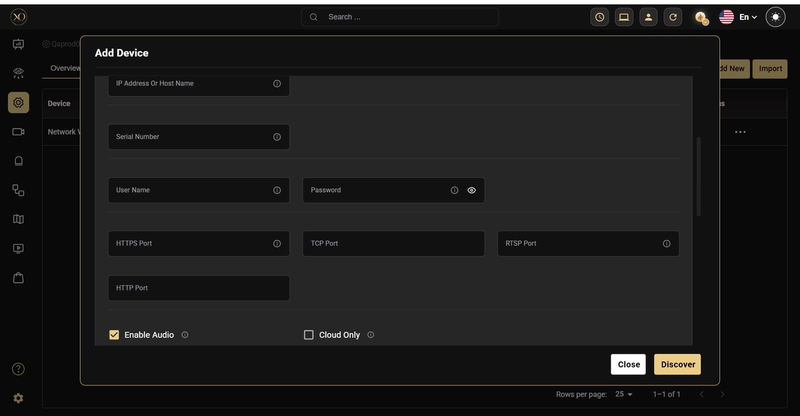
Step 5: Enter all required fields: Name, IP Address or Host, Username, Password, HTTPS Port, TCP Port, RTSP Port, HTTP Port, Timezone
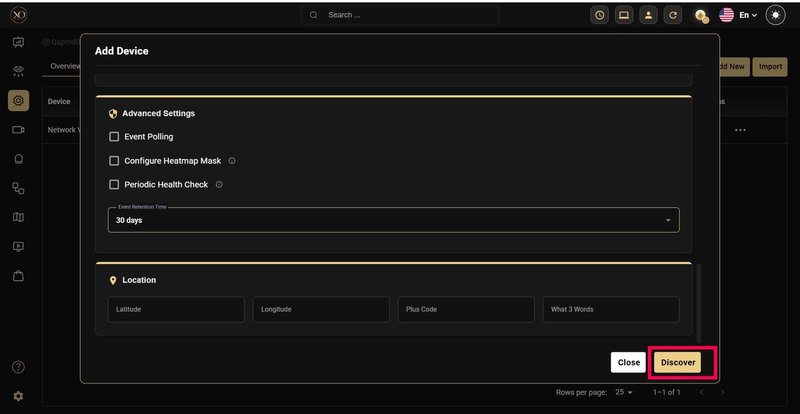
Step 6: Click Discover.
Step 7: Once the device is successfully discovered, click Save.