Organization & Hierarchy Setup
Overview
Before beginning, ensure that First-Time Login & Access has been completed. Proper configuration ensures structured access control, operational segmentation, and scalable management across the platform hierarchy.
Platform Hierarchy
GCXONE follows a structured 5-level hierarchy. Each level sits inside the one above it:
Service Provider └── Customer └── Site └── Device └── Sensor
| Level | Description |
|---|---|
| Service Provider | The top-level entity — your organization managing the platform |
| Customer | A business or client you monitor on behalf of |
| Site | A physical location belonging to a customer |
| Device | A hardware unit (NVR, DVR, hub) installed at a site |
| Sensor | An individual camera or sensor connected to a device |
Navigate to Configuration
From the left sidebar, click the Configuration icon. You will see a set of tabs across the top:
Overview · Customers · Customer Groups · Sites · Mobile Towers · Devices · Sensors · IO · Audio · Dashboard · Audit · Analytics
Level 1: Service Provider
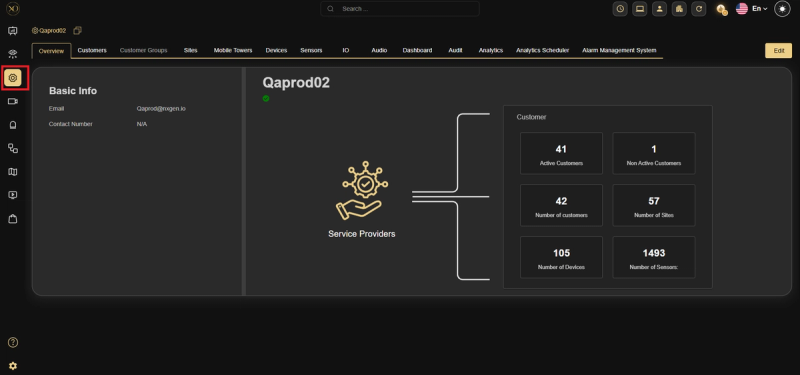
The Overview tab shows a high-level summary of your entire environment.
Basic Info:
- Email — Service Provider contact email
- Contact Number — Primary contact number
Stats at a glance:
| Metric | Description |
|---|---|
| Active Customers | Number of currently active customers |
| Non Active Customers | Customers that are inactive |
| Number of Customers | Total customer count |
| Number of Sites | Total sites across all customers |
| Number of Devices | Total registered devices |
| Number of Sensors | Total sensors across all sites |
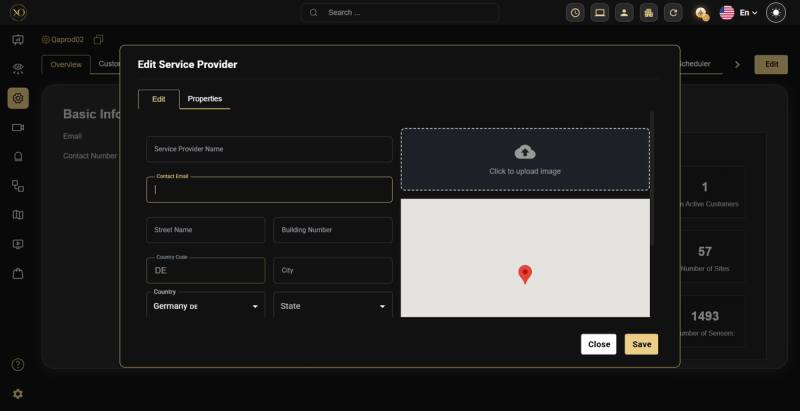
To edit your Service Provider details, click the Edit button in the top right.
Edit Service Provider fields
- Service Provider Name
- Contact Email
- Street Name / Building Number
- Country Code / City
- Country / State
- Logo — Click to upload image
- Map — Interactive location pin
Level 2: Customer
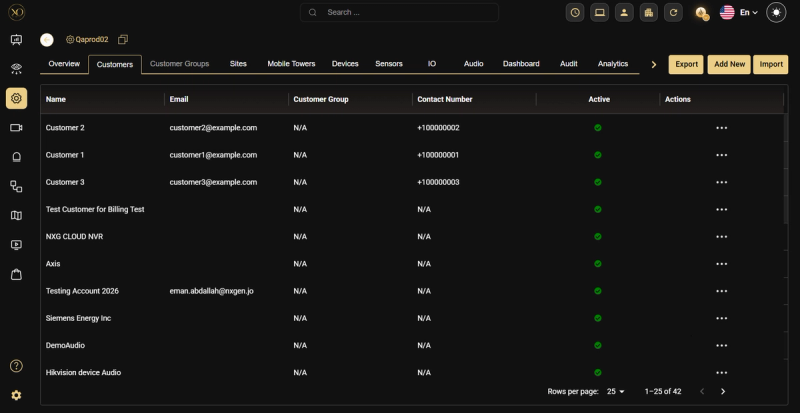
Go to the Customers tab and click Add New.
Basic Information
- Customer Name — Official name of the customer entity
- Contact Email — Primary contact email address (Required)
Address Information
- Street Name / Building Number
- Country / State — Dropdowns
Contact Information
- Country Code / Phone Number
Location Details
- Latitude / Longitude — GPS coordinates for map visualization
Image & Map
- Upload a customer logo using the Click to upload image area
- An interactive map pin confirms the geographic location
Once all required fields are filled, click Save.
The Customers list shows: Name, Email, Customer Group, Contact Number, Active status, and Actions.
Alternative: Bulk Import Customers
- Go to Configuration → Customers
- Click Import
- Download the template file
- Fill in the required data and upload the Excel file
BulkImport accelerates onboarding — instead of manually adding each customer, you upload structured data and enable faster go-live.
Level 3: Site
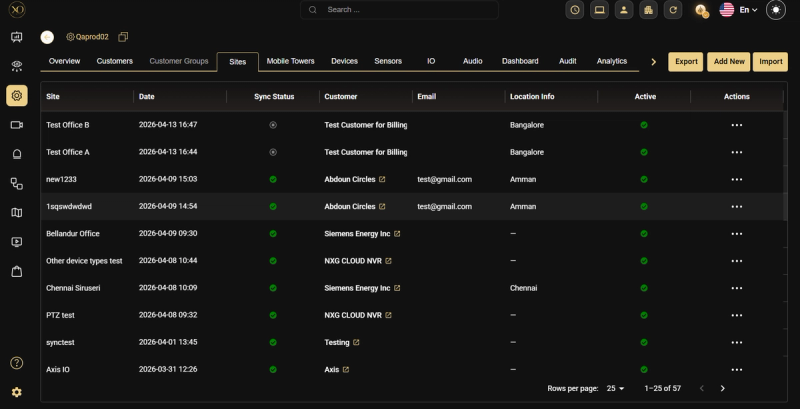
Go to the Sites tab and click Add New.
Basic Information
- Customer — Select the customer this site belongs to (dropdown)
- Site Name — Descriptive name for the physical location
Address Information
- First Name / Last Name — Contact person at this site
- Street, Zip, City
- Country / State — Dropdowns
Contact Information
- Email / Phone — Site contact details
Location Details
- Latitude / Longitude — GPS coordinates
- Plus Code — Google Plus Code for precise location
- What 3 Words — Alternative precise location identifier
- Timezone — Local operating timezone (dropdown)
Once all required fields are filled, click Save.
The Sites list shows: Site name, Date, Sync Status, Customer, Email, Active status, and Actions. A green dot in Sync Status confirms the site is live and synchronized.
Alternative: Bulk Import Sites
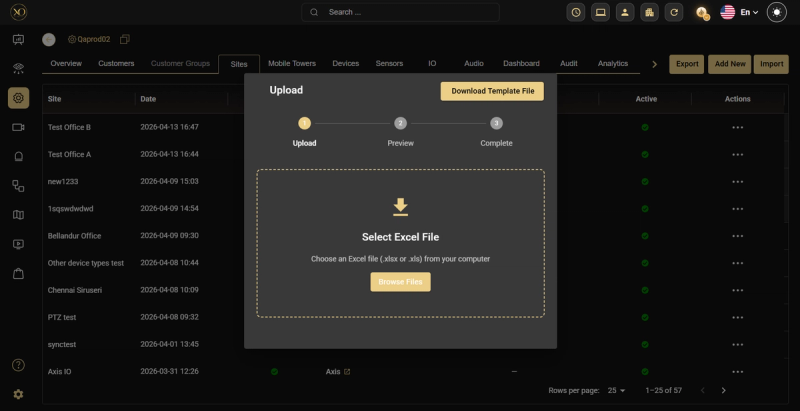
- Go to Configuration → Sites
- Click Import
- Download the template file
- Fill in the required data and upload the Excel file
Site Synchronization with TALOS
By default, GCX-ONE and TALOS are automatically synchronized. When you add a new site, it will appear directly in TALOS.
If a specific site is not fully synced, you can manually force synchronization:
- Push to TALOS — Sends data from GCX-ONE to TALOS
- Pull from TALOS — Retrieves data from TALOS into GCX-ONE
You can also arm or disarm a site directly from this view if required.
To delete a site, you must be at the Customer level. You cannot delete a site from the Site-level view.
Level 4: Device
A Device is the hardware unit (NVR, DVR, hub, or integration) installed at a site. Each device belongs to a specific Site and Customer.
Go to Configuration → Devices and click Add New.
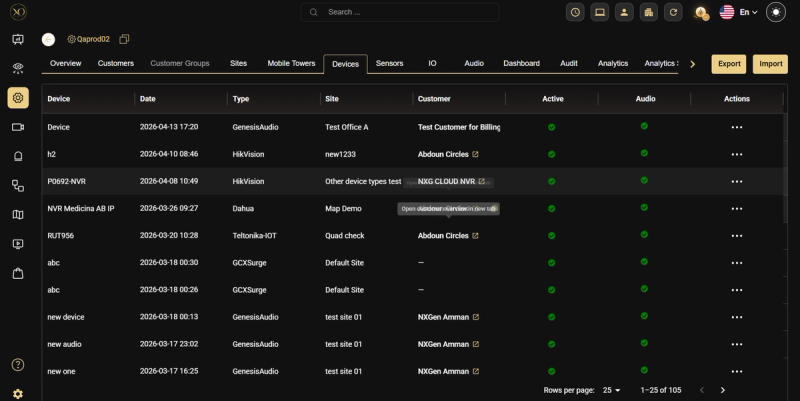
When adding a device, select the device type from the dropdown. Supported types include: AjaxHub, AjaxNVR, Avigilon, Axis, AxisCameraStation, Axxon, Camect, Dahua, and more.
The Devices list shows: Device name, Date, Type, Site, Customer, Active status, Audio, and Actions.
For detailed setup instructions per device type, refer to the Devices documentation.
Level 5: Sensor
A Sensor is an individual camera or detection point connected to a device. Sensors are the lowest level of the hierarchy and are what GCXONE monitors in real time.
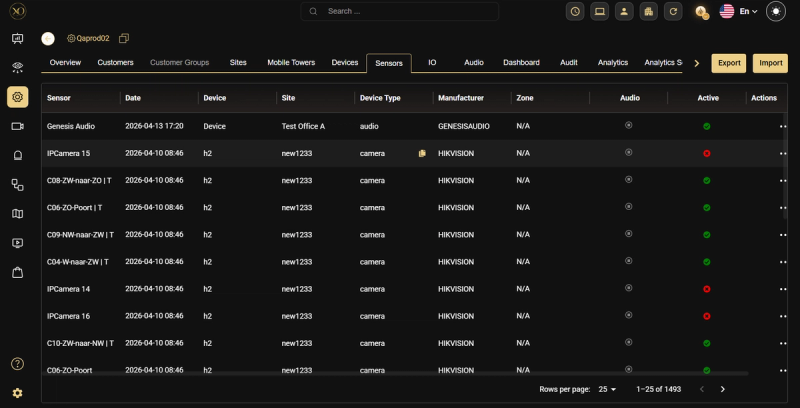
Go to Configuration → Sensors and click Add New (or add sensors directly from within a site's Sensors tab).
Add Sensor fields:
- Type — Sensor type (dropdown)
- Name — Sensor display name
- Channel Id / Stream Id — Identifier for the stream
- Plus Code — Precise location code
- Latitude / Longitude — GPS coordinates
- What3Words — Alternative location identifier
- Zone — Zone assignment within the site
- Image — Upload a reference image (PNG, JPG, JPEG up to 10MB)
The Sensors list shows: Sensor name, Date, Device, Site, Device Type, Manufacturer, Zone, Audio, Active status, and Actions.
Customer Groups
Customer Groups have been replaced by User Entities within Roles and Permissions.
To control access and grouping, go to Roles & Permissions where you can define User Entities and assign them accordingly.
Considerations
- Always follow the hierarchy order: Service Provider → Customer → Site → Device → Sensor
- Use Export and Import on all tabs for bulk management
- Latitude, Longitude, Plus Code, and What3Words fields support map visualization and analytics
- Timezone configuration supports automated scheduling and time-sensitive workflows
- Dashboards exist at each level so you can investigate quickly