Mobile App Guide
What the GCXONE Mobile App Does
The GCXONE mobile app gives you secure, on-the-go access to your security monitoring platform. From your smartphone you can view live camera feeds, check site and device status, manage arm/disarm states, isolate devices, and monitor audio intervention activity — all from a single application.
Why It Matters
Security monitoring shouldn't stop when you leave your desk. The mobile app ensures operators and managers stay connected to their entire security estate from anywhere — with live video, real-time status, and direct device control at their fingertips.
How It Works
Downloading the App
The GCXONE mobile app is available for Android and iOS. Search for NXGEN in the Google Play Store or Apple App Store and install it on your device.
Logging In
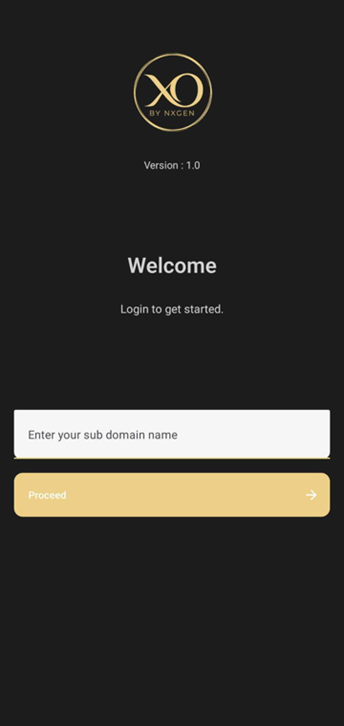
Opening the app for the first time presents the Welcome screen. Login takes two steps:
- Enter your sub-domain name — this is the unique identifier for your organization's GCXONE environment. Tap Proceed when done.
- You will be redirected to the secure login page. Enter your email address and password, then tap Continue.
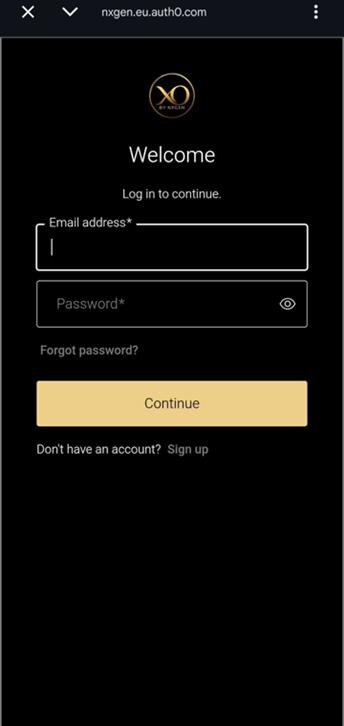
Your sub-domain name is provided by your system administrator. If you are unsure what to enter, contact your support team.
Home Dashboard
After logging in you land on the Home screen. This is your monitoring overview — a quick snapshot of your entire estate at a glance.
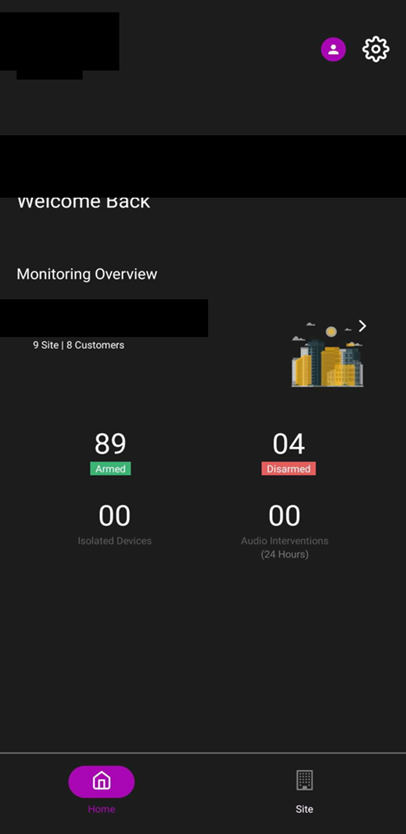
The Home screen displays:
- Customers ��— total number of sites and customer accounts you have access to.
- Armed / Disarmed — how many of your sites are currently in an armed or disarmed state, shown at a glance with colour-coded labels.
- Isolated Devices — the count of any devices currently in isolation mode.
- Audio Interventions (24 Hours) — the number of audio intervention actions taken in the past 24 hours.
Use the bottom navigation bar to switch between Home and Site views at any time.
Key Capabilities
Sites
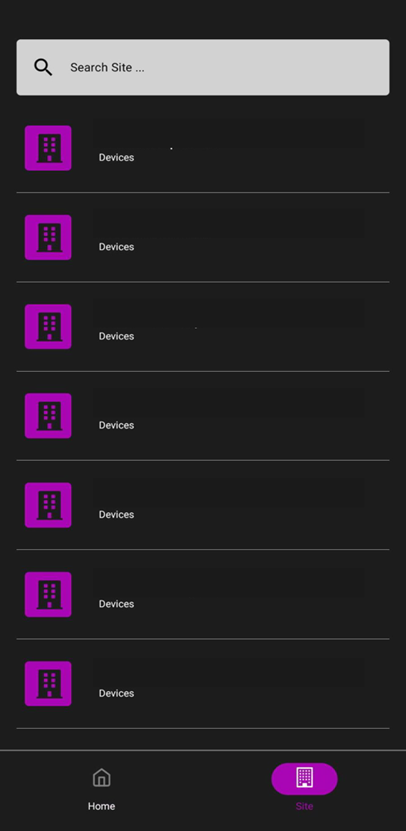
Browsing Your Sites: Tap Site in the bottom navigation bar to see a full list of all sites you have access to. Each site is displayed with its name. Use the Search Site field at the top to filter by name if you manage a large number of locations.
Site Overview: Tapping a site opens its overview screen, giving you a summary of everything configured at that location.
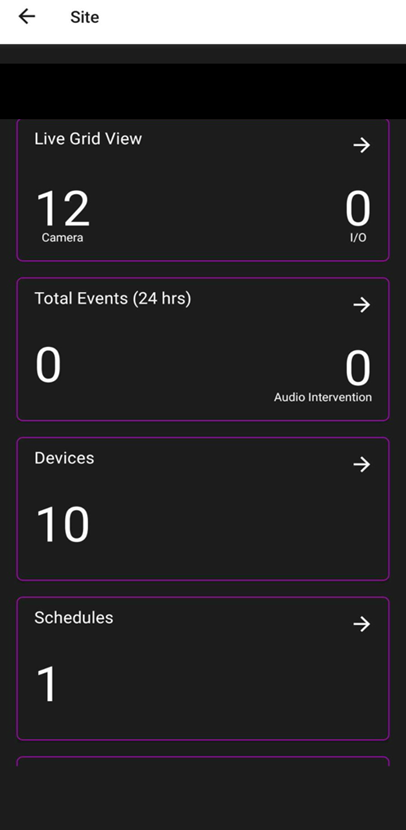
From the site overview you can access:
- Live Grid View — tap to open the live camera feed for all cameras at this site.
- Total Events (24 hrs) — shows how many alarm events have occurred in the last 24 hours, plus a count of audio interventions.
- Devices — the number of devices configured at this site.
- Schedules — the number of active arm/disarm schedules set for this site.
Live Camera View
Live Grid View: Tapping Live Grid View from the site overview opens the camera selection screen. Four layout options are available
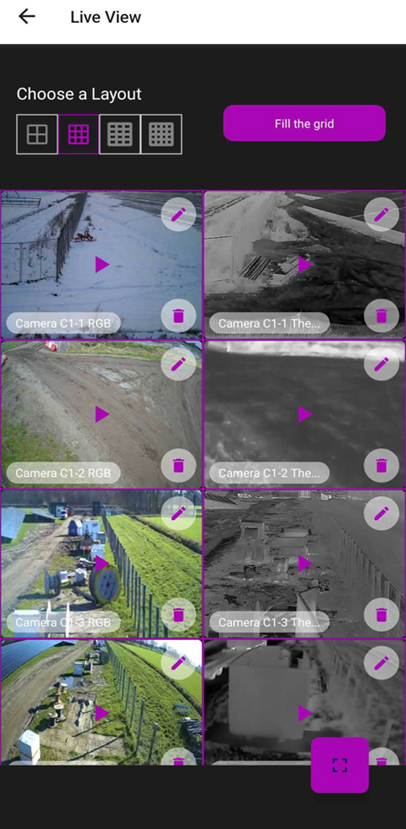
at the top: 2×2, 3×3, and 4×4 grids. Select the layout that works best for the number of cameras you want to monitor. Tap Fill the Grid to automatically populate the selected layout with all available cameras at the site.
Each camera tile shows a still preview image and the camera name. Tap the play button on any tile to begin streaming that camera. You can also tap the edit icon on a tile to adjust settings, or the delete icon to remove it from the current layout.
Viewing a Single Camera Live: Tapping the play button on a camera tile opens the View Live screen, which streams that camera feed in real time. The fullscreen button (purple icon, bottom right) expands the view to fill the entire screen for a clearer picture.

If the stream takes a moment to load, wait a few seconds. Stream availability depends on your device's network connection and the camera's online status.
Devices
Device Details: Within a site, tapping on any device from the Devices list opens the Device Details screen. This screen shows the device name, its active sensors, and the current arm state.
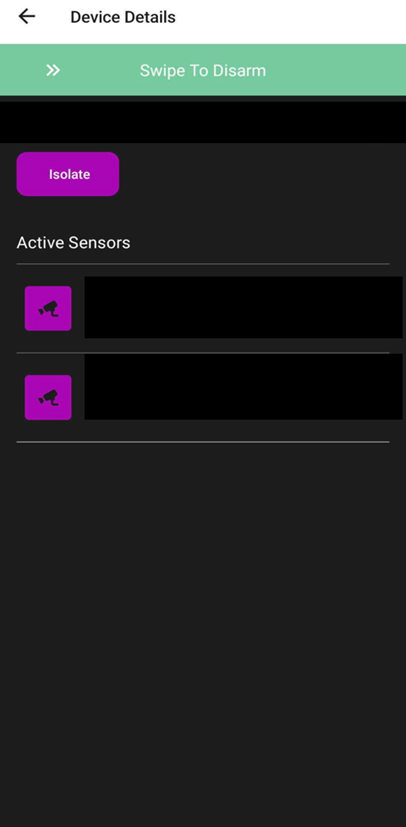
Each sensor is listed with its name and type. A green Active badge confirms the sensor is online and functioning. Two actions are available directly from this screen:
- Swipe to Disarm — when a site is armed, a green banner appears at the top of the screen. Swipe it to disarm the device. This is the quickest way to respond to an accidental trigger.
- Isolate — tap the Isolate button to temporarily suppress alarm signals from this device.
Isolation
Isolation temporarily pauses alarm transmission from a device or an entire site for a set period of time. This is useful during maintenance, testing, or when planned activity at a site would otherwise generate false alarms. Disarm stops alarms from being received by the device.
To isolate a device:
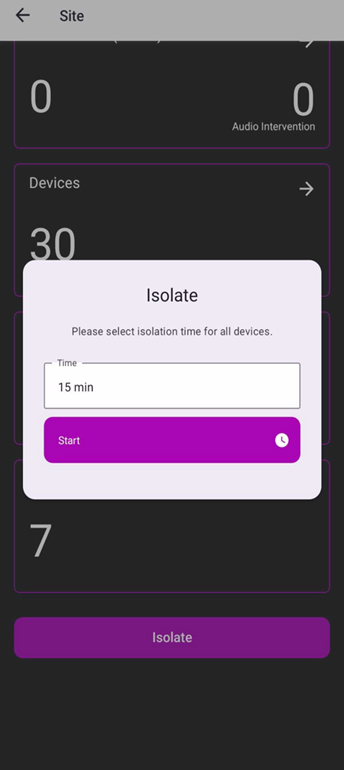
- From the Device Details screen, tap the purple Isolate button.
- The Isolate dialog appears. Enter the duration in the Time field (for example, 15 min).
- Tap Start. The device will be isolated for the specified time and will not send alarm signals during that period.
To isolate an entire site at once, scroll to the bottom of the Site overview screen and tap the Isolate button there. The same time-selection dialog appears and applies to all devices at the site simultaneously.
Isolated devices are counted on the home dashboard under Isolated Devices, so your monitoring team always has visibility of which devices are currently suppressed.
Real-World Use Cases
- A manager leaves the office and receives an alert — they open the mobile app, view the live feed from the affected camera, and swipe to disarm directly from their phone.
- A technician arrives at a site for maintenance — they isolate all devices at the site for 30 minutes directly from the Site overview to prevent false alarms during the work.
- A supervisor checks the Home dashboard first thing in the morning — they see armed/disarmed counts across all sites and spot two isolated devices that need attention.
Best Practices
- Always verify your sub-domain before logging in — entering the wrong sub-domain will redirect you to the wrong organization's environment.
- Use Fill the Grid in Live Grid View to instantly load all cameras at a site without selecting them individually.
- Use site-level Isolation for maintenance windows instead of isolating devices one by one.
- Check the Isolated Devices count on the Home dashboard at the start of every shift — isolated devices are not sending alarms.
Additional Details
Quick Reference
| Screen | What You Can Do |
|---|---|
| Home | Monitoring overview — armed/disarmed counts, isolated devices, audio interventions. |
| Sites | Browse all sites; search by name; open site detail. |
| Site Detail | Access Live Grid View, event totals, device count, schedules, and site-level Isolate. |
| Device | Primary hardware hub connecting and managing security data at a specific location. |
| Device List | Browse all devices at a site; view device name and status; tap any device to open its details. |
| Sensor | Individual monitoring component (camera, motion detector) that captures data to trigger alerts. |
| Sensor Details | View individual sensor name, type, and active status; identify camera type (RGB, Thermal). |
| Live Grid View | Select layout; browse camera thumbnails; start live stream. |
| View Live | Watch a single camera stream in real time; expand to Fullscreen. |
| Device Details | View active sensors; Swipe to Disarm; isolate the device. |
| Isolation | Suppress alarm signals for a set time — per device or for the whole site. |