Admin Training
What Admin Training Covers
Admin Training walks new administrators through everything needed to deploy, configure, and maintain GCXONE — from first login to daily operational routines. This guide covers network requirements, system architecture setup, pre-launch tasks, and ongoing monitoring cadences.
Why It Matters
A misconfigured deployment — missing roles, unmapped sites, or unchecked camera health — creates operational failures that are hard to trace after the fact. Following the structured training path ensures every admin starts from a solid, validated foundation.
How It Works
Pre-Deployment: Browser & Network Requirements
Browser Requirements:
| Browser | Support Level |
|---|---|
| Google Chrome v90+ | Optimal (recommended) |
| Mozilla Firefox v88+ | Supported |
| Microsoft Edge v90+ (Chromium) | Supported |
| Apple Safari v14+ | Limited |
| Internet Explorer (any version) | Blocked. Not supported |
Firewall & Port Requirements:
| Port | Direction | Purpose |
|---|---|---|
| 443 (HTTPS) | Client → Cloud | Core UI, API tunneling, Sanity CDN |
| 554 (RTSP) / 443 | Bidirectional | RTSP streams or WebRTC negotiation |
| 8000 / 80 | Device → Cloud | Hikvision/ISAPI HTTP event nodes |
| DC09 Protocol | GCXONE → CMS | External alarm receiver forwarding |
ℹ️ INFO — IP Whitelisting: For secured corporate networks, GCXONE provides CIDR block ranges. These ranges are critical for edge-bridge hardware and must be whitelisted before go-live.
Super Admin Onboarding Path
- Receive Invitation Email — NXGEN dispatch sends a welcome invitation to the Super Admin's business email from
no-reply@nxgen.cloud. - Confirm Email Address — Click Confirm Email to validate the domain. This mitigates routing errors and locks the user schema against spoofing.
- Set Cryptographic Password — Click the Password Configuration token. This payload expires precisely 24 hours post-issuance.
- Authenticate — Return to your tenant URL. Log in with established credentials. Multi-tenant operators will see an organization selector.
Establishing System Architecture
- Define Service Provider Info — Set root organization branding, regional locale, operational timezones, and SOC contact variables. Navigation: Settings → Service Provider
- Create Customer Entities — Map your clients or internal divisions. For 100+ entities, use the BulkImport CSV framework. Navigation: Configuration → Customers
- Deploy Sites — Define unique geographical constraints and link each site to its correct customer. Navigation: Configuration → Sites
- Register Devices — Add bridges, NVRs, or cloud-direct nodes with correct endpoint definitions and credentials. Navigation: Configuration → Devices
Four Critical Pre-Launch Tasks
️ WARNING — Configure Roles Before Inviting Users: A user invited without a role assigned lands on a blocked screen the moment they log in and stays blocked until an admin manually assigns them a role. Design your role structure, create the roles, then invite users.
- Configure Roles Before Inviting Users — Create your complete role structure before sending any user invitations.
- Super Admin — full access, internal only.
- Operator — alarm queue, video viewer, map.
- Installer — device configuration, limited to assigned sites.
- End User / Customer Viewer — dashboard and live view only.
- Set Up the Alarm Management System — Configure your CMS integration before any site goes monitoring-active. Alarms generated by unmapped sites have no destination and are silently discarded. Minimum: DC-09 connection verified (green), every active site mapped to a CMS Account ID, and at least one test alarm confirmed received at CMS.
- Enable HealthCheck on All Sites — HealthCheck must be subscribed before cameras go live — it cannot retroactively capture events. Recommended: Subscribe at Customer level with Include Children enabled. Navigation: Configuration → [Customer] → Analytics Tab → Camera Health Check
- Create at Least One Scheduled Report — Monthly HealthCheck SLA reports serve as verifiable uptime evidence for customers. Set up the schedule before go-live so the first cycle captures baseline data. Navigation: Settings → Reports → + Create New Schedule
Key Capabilities
Deployment Validation Checklist
| Item | Area |
|---|---|
| Firewalls, routing, and NAT rules verified | Comms/Security |
| Super Admin login operational | Access Control |
| Minimum Customer/Site topology mapped | Topology |
| First hardware node connected and streaming | Ingestion |
| Test alarm received at Talos/DC09 | Delivery |
| HealthCheck engine active on node 1 | Diagnostic |
Event-Driven Workflows
New Site Goes Live:
- Create the Site entity under the correct Customer.
- Register Devices and confirm they show Online.
- Map the site in AMS (set DC09 Account ID or Talos sync).
- Enable HealthCheck at site or device level.
- Send a test alarm and confirm receipt at CMS.
- Assign any site-specific user access via role entity selection.
Camera Goes Offline:
- Check HealthCheck board for the diagnostic code.
- If Network Timeout: verify physical connection and firewall rules.
- If Sabotage Detected: dispatch field technician.
- If Image Quality — Illumination: check IR/lighting at site.
- Log the incident in your ticket system with HealthCheck screenshot as evidence.
Alarm Not Reaching CMS:
- Open Marketplace → Alarm Management System.
- Confirm the AMS card shows green status.
- Open the AMS mapping table — look for red rows (unmapped sites).
- For red rows: click Edit, verify DC09 Account ID matches CMS exactly (case-sensitive).
- Run a test alarm from the affected site.
- If still failing: check firewall rules for DC09 Receiver IP and Port.
User Reports Access Issue:
- Navigate to Settings → Users → [User].
- Check their assigned role.
- Verify role has the required module enabled (e.g. Video Viewer).
- Check entity access — confirm the relevant Customer/Site is included.
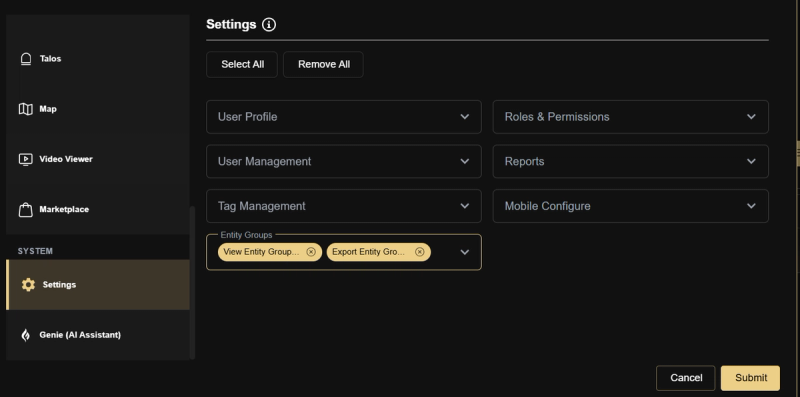
- Use Edit Entity Access on the user record for per-user adjustments without changing the shared role.
Real-World Use Cases
- A new admin completes full onboarding — Super Admin login, system architecture, and first test alarm — in a single day using this training path.
- An admin completes the Deployment Validation Checklist and catches a missing HealthCheck subscription before the site goes live.
- An admin follows the Camera Goes Offline workflow and identifies a Sabotage Detected code — dispatches a technician before the morning shift.
- A new operator logs in and sees a blocked screen — the admin traces it immediately to a missing role assignment and resolves it in minutes.
Best Practices
- Always configure roles before inviting any users — a user with no role is immediately blocked on login.
- Complete the Deployment Validation Checklist before any site goes monitoring-active.
- Enable HealthCheck at the Customer level with Include Children — this future-proofs new site onboarding automatically.
- Run a test alarm after every new site goes live — never assume delivery is working.
- Follow the Daily and Weekly cadences consistently — most operational failures are caught during routine checks, not incident response.
Additional Details
Daily Monitoring Cadence
- Dashboard KPIs — Unusual spike in Total Alarms; elevated Unhealthy Cameras count.
- Real vs. False Alarm ratio — Sharp drop in real alarm % may indicate AI over-blocking.
- HealthCheck board — Any new Critical Offline or Sabotage-Detected cameras.
- AMS connection status — Green = forwarding; red = alarms not reaching CMS.
- Stale alarm queue — Unacknowledged alarms older than shift window need follow-up.
Weekly Operational Cadence
- Review offline camera list — Escalate cameras offline > 48h to site contact.
- Audit new user invitations — Confirm all pending invitations have been accepted.
- Check report delivery logs — Failed deliveries indicate email routing issues.
- Review Audit Log for anomalies — Look for unexpected role changes or mass configuration edits.
- Validate DC-09 site mappings — Any red rows in AMS mapping = unrouted alarms.