NX Witness
Introduction
This guide describes the steps required to configure NX Witness for integration with GCXONE.
NX Witness Configuration
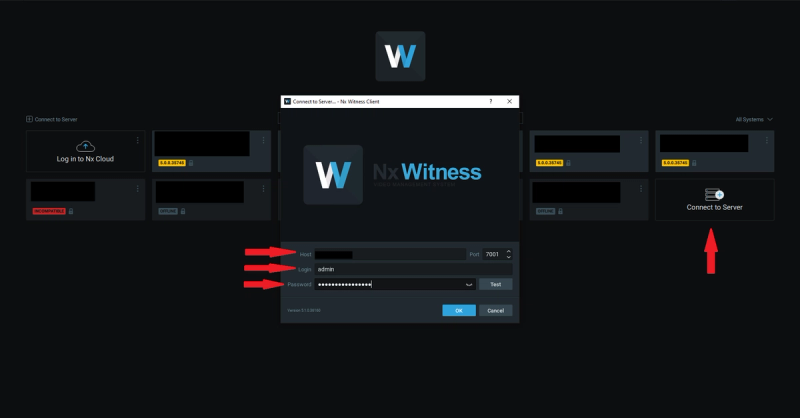
Step 1: Open NX Witness client and click on connect to server. Enter the admin/owner credentials like IP address (HOST) of the device, username (Login) and the Password into the popup window. Click "OK" button to continue.
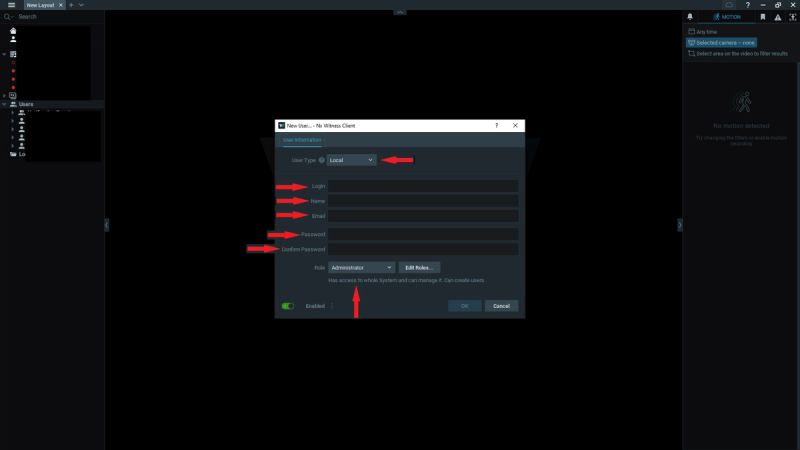
Step 2: After login, right-click on Users and select New User...

**Step 3: **Create new user by filling up the below mentioned screen. User Type must be "Local" and Roles "Administrator".
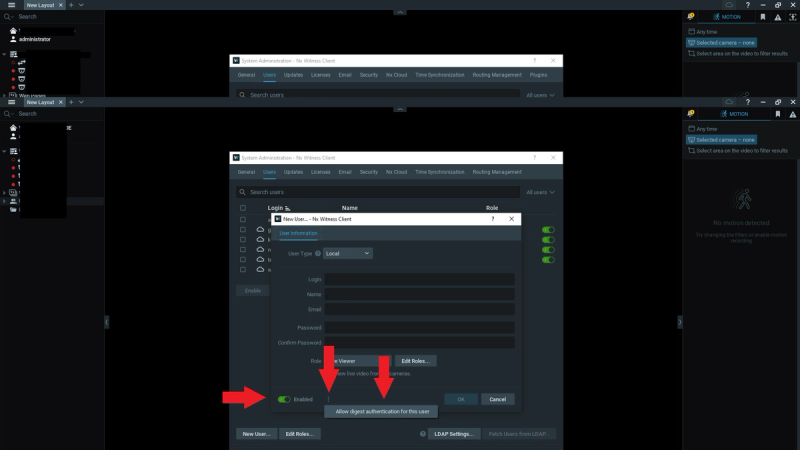
Step 4: Make sure the Enable toggle is on. Click the three dots (⋯) highlighted on screen — this displays the option Allow digest authentication for this user. Make sure this option is selected.
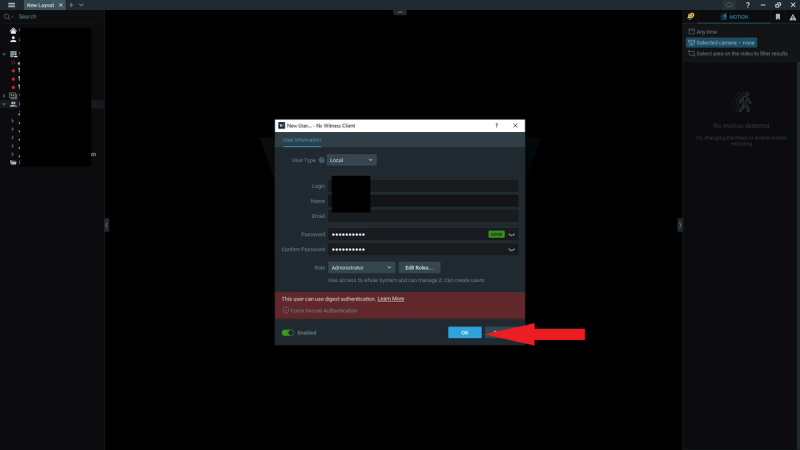
Step 5: You will be able to see the screen as show below post entering all the information. Click OK.
Step 6: Configure the I/O module. Right-click the I/O device and select I/O Module Issues.
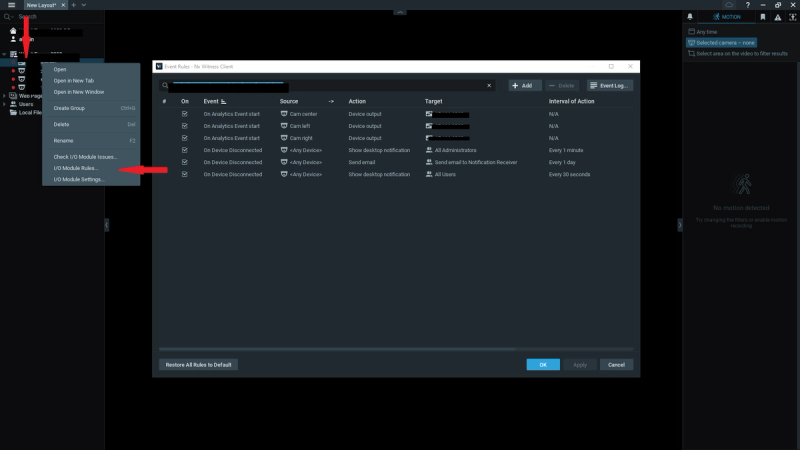
Step 7: Click Add and create the necessary rules as required.
Step 8: To configure cameras/sensors, right-click each one individually and click Add.
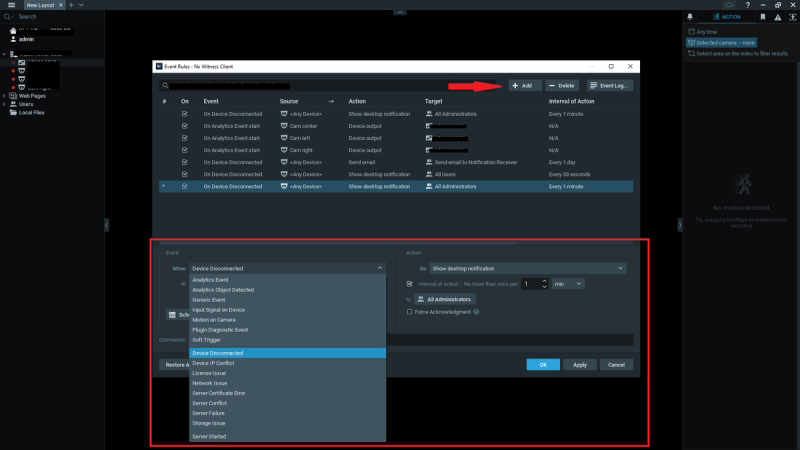
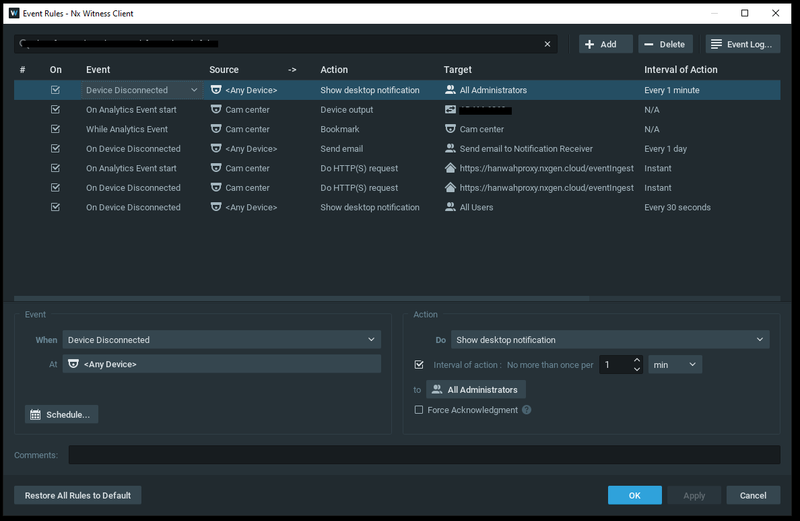
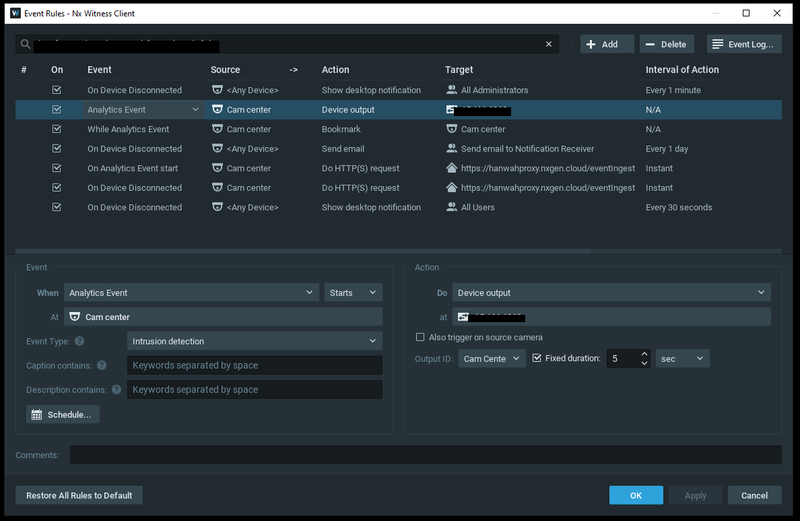
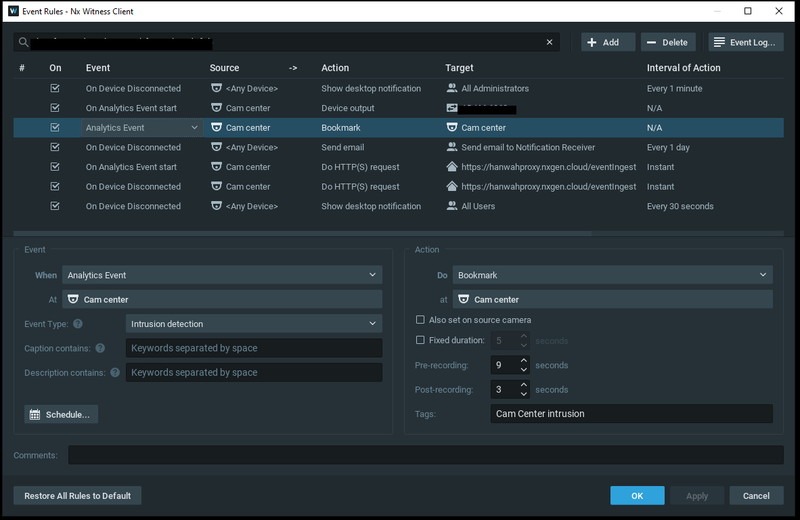
Step 9: Create all the rules as mentioned below:
-
Device Disconnected
-
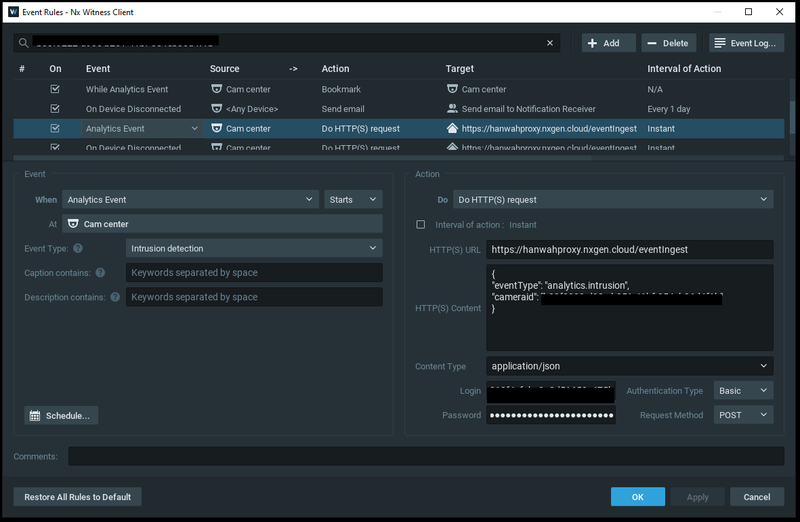
On Analytics Event start
-
While Analytics Event
-
On Event Disconnected
-
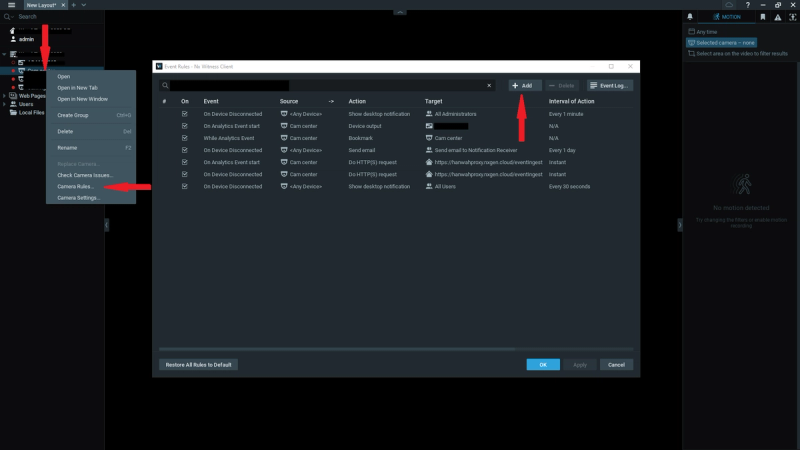
On Analytics Event start — Under the Action tab, configure:
-
Select: Do HTTP(S) request
-
HTTP(S) URL: https://hanwahproxy.nxgen.cloud/eventIngest
-
HTTP(S) Content: {"eventType": "analytics.intrusion", "cameraid": "[ENTER THE NX WITNESS CAMERA ID]"}
-
Content Type: application/json
-
Login: [ENTER THE GCXONE DEVICE ID]
-
Password: [ENTER THE GCXONE DEVICE ID]
-
Authentication Type: Basic
-
Request Method: POST
-
Click Apply and OK.
-
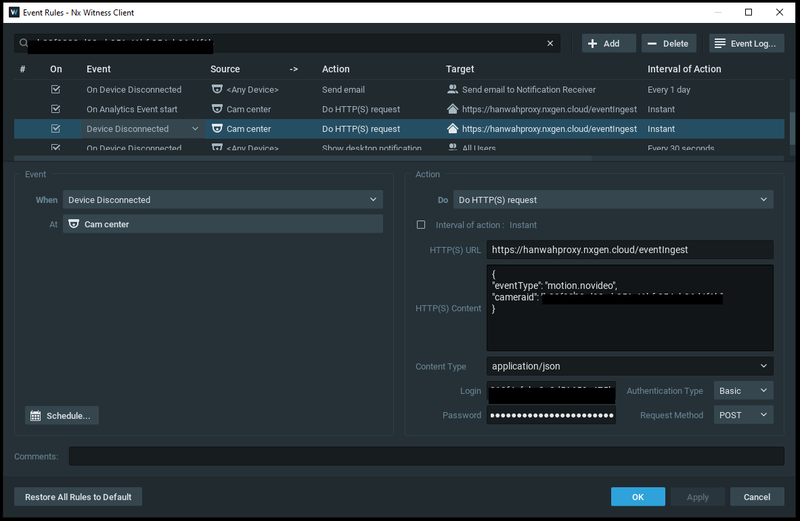
- On Device Disconnect — Under the Action tab, configure:
-
Select: Do HTTP(S) request
-
HTTP(S) URL: https://hanwahproxy.nxgen.cloud/eventIngest
** sensor id: 882e8f525a50444c98619e7xxxxxxxx
** device id: de78ee2cba8a4e2c91ce887cxxxxxx

-
HTTP(S) Content: {"eventType": "motion.novideo", "cameraid": "[ENTER THE UNIQUE CAMERA ID]"}
-
Content Type: application/json
-
Login: [ENTER THE UNIQUE DEVICE ID]
-
Password: [ENTER THE UNIQUE DEVICE ID]
-
Authentication Type: Basic
-
Request Method: POST
-
Click Apply and OK.
-
- On Device Disconnected
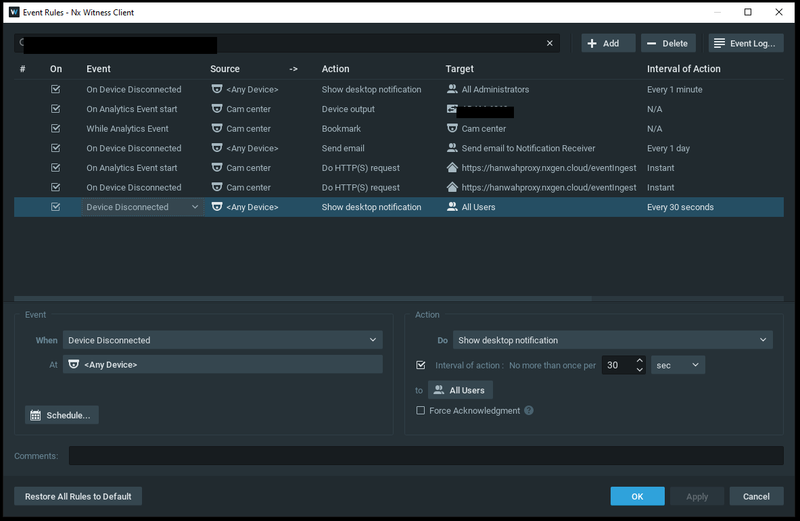
- On Device Disconnected
NX Witness Config Guide with GCXONE
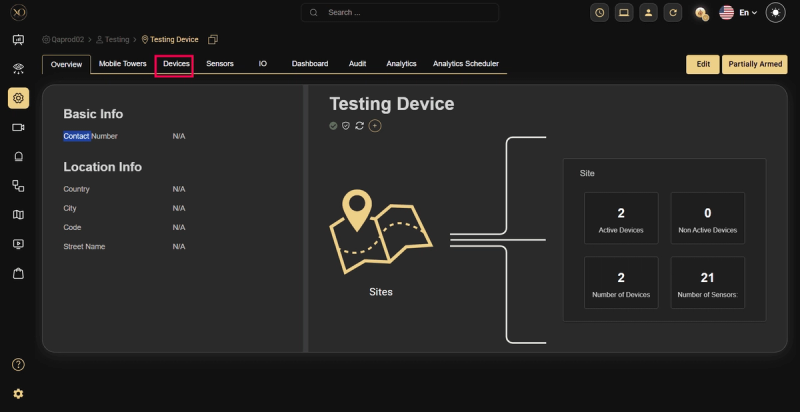
Step 1: Navigate to the Devices tab.
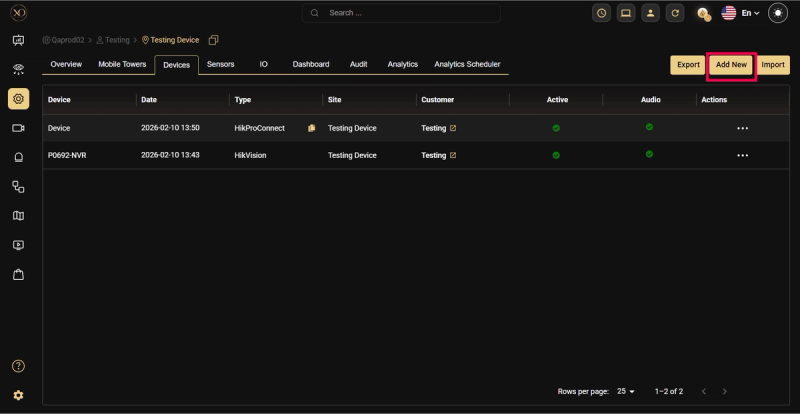
Step 2: Click the Add button.
Step 3: The Add Device dialog will be displayed.
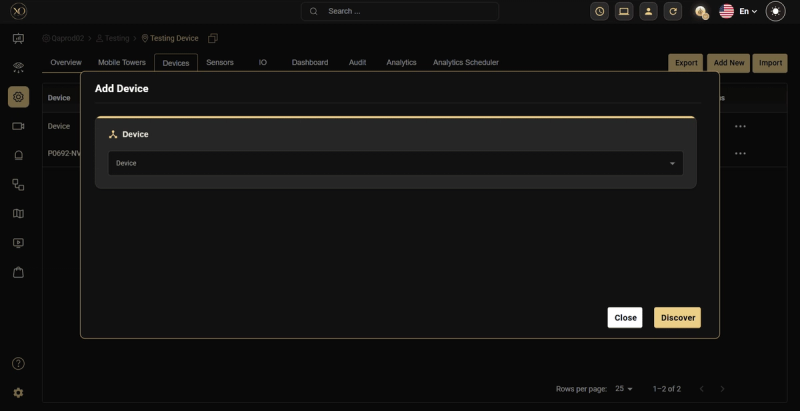
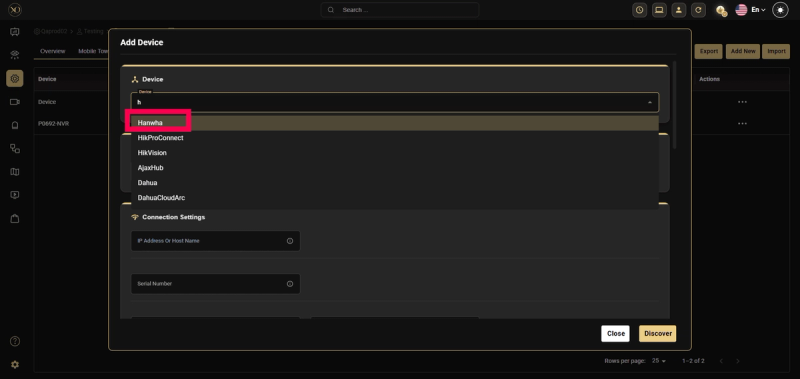
Step 4: In the dialog, open the Device dropdown and select NX Witness.
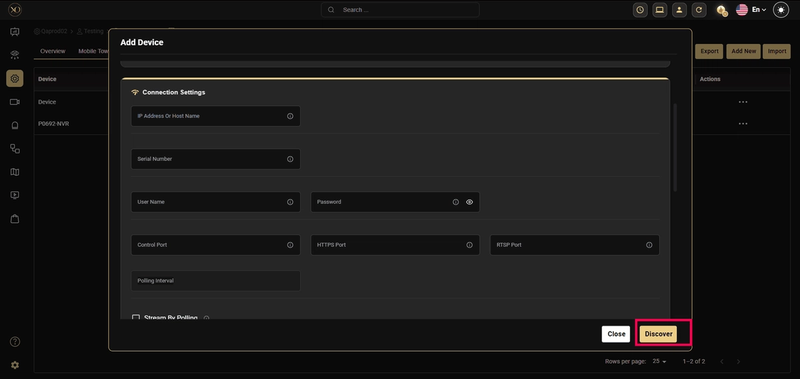
Step 5: Enter all required fields: IP Address or Host, Username, Password, RTSP Port, HTTPS Port.
Note: The HTTPS Port field is mandatory when adding an NX Witness device.
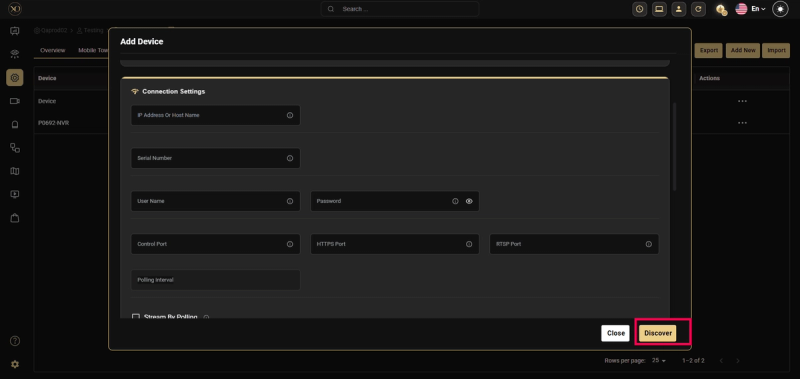
Step 6: Click Discover.
Step 7: Once the device is successfully discovered, click Save.
