Hikvision
Introduction
In order to achieve seamless integration between your Hikvision Portal and GCX-ONE platform, it is essential to configure various network and software settings accurately. This document provides a step-by-step guide to configuring your Hikvision portal, ensuring that it communicates effectively with both internal and external systems. Proper configuration will not only enhance the functionality of your surveillance system but also ensure data security and optimal performance. By following the detailed instructions below, you will set up your system to handle video surveillance tasks efficiently, enabling robust management and monitoring capabilities.
Prerequisites
- The Hikvision device is set up with Continuous Recording
- Whitelist the IP address 35.156.60.98 (Hikvision Receiver)
- Local Mode is installed (For P2P streaming, Audio, Encrypted stream)
Hikvision Configuring
A. System
Time Management:
Step 1: Log in to your Hikvision portal by providing the credentials needed.
Step 2: Navigate to the configuration page, then select System. Proceed to System Settings and choose Time Settings. The below window will appear:
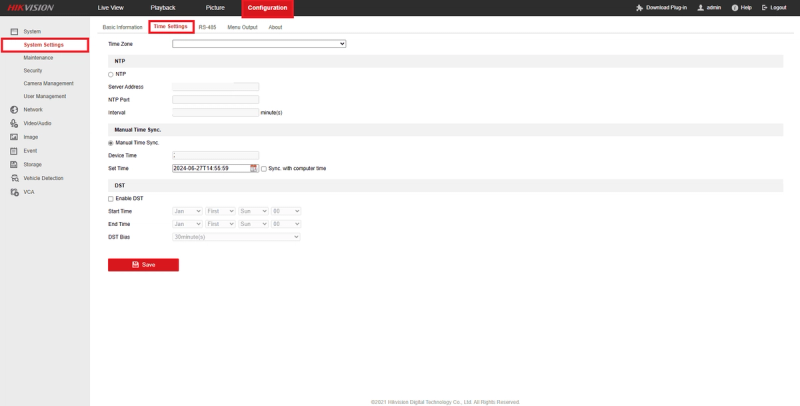
Choose the time zone of your device and make sure to enable the NTP, It is a protocol used to synchronize the clocks of computers and other devices over a network.
If your device supports DST, we recommend enabling it. The primary goal of DST is to make better use of daylight during the longer days of summer.
User Management:
Step 1: Navigate to the configuration page, then select System. Proceed to User management then click on "Add".
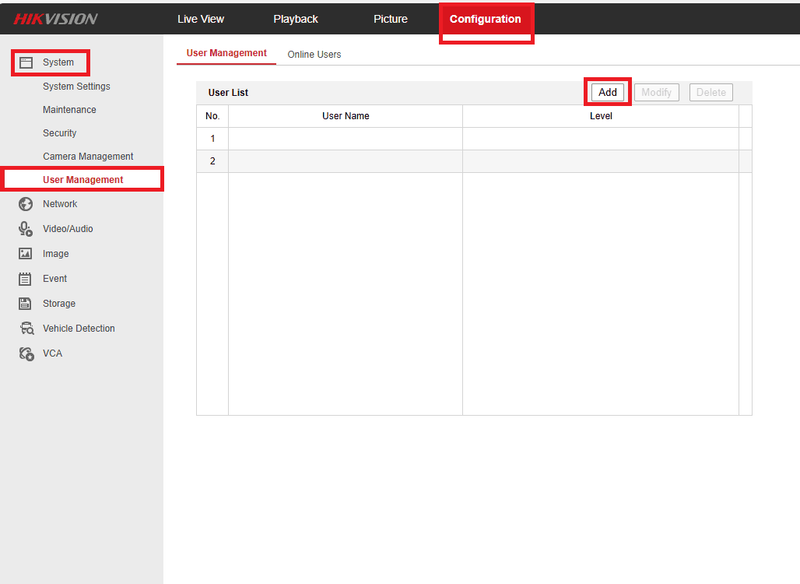
Step 2: A new window will open, allowing you to enter the username and password for NXGEN. We recommend setting the username to "NXG" with the specified permissions.
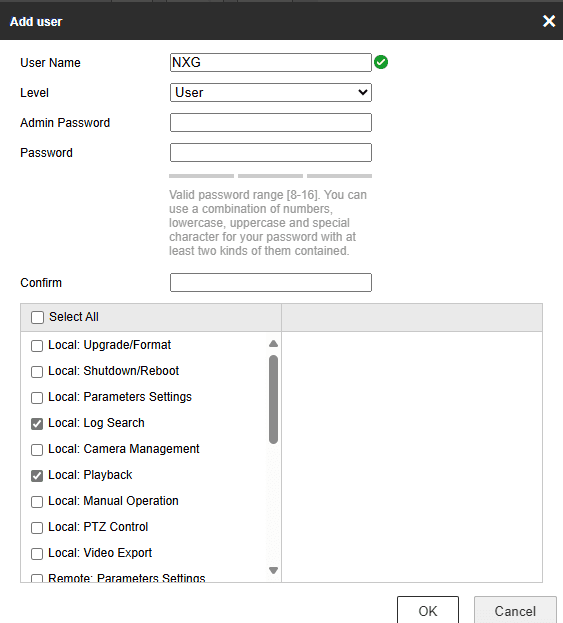
Step 3: Permissions:
Choose the permissions below for the user "NXG" and select the specific cameras you want to apply these permissions to.
- Local: Parameters Settings.
- Local: Log Search.
- Local: Playback.
- Local: Manual Operation.
- Local: PTZ Control.
- Local: Video Export.
- Remote: Parameters Settings.
- Remote: Log Search / Interrogate Working.
- Remote: Two-way Audio.
- Remote: Notify Surveillance Center / Trigger.
- Remote: Video Output Control.
- Remote: Live View.
- Remote: PTZ Control.
- Remote: Playback/Download.
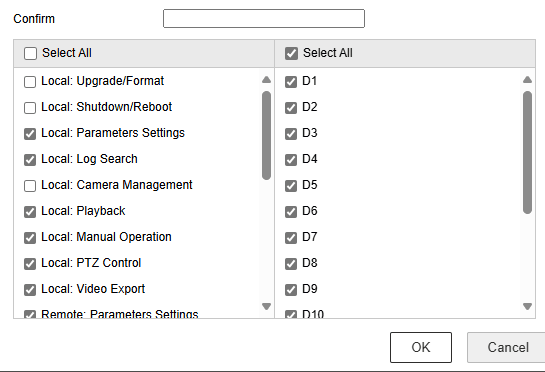
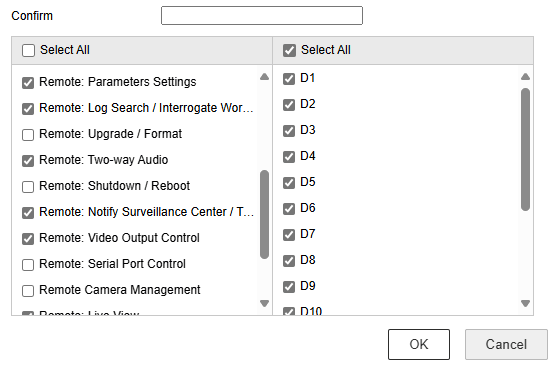

Don't forget to click the OK button to save the changes.
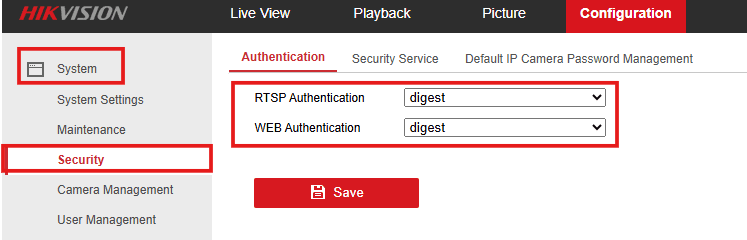
Security:
We highly recommend configuring both RTSP and WEB authentication as Digest. This enhances security by ensuring that your credentials are protected with stronger encryption, reducing the risk of unauthorized access.
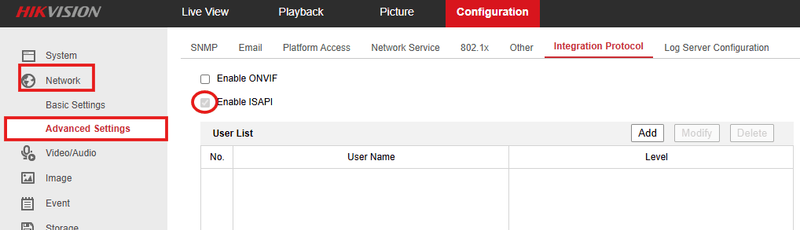
B. Network
Under "Network," go to "Advanced Settings," and then select "Integration Protocol."
Enable the ISAPI by simply clicking on the check box.
C. Events
Camera configurations are managed at the individual camera level. There are two types of configurations: basic and smart. This chapter provides a brief explanation of each type.
Basic Events:
These steps apply to all basic events (Motion, Video Tampering, etc.).
Step 1: On the "Configuration" page, under the "Event" application, click on "Basic Event". The window below will appear:
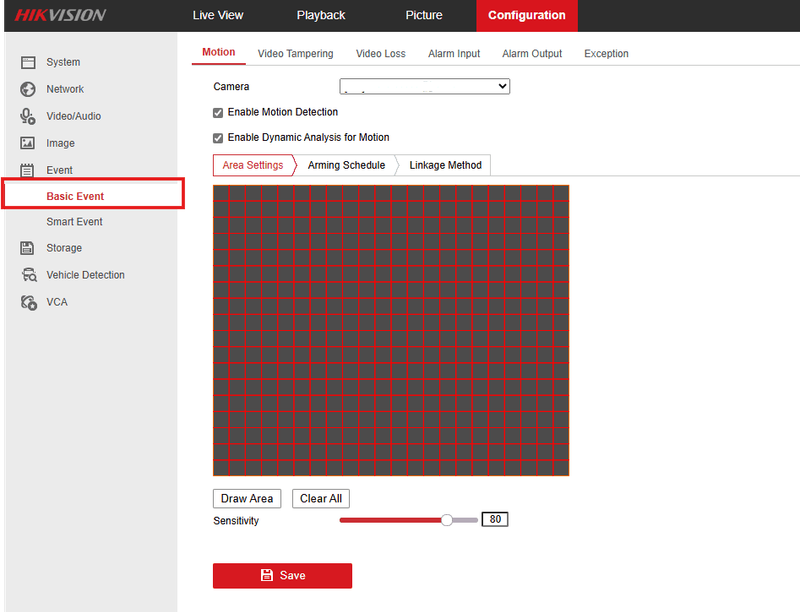
Note: Avoid setting up Motion events; they can trigger too many alarms and cause issues.
Step 2: Choose the camera you want to configure.
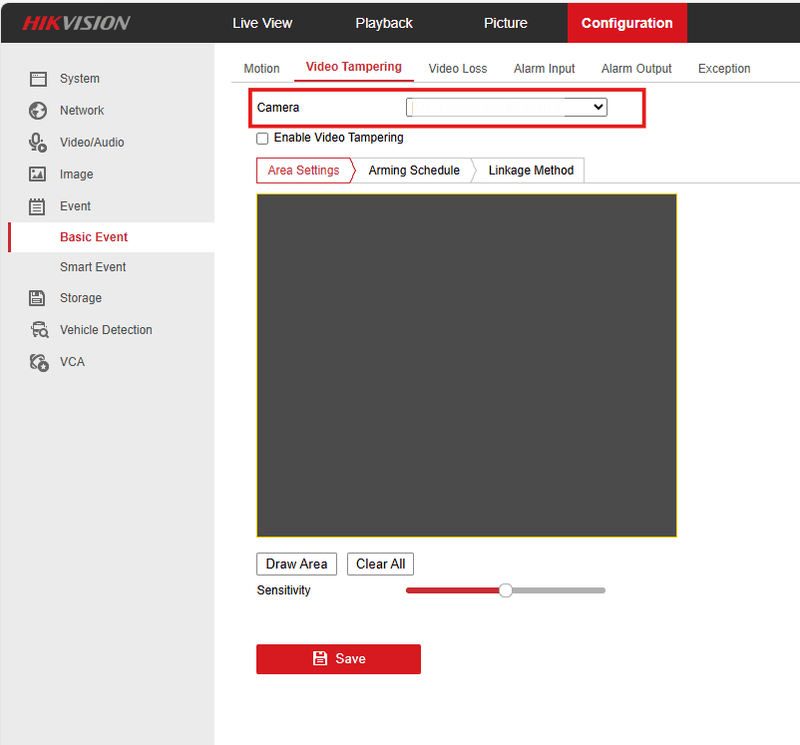
Step 3: Draw your area of interest.

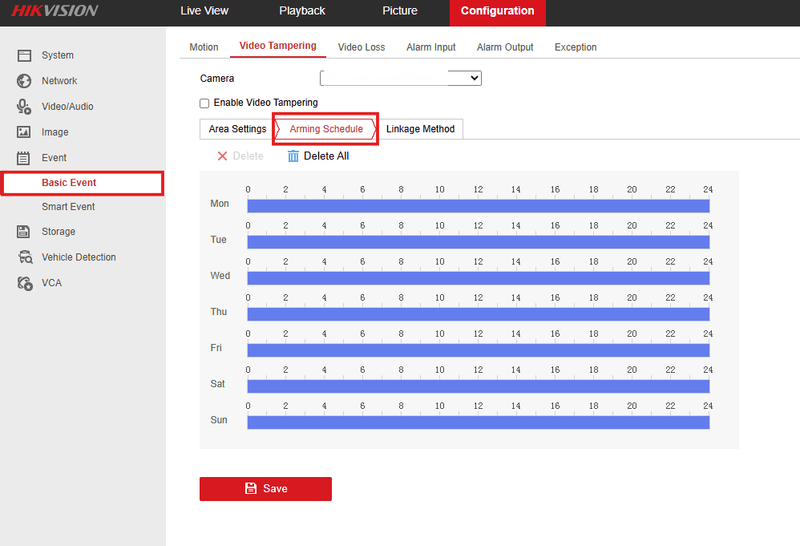
Step 4: Choose the Arming Schedule under the "Arming Schedule" tab.
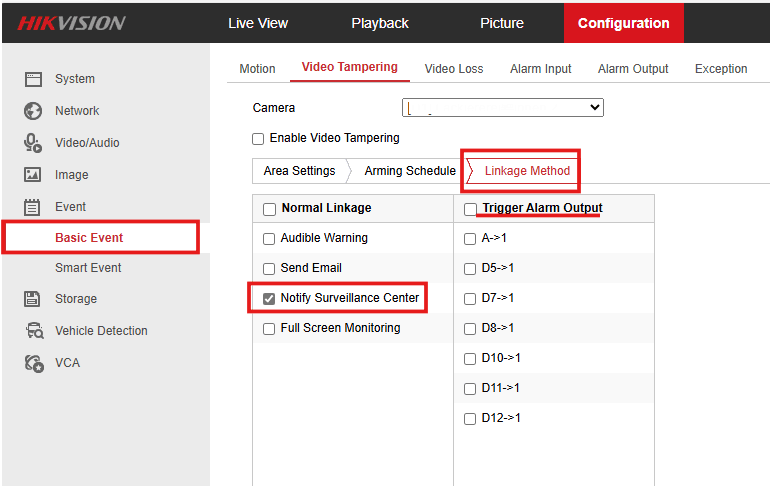
Step 5: In the "Linkage Method" tab, enable the checkbox under the camera and check "Notify Surveillance Center." To trigger alarms from other cameras, use the "Trigger Alarm Output" options in the "Normal Linkage" section.
Smart Events:
Line Crossing Detection: This feature identifies when an object crosses a predefined virtual line, useful for monitoring entry and exit points.
Intrusion Detection: It detects when an object enters or moves within a designated area, ideal for securing restricted zones.
The Steps are applicable for both events:
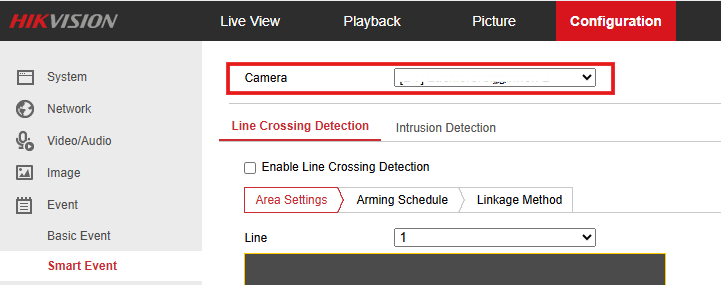
Step 1: On the "Configuration" page, under the "Event" application, click on "Smart Event". The window below will appear:
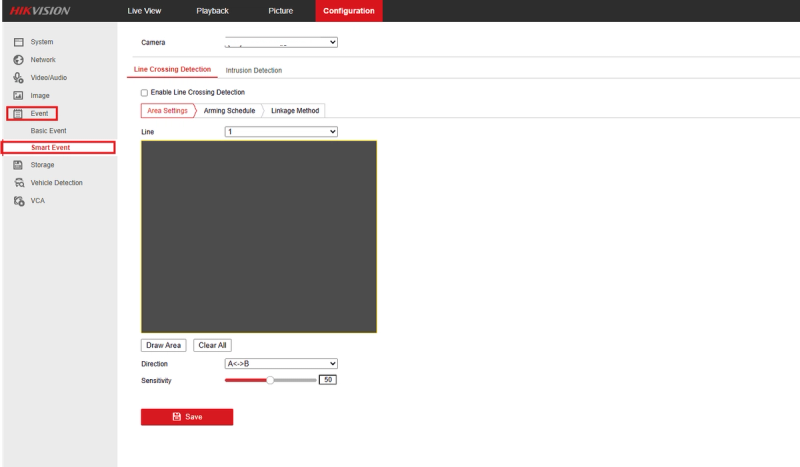
Step 2: Choose the camera you want to configure.
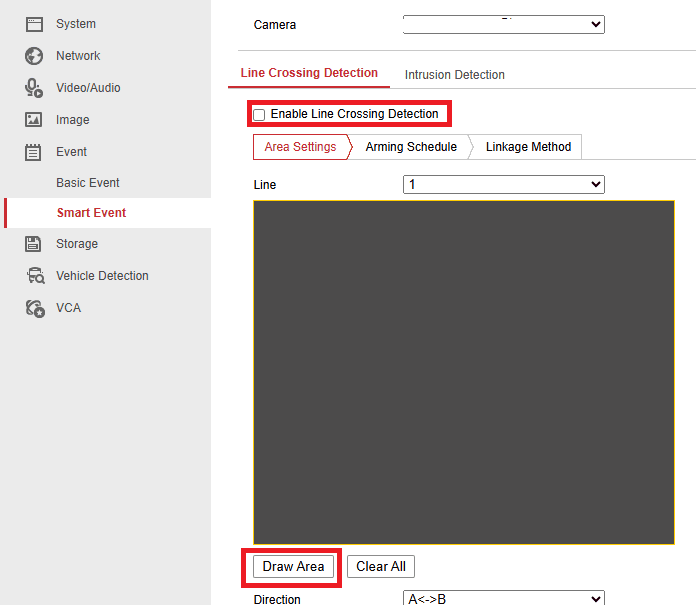
Step 3: Draw lines on the area of interest.
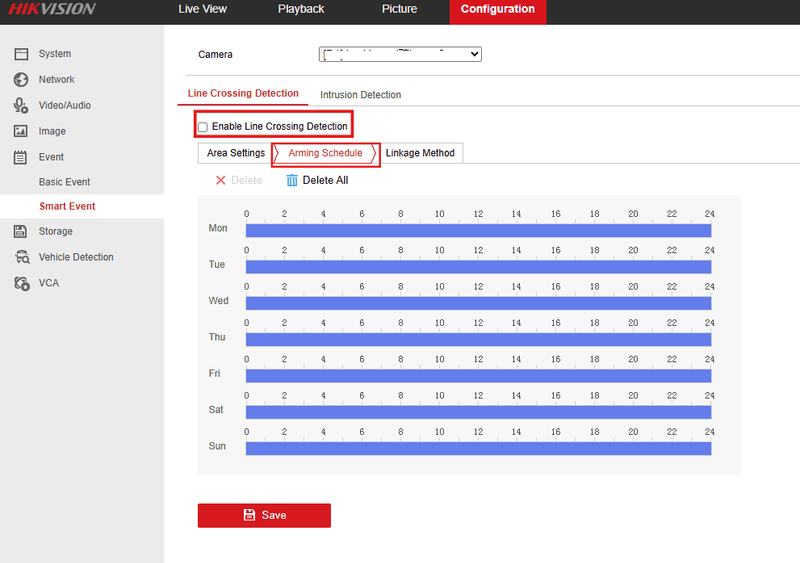
Step 4: Choose the Arming Schedule under the "Arming Schedule" tab.
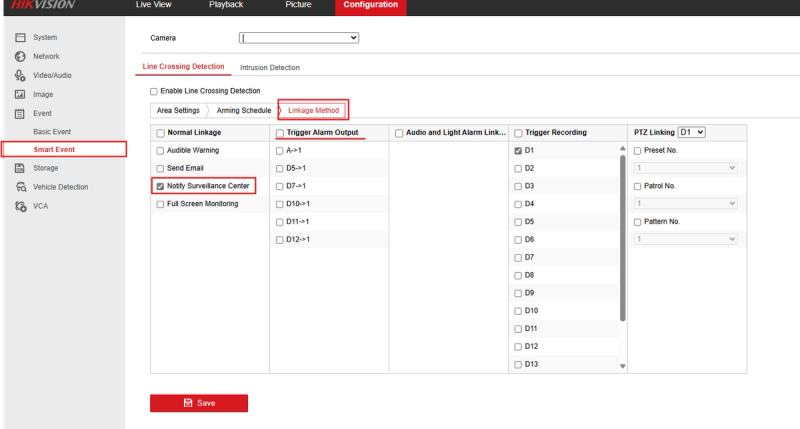
Step 5: In the "Linkage Method" tab, enable the checkbox under the camera and check "Notify Surveillance Center." To trigger alarms from other cameras, use the "Trigger Alarm Output" options in the "Normal Linkage" section.
These steps and explanations will help you configure the appropriate analytics on your Hikvision Device to enhance your security system’s effectiveness and responsiveness.
Hikvision Config Guide with GCX-ONE
Step 1: Navigate to the Devices tab.
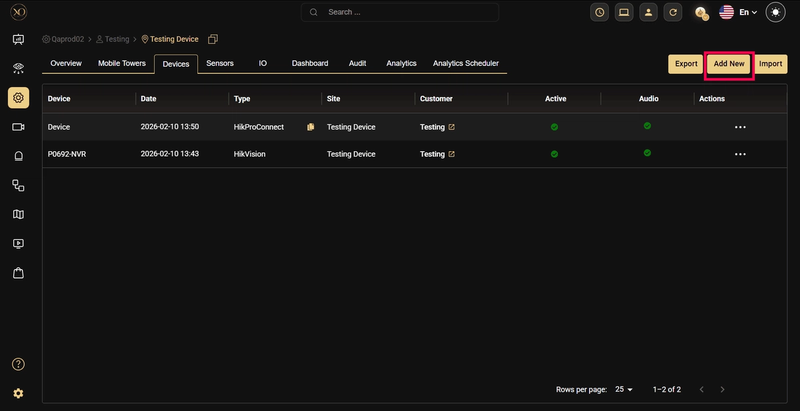
Step 2: Click the Add button.
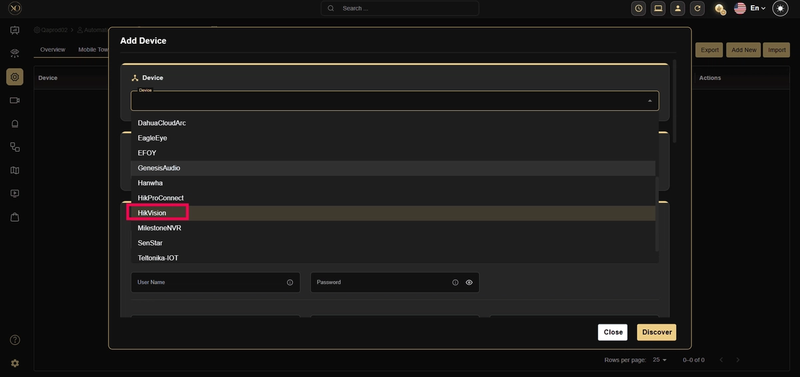
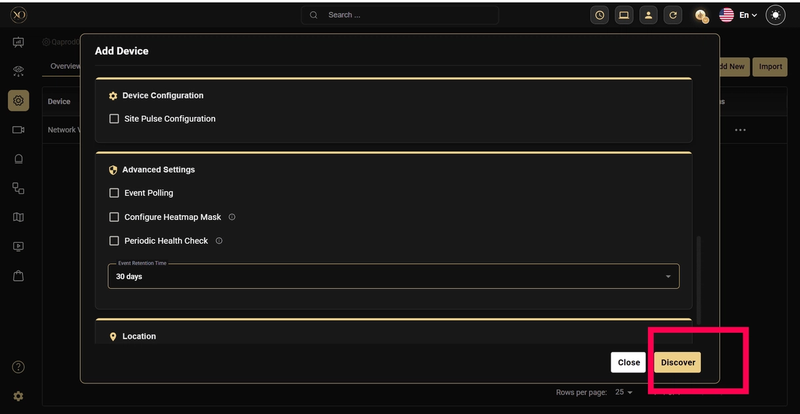
Step 3: The Add Device dialog will be displayed.

Step 4: In the dialog, open the Device dropdown and select Hikvision.
Step 5: Enter all required fields: Name, IP Address or Host, Username, Password, Server Port, HTTPS Port, RTSP Port, Encryption Key
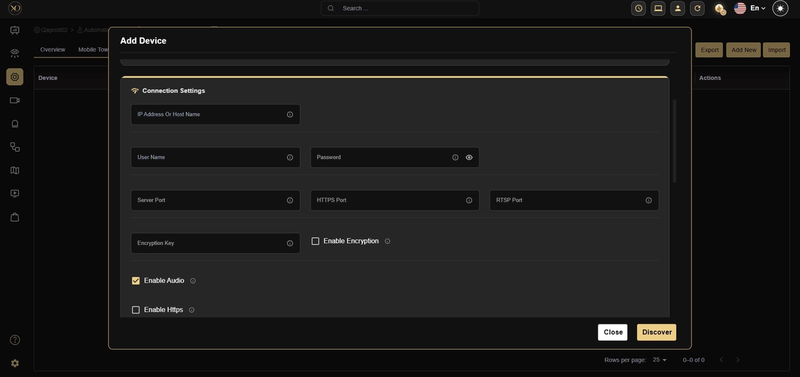
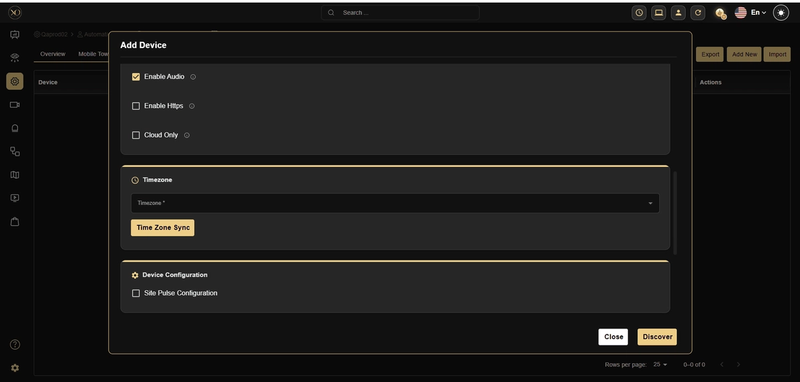
Step 6: Click Discover.
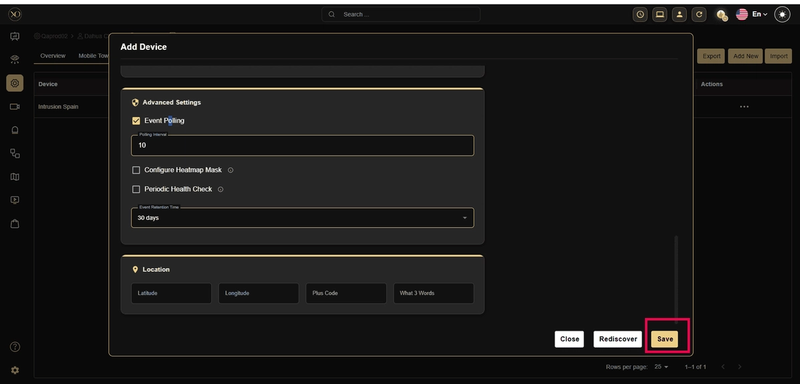
Step 7: Once the device is successfully discovered, click Save.
Additional Details
Live & Playback — Local Mode
- SDK — RTSP is not required as the device communicates directly with the device via SDK
- RTSP — If the RTSP port is entered, streaming will happen only via the configured RTSP port
Cloud Only Toggle
- SDK — Regardless of Local Mode, streaming will work via cloud
Non-Local Mode Users
- RTSP — Streaming will work only based on the RTSP port configured
Alarms
- ISAPI (multipart decoder) — No specific configuration required. Alarm images are transmitted via ISAPI from the device. If the device does not provide images, they will be fetched via playback (only if available)
- Webhook — Only for IP cameras not connected to any NVR. Device-level alarm server configuration is required. If the device does not provide images, they will be fetched via playback (only if available)
- Event Polling — Device time settings must be in sync between GCXONE and the device. If the device does not provide images, they will be fetched via playback (only if available)
Audio
- Local Mode — Localhost URL is required at the device level
- Cloud Only Toggle — streaming03 URL is required at the device level