Maps
What Maps Does
Maps gives you a unified geospatial view of your entire security estate. Operators can visualize customers, sites, devices, cameras, and sensors on a live satellite or road map and interact with them directly without leaving the map screen.
Maps integrates with Alarm Handling through the Multi-Monitor feature, giving operators instant location context the moment an alarm is assigned.
Why It Matters
Managing multiple sites across different locations creates orientation delays during incident response. Switching between screens to find a site slows everything down.
Maps solves this by keeping all location context visible and live. When paired with Alarm Handling, the map follows the alarm automatically, no manual searching, no screen switching.
How It Works
Before a site appears on the map, it must be created and configured with its geographic coordinates. This section walks through the complete setup workflow.
Site Overview Page
Navigate to Configuration→ Sites→ Overview to access a site’s overview page. The Overview tab is the landing page for any site and gives you a summary of its status.
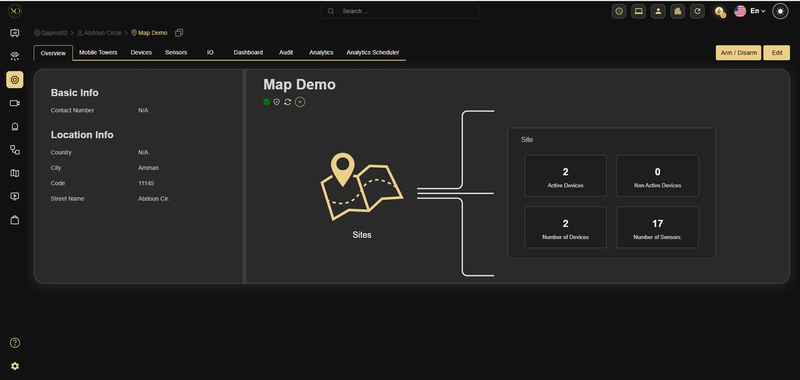
Figure 1- Site Overview Page
The Overview page displays:
- Basic Info: Contact number for the site
- Location Info: Country, city, postal code, and street address
- Site Statistics: Active devices, non-active devices, total devices, and total sensors
A site must have valid latitude and longitude values set before it will appear as a pin on the global Map view.
Editing Site Details
Click the Edit button in the top-right of the Overview page to open the Edit Site dialog. The dialog has two tabs: Edit and Properties.
Contact Information
The Contact Information section within the Edit tab lets you capture the site's email address and phone number.
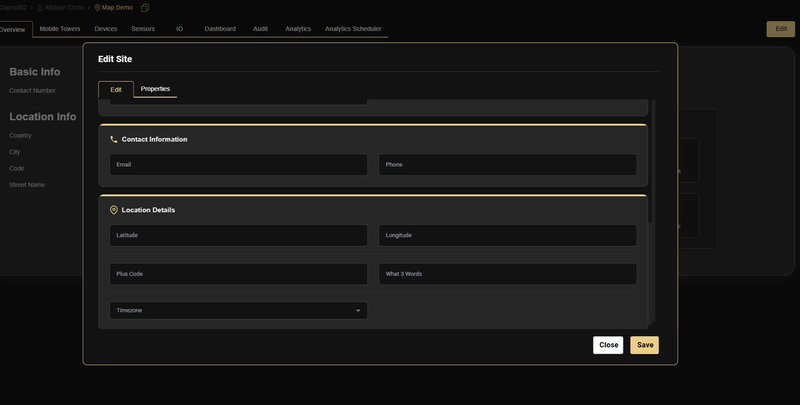
Figure 2 - Edit Site dialog showing the Contact Information and Location Details sections.
Location Details
The Location Details section is where you set the site's physical coordinates. Fill in the following fields:
| Field | Description |
|---|---|
| Latitude | The site's north-south coordinate in decimal degrees (e.g., 31.9489113). |
| Longitude | The site’s east-west coordinate in decimal degrees (e.g., 35.8928442). |
| Plus Code | Optional - Google Plus Code for the site location. |
| What 3 Words | Optional - the What3Words address for the site. |
| Timezone | Select the site's local time zone from the dropdown. Used for scheduling and event timestamps. |
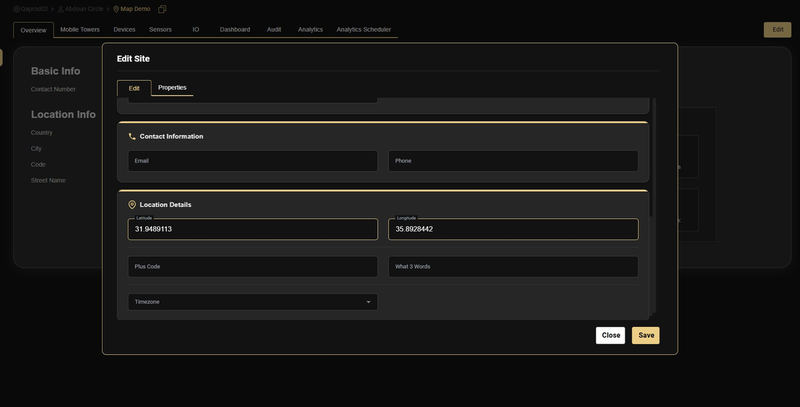
Figure 3 - Location Details filled in with latitude 31.9489113 and longitude 35.8928442.
Coordinates must be entered in decimal degree format. Do not use degrees/minutes/seconds notation. Once saved, the site pin will appear on the Map view at the specified location.
Accessing the Map View
The global Map view is accessible from the left-hand navigation bar. It displays all customers and their sites as pins on a world map.
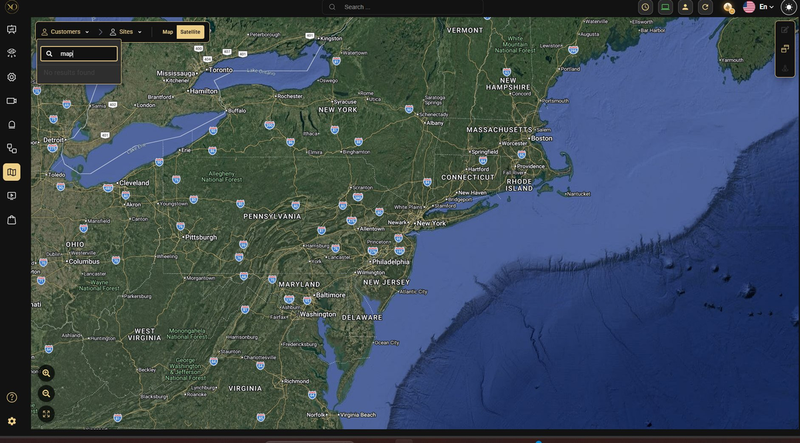
Figure 4 - Map view with the search bar open. Sites without coordinates set will not appear in search results.
Use the search bar at the top-left of the map to locate a specific site by name. As you type, matching site names appear in a dropdown. Selecting a result pans the map to that site.
If a site does not appear in search results, verify that its latitude and longitude have been saved correctly in the Edit Site dialog.
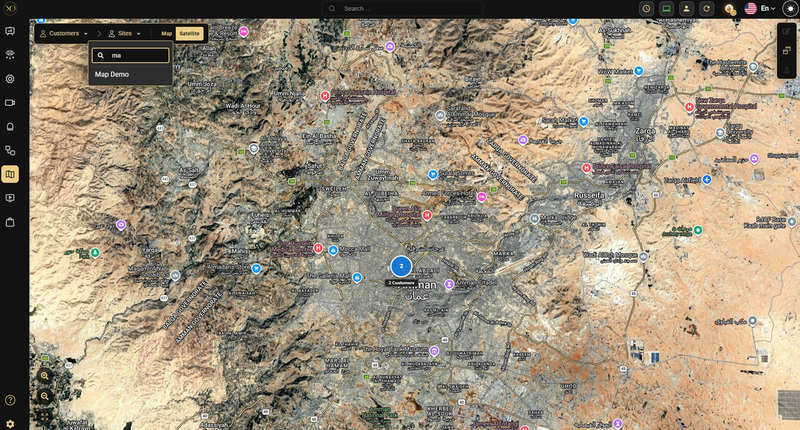
Figure 5 - Map view zoomed to Amman, Jordan, with "Map Demo" appearing as a search suggestion after typing "ma".
The map supports two view modes:
- Map: Standard road map with street names and labels
- Satellite: High-resolution aerial imagery for precise site placement
Map Edit Mode
Edit Mode lets operators and administrators enrich the map with site-specific overlays including cameras, IO sensors, towers, zone boundaries, and text labels. These overlays persist on the map and give control room staff at-a-glance situational awareness.
Entering Edit Mode
Navigate to Map view, locate your site, and click the Edit Mode button in the top-right corner of the map canvas.
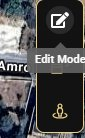
Figure 6 - The Edit Mode toggle button.
Once activated, the toolbar at the bottom of the screen expands to show all available placement tools, and a zone-drawing panel appears on the left.
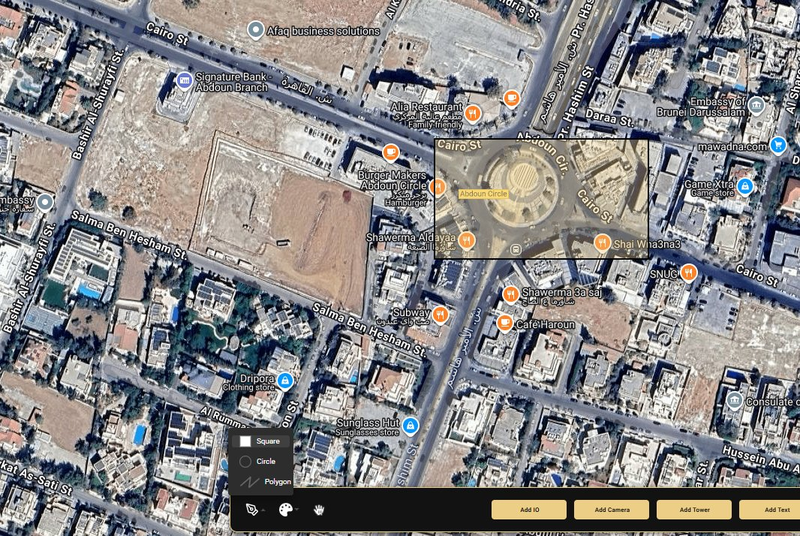
Figure 7 - Map in Edit Mode.
Drawing Zones
Use the zone drawing panel on the left to mark defined areas on the map. Three shapes are available:
- Square: Click and drag to draw a rectangular zone
- Circle: Click and drag to draw a circular zone
- Polygon: Click multiple points to define a custom boundary, then close the shape to complete it
Zones are ideal for highlighting restricted areas, patrol routes, or logical site sections such as "Zone A" or "Perimeter".
Adding a Camera
- The Add Camera button places a camera icon on the map and links it to a physical device and sensor already configured in GCXONE.
- Click Add Camera in the bottom toolbar
- A camera icon appears on the map. Drag it to the correct position
- The Add Camera properties panel opens on the right
- Select the Device from the dropdown list
- Select the associated Sensor
- Drag the orientation handle on the camera icon to set the field of view direction.
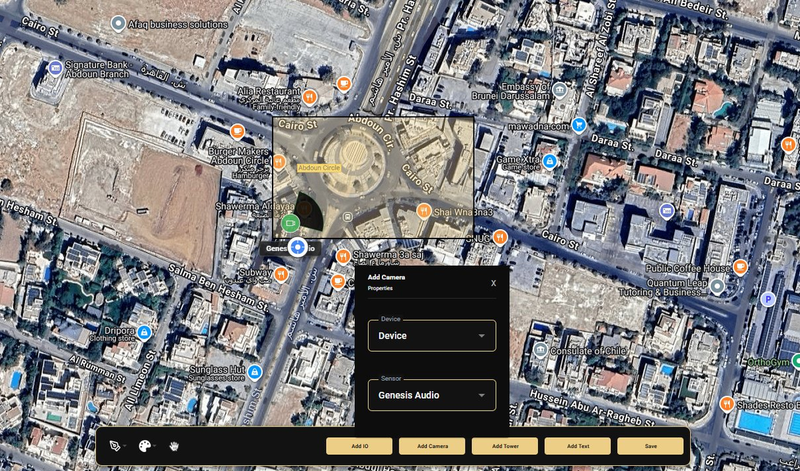
Figure 8 - Add Camera dialog with Device and Sensor dropdowns.
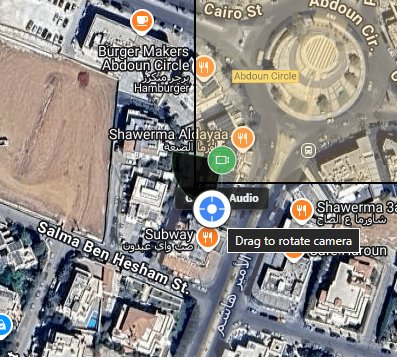
Figure 9 - "Drag to rotate camera" tooltip.
Adding a Text Label
- Text labels let you annotate any area of the map with custom names such as "Zone A", "Server Room", or "Gate 1".
- Click Add Text in the bottom toolbar
- An Add Text properties panel appears
- Type your label in the Text field
- Click Save. The label appears on the map canvas and can be dragged to the desired position.
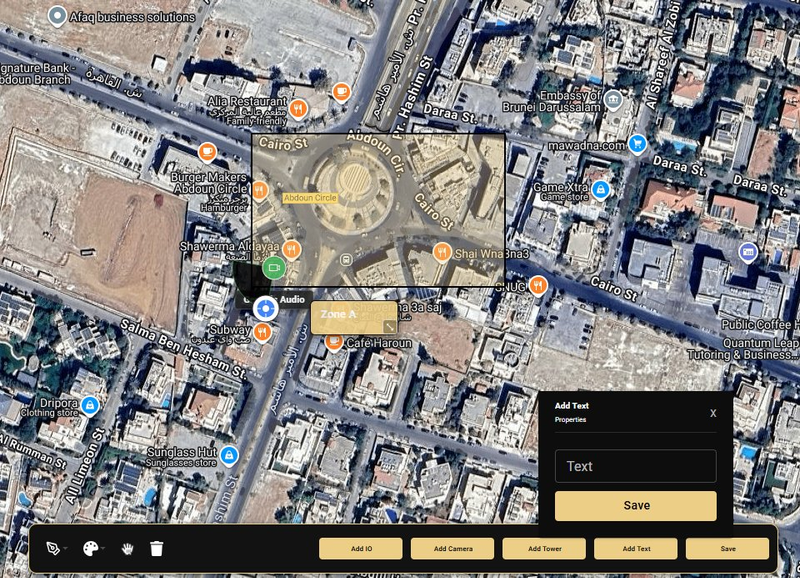
Figure 10 - Add Text dialog.
Saving the Map Layout
Once you have finished placing all elements, click Save in the bottom-right corner of the toolbar. All camera positions, zone boundaries, and text labels are saved to the site and will be visible to all operators viewing that site on the map.
Leaving Edit Mode without clicking Save will discard all unsaved placements. Always click Save before exiting Edit Mode.
Key Capabilities
Once sites are configured and map layouts are saved, Maps becomes a live operational tool. This section describes how it is used during day-to-day monitoring and alarm response.
| Capability | Description |
|---|---|
| Site Configuration | Set geographic coordinates, time zone, and location metadata for each site. |
| Map Visualization | Switch between satellite and road-map views across all customer sites. |
| Site Search | Instantly locate any site using the map search bar. |
| Edit Mode | Place cameras, IO points, towers, and zone labels directly on the map canvas. |
| Camera Placement | Assign a device and sensor to a camera icon and set its field of view by rotating it. |
| Zone / Text Labelling | Draw square, circle, or polygon zones and add freeform text labels to any area. |
| Multi-Monitor Sync | Synchronize Maps with Alarm Handling so alarm events automatically highlight the relevant site location. |
| Axis IO Output Visibility | Axis IO Outputs are visible in the Map alongside cameras and inputs, listed with their associated devices in the same context as other device types. |
Axis IO Outputs are visible in the GCX Map alongside cameras and inputs. When you open the Map view:
- IO Outputs are listed with their associated devices.
- They display in the same context as other device types.
Multi-Monitor - Synchronizing Maps with Alarm Handling
GCXONE applications can be connected using the Multi-Monitor feature, which synchronizes two application panels side-by-side on the same screen. The most powerful pairing is Maps with Alarm Handling.
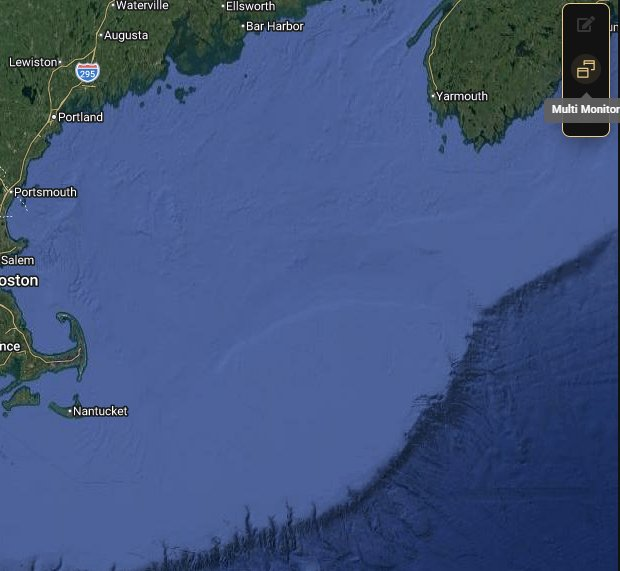
Figure 11 - The Multi-Monitor button.
How Multi-Monitor Works
When an operator assigns an alarm to themselves in the Alarm Handling panel, the Map panel automatically pans and zooms to the site associated with that alarm. This gives the operator instant location awareness without switching screens.
The benefit is twofold:
- Speed - the operator does not need to manually search for the site; the map follows the alarm.
- Context - the operator can see the site’s camera positions, zone labels, and geographic surroundings while handling the alarm.
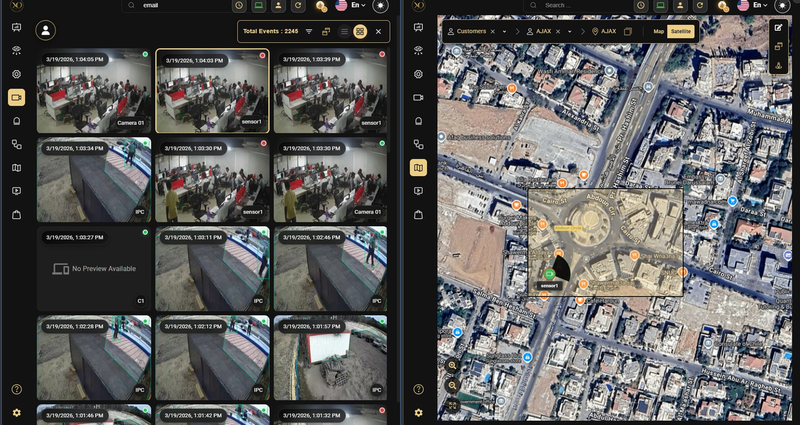
Figure 12 - GCXONE split view: Alarm Handling (left panel), and the Map (right panel).
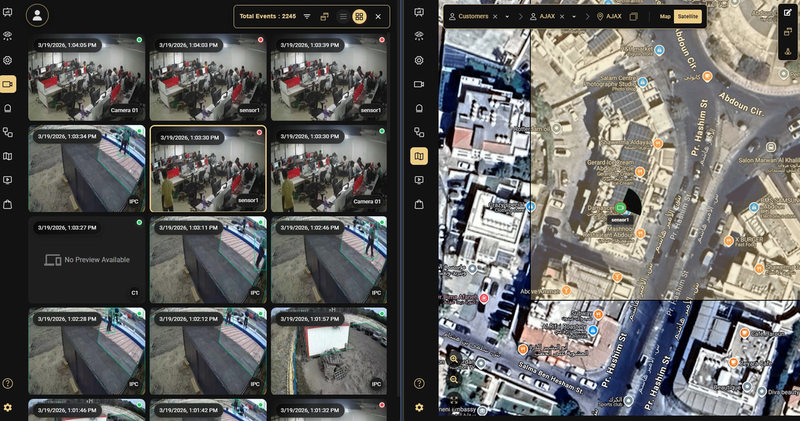
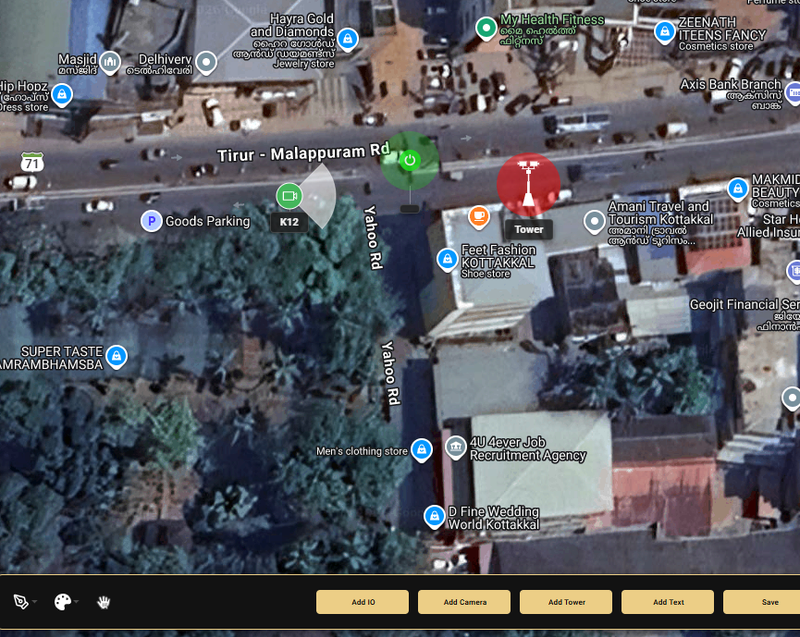
Figure 13 - Zoomed map view showing sensor placement.
For the best operational experience, open the GCXONE application on a wide display or dual-monitor setup. Use multi-monitor to pair Alarm Handling on the left with Maps on the right, keeping both visible simultaneously.
Real-Time Sensor Visibility
Camera and sensor icons placed during Edit Mode are visible to all operators in real time. When zoomed in on a site, operators can see:
- Camera icons with their field-of-view orientation.
- Sensor markers labelled with their configured names.
- Zone boundaries highlighting defined areas of the site.
- Text labels identifying key locations within the site.
This persistent visual layer reduces the cognitive load on operators, letting them focus on response rather than orientation.
Map View Modes
During live operations, operators can switch between Map and Satellite view at any time using the toggle in the top-right of the map canvas. Satellite view is recommended for operational use as it provides photographic ground truth for site layout.
Real-Time IO Status
IO Inputs and Outputs placed on the map now reflect their actual live state — both on initial load and throughout the monitoring session.
On load:
- Current IO status is fetched immediately when the Map is opened.
- Each IO icon is colored based on its actual state from the start — no refresh required.
During live operation:
- IO state changes are reflected on the map in real time.
- Icon colors update instantly without any page refresh.
Real-World Use Cases
- An operator receives an alarm. The Multi-Monitor setup automatically pans the map to the affected site, showing camera positions and zone labels instantly, with no manual navigation required.
- A control room manager sets up a new site. They enter the site coordinates, configure the map layout in Edit Mode, and place cameras with correct field-of-view orientations so all operators have accurate visual context from day one.
- A security team monitors multiple customers across different regions. Maps displays all sites as pins on a single world map, giving supervisors a live overview of the entire estate at a glance.
- A technician adds a new camera at an existing site. They enter Edit Mode, place the camera icon at the correct location, link it to the device and sensor, and save, making it immediately visible to all operators.
Best Practices
- Always set site coordinates before going live — sites without coordinates will not appear in Map search results.
- Use Satellite view during live operations for accurate photographic ground truth of the site layout.
- Pair Maps with Alarm Handling using Multi-Monitor for instant site context during alarm response.
- Set camera field-of-view orientations correctly during Edit Mode — this gives operators accurate visual context during incidents.
- Save the map layout after every change — unsaved changes are not visible to other operators.
Additional Details
| Task | Steps |
|---|---|
| Set site coordinates | Site Overview - Edit - Location Details - Enter Latitude and Longitude - Save |
| Find a site on the map | Map view - Search bar - Type site name - Select from dropdown |
| Enter Edit Mode | Map view - Navigate to site - Click Edit Mode button (top-right) |
| Add a camera to the map | Edit Mode - Add Camera - Position icon - Select Device and Sensor - Rotate for FOV - Save |
| Draw a zone | Edit Mode - Select zone shape (Square / Circle / Polygon) - Draw on map - Save |
| Add a text label | Edit Mode - Add Text - Enter label text - Save - Drag to position - Save |
| Enable multi-monitor | Map view - Click Multi-Monitor button - Select companion application (e.g., Alarm Handling) |
| Switch map view | Map canvas - Click Map or Satellite toggle (top-right) |