Camect Configuration Guide
Introduction
This guide outlines the steps required to configure Camect devices for seamless integration with the GCX-ONE platform, ensuring optimal performance, security, and monitoring capabilities for your surveillance system.
Prerequisites
- Whitelist the IP (CamectReceiver). If you don’t use NXGEN OpenVPn services.
- Local Mode is installed in operator workstations.
- Configure the private IP address given by NXGEN in case of using NXGEN OpenVPN services.
- Make sure the RTSP port 554 and the Http port (Control port) 443 are open.
Camect Configuration
Step 1: Login into your Camect device using the credentials needed.
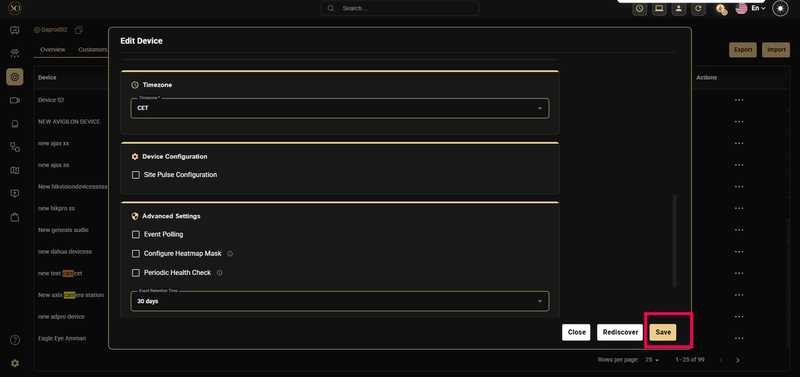
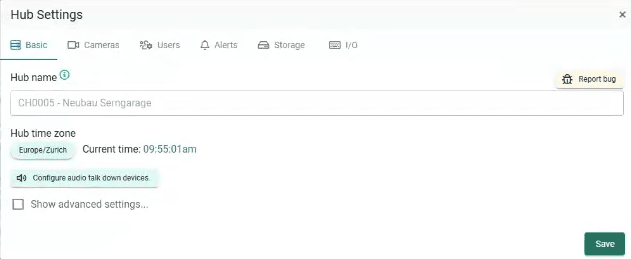
Step 2: Navigate to the "Hub settings" and ensure the time zone is configured correctly.
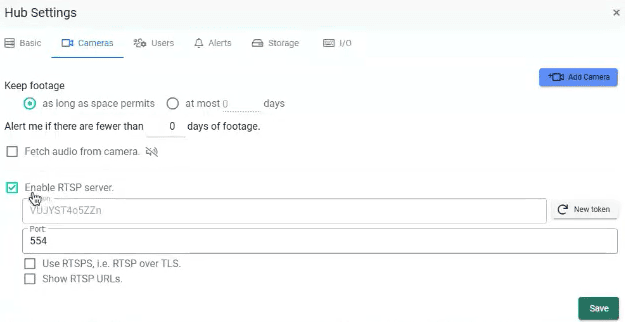
Step 3: On "Hub Settings" Navigate to "Cameras" and make sure the RTSP is enabled.
Step 4: Set-up a user for NXGEN (Local User credentials) with the permissions mentioned below:
- Live view.
- Query Cameras.
- Pan/Tilt Cameras.
- View alerts.
- View footage.
- Share cameras.
- Change operating modes.

Step 5: On "Camera Settings" navigate to "Basic" and make sure to enable "Pan/Tilt" or "Zoom" if the camera supports this functionality.
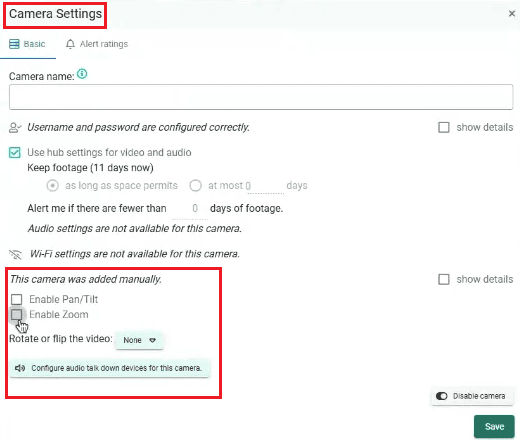
Don't forget to save the changes.
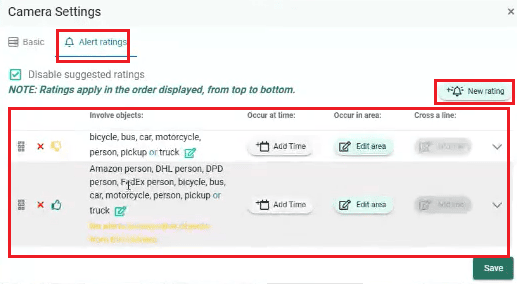
Step 6: If the camera supports "Alerts Rating" configuration, please follow these steps to set it up:
- Click on "Add Ratings".
- Choose "Thumbs down" if you dont want certain objects to trigger an alarm. For Example: bicycle, car, person etc.
- Choose "Thumbs up"if you want to trigger some certain options, such as: Amazon person, DHL person etc.
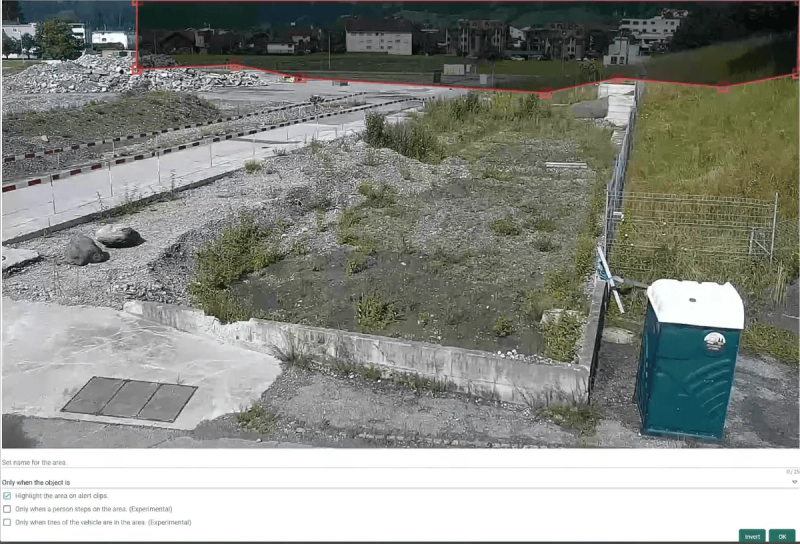
- Click on "Edit Area" to Specify your area of interest.
Don't forget to save the changes.
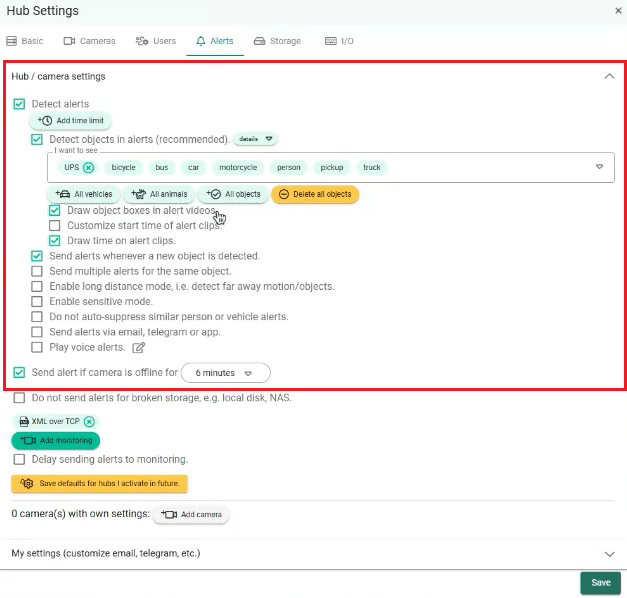
Step 7: Click on "Hub Settings," then navigate to "Alert" to configure alarms at the device level.
- Make sure the "Detect alerts" box is enabled.
- Configure the objects that you want to get it detected under the "Detect objects in alerts".
- Select the alerts needed on your side. Please refer to Camect document
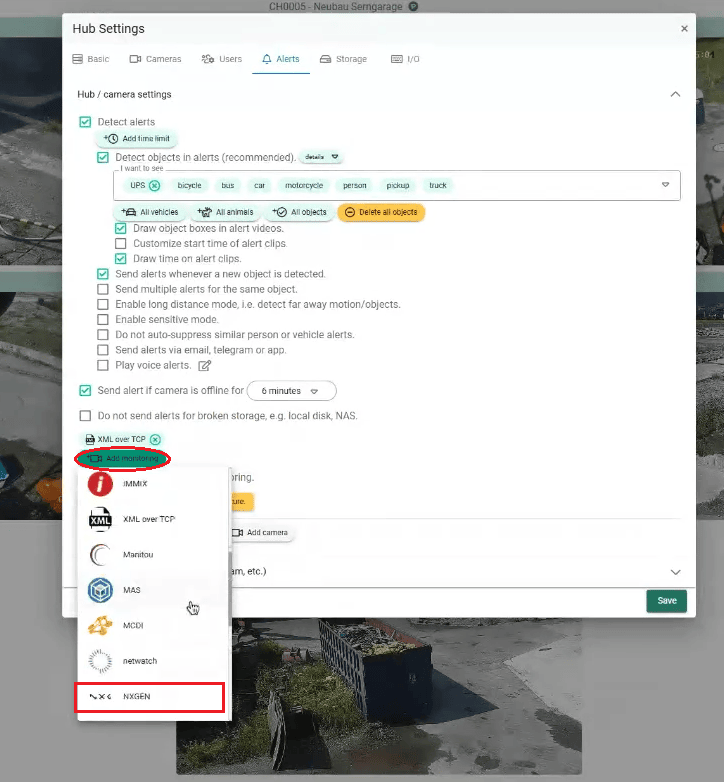
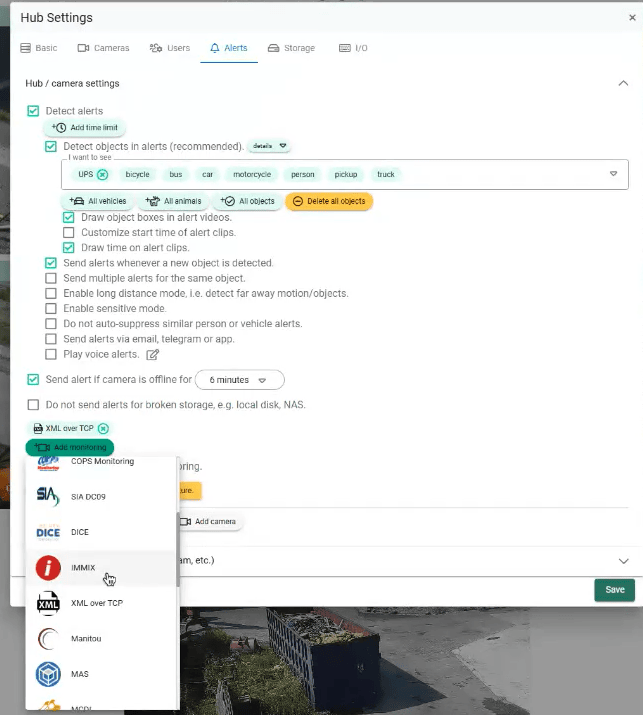
Step 8: In the same window, click on "Add Monitoring" to add a monitoring site.
-
Choose "NXGEN" as a monitoring site.
-
In Case if NXGEN is not there, choose "IMMIX".
-
If you couldn't find both, choose "XML over TCP".
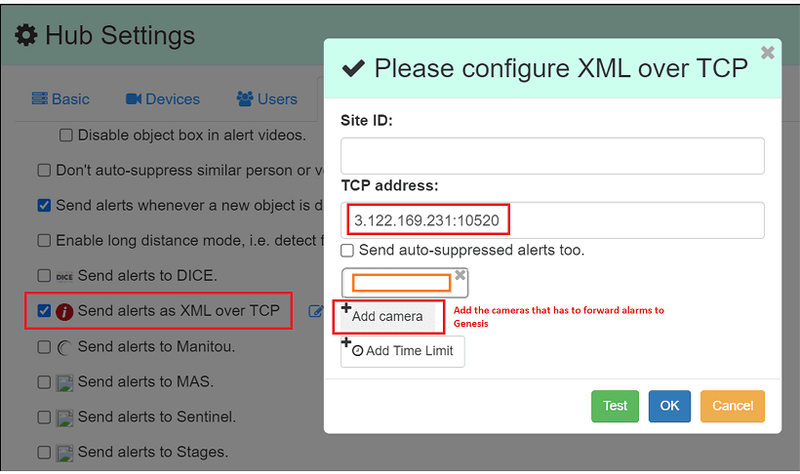
Step 9: When you select NXGEN as a monitoring site, you will be directed to the configuration page. On this page, follow these steps:
- Set the site ID to "1", as a dummy value.
- On TCP address, add Genesis TCP address.
TCP address
TCP address in case of using OpenVPN
- Then click on "Add camera" that has to forward alarms to Genesis.
These steps and explanations will help you configure the appropriate analytics on your Camect Device to enhance your security system’s effectiveness and responsiveness.
Camect Config Guide with GCX-ONE
This document describes the steps required to configure an Camect device in GCX-ONE.
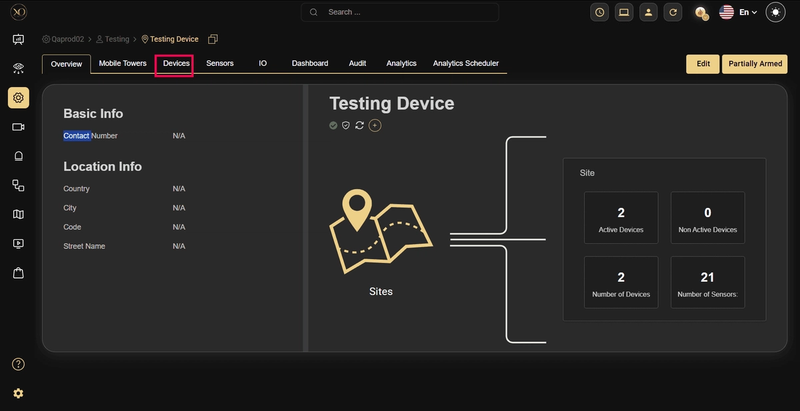
Step 1: Navigate to the Devices tab.
Step 2: Click the Add button.
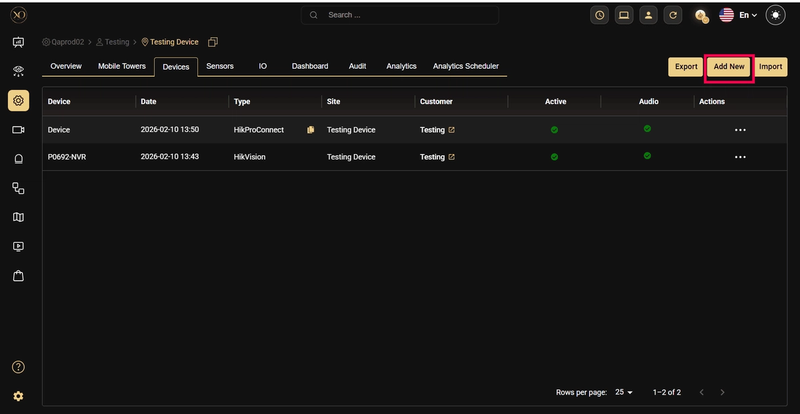
Step 3: The Add Device dialog will be displayed.
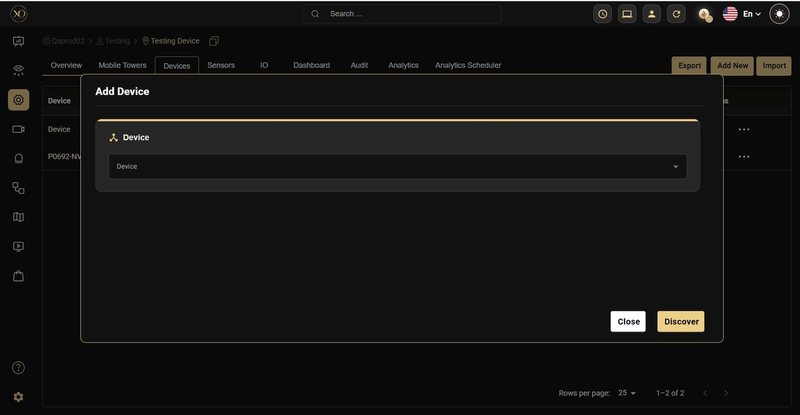
Step 4: In the dialog, open the Device dropdown and select Camect.

Step 5: Enter all required fields: Name, IP Address or Host Name, serial number, Username, Password , Control Port, RTSP Port.
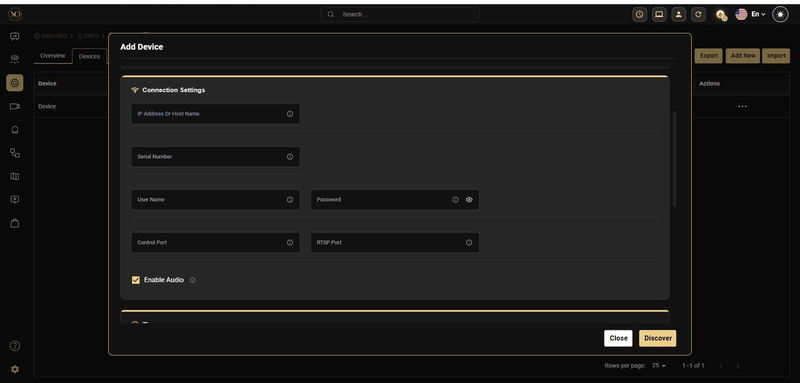
Step 6: Click Discover

Step 7: Once the device is successfully discovered, click Save.