Daily Monitoring Workflow
What Daily Monitoring Workflow Covers
This page describes the standard daily routine for operators in GCXONE, covering how to open your shift, review incoming events efficiently, use Auto Stream for live alarm video, monitor sites via Maps, and close out your shift properly.
Why It Matters
A structured daily routine ensures no alarms are missed, no escalations are left unassigned, and every shift starts and ends with full situational awareness.
How It Works
Before You Begin
- You have completed the Operator Quick Start and can log in successfully.
- Cloud Mode Active is confirmed in the status bar.
- Your assigned customer/site filters are known for the shift.
Starting Your Shift
- Log in and verify your account role and timezone.
- Open Video Search from the left navigation menu.
- Confirm Cloud Mode Active is displayed in the status bar.
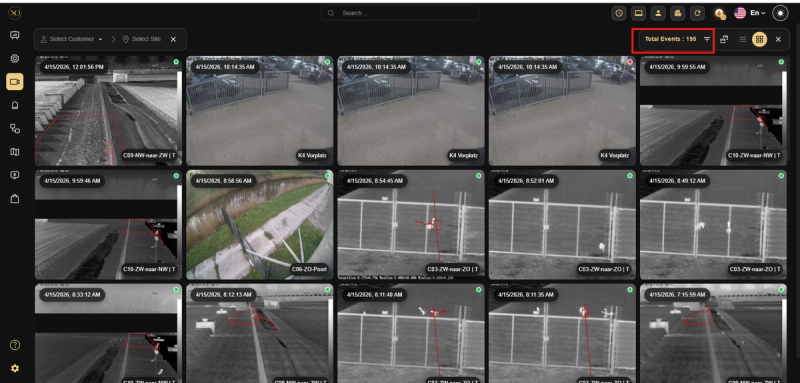
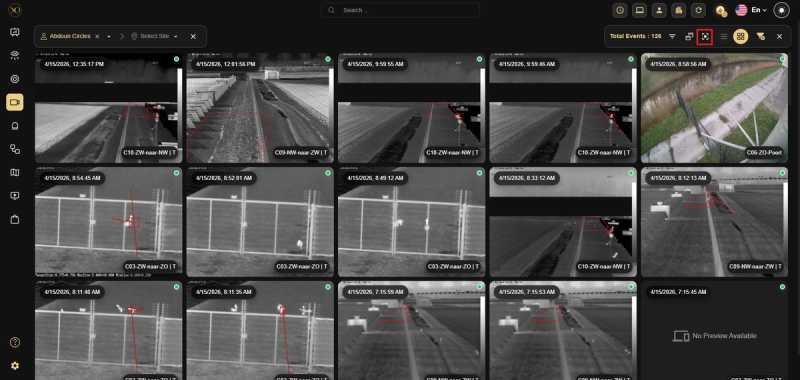
- Check the “Total Events” counter in the top-right of Video Search to estimate the volume of events that need review.
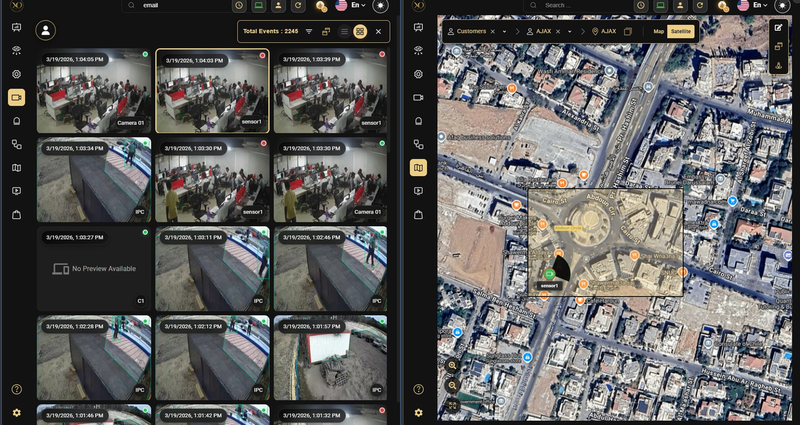
Reviewing Events in Video Search
Video Search is your primary workspace. Events are color-coded: green for real alarms and red for false alarms. Use the Customer and Site selectors on the left to define your scope. Use the filter panel on the right to narrow events by Alarm Type, Time Period, Search Tag, and Detection Type. Click any event to open its detail view.
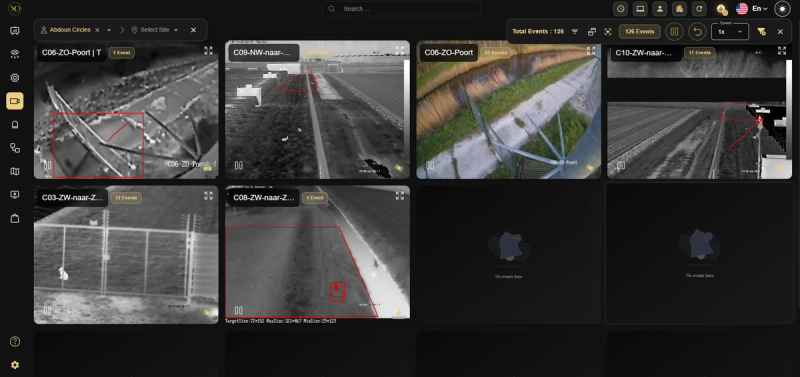
Using ZenMode for High-Volume Shifts
ZenMode automatically combines multiple alarm events from the same sensor into a single continuous video clip, so you review all related events in one playback instead of opening each alarm individually. This significantly speeds up alarm review during busy shifts.
-
Select a Customer, Site, or Device from the filters.
-
In Video Search, click the ZenMode icon in the toolbar.
-
GCXONE plays all combined events sequentially, with event times updating automatically. Use the Speed control to process faster, and the Events Counter to track total events remaining.
Using Auto Stream
Auto Stream automatically opens live camera feeds in the Video Viewer the moment an intrusion alarm is triggered. You do not need to search for cameras manually — the correct cameras appear instantly based on the alarm zone.
How Auto Stream behaves:
- Zone alarm matched — Only cameras mapped to that zone are streamed automatically
- No zone or no match — The entire site is streamed
- Multiple alarms — Cameras from all relevant zones are combined with no duplicates
- Motion alarm present — Motion alarms take priority and switch to Quad View
- New alarms during active workflow — The stream updates automatically in real time
Auto Stream must be configured by an administrator before it can activate. Zone mappings must be set up in Talos and assigned to cameras in GCXONE. If Auto Stream does not trigger, contact your administrator to verify the zone configuration.
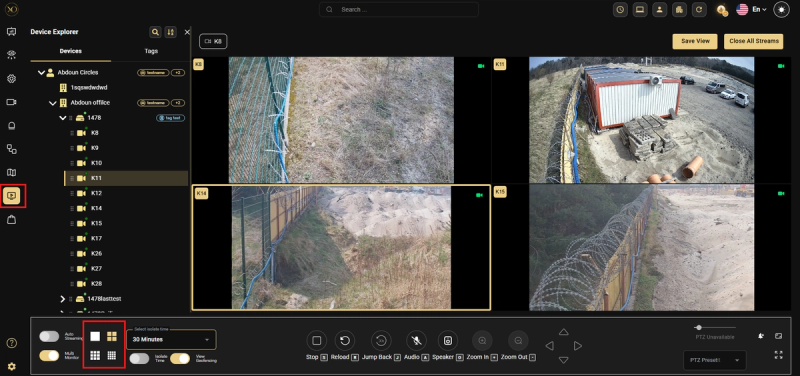
Monitoring with Video Viewer
Open Video Viewer from the left navigation. Select a site or device to load cameras, then choose your grid layout: Quad View (2×2), 3×3 Grid, or 4×4 Grid.
Fullscreen View — Double-click any Quad View tile — including pre-alarm, alarm, post-alarm, and preview — to expand it to full screen for clearer inspection. This allows operators to clearly verify events without struggling with small image sizes. Preview is now fully interactive and supports the same expansion behavior a
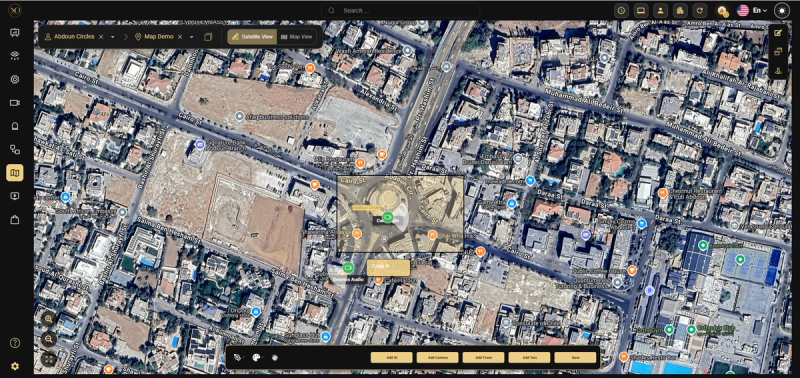
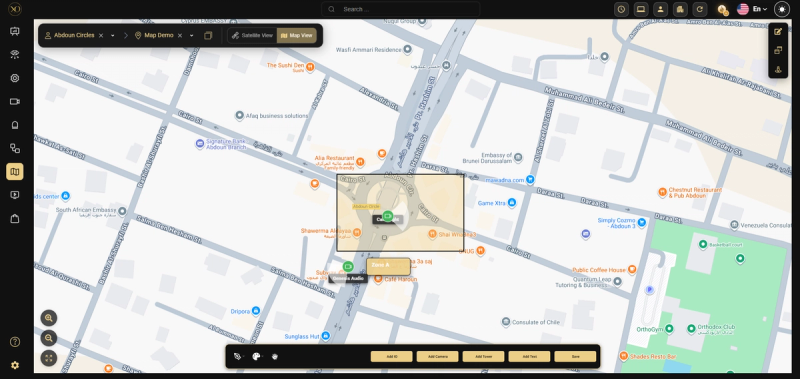
Using Maps During Your Shift
Maps gives you a geospatial overview of all your customer sites on a live satellite or road map. As an operator, you use Maps to quickly locate a site, see camera positions and zone labels, and get instant location context when responding to alarms.
-
Open Maps from the left navigation. All sites appear as pins on the world map.
-
Use the panel at the top left to find a site by name. Selecting a result will instantly move the map to that location.
-
Click on a site pin to see camera placements, zone boundaries, and text labels on the site map.
-
Enable Multi-Monitor to synchronize Maps with Alarm Handling — when you assign an alarm, the map automatically pans to the affected site with no manual navigation needed.
-
Switch between Map and Satellite view using the toggle in the top-right of the map canvas. Satellite view is recommended during live operations.
Ending Your Shift
- Review any unresolved alarms in Video Search.
- Ensure all active Isolate Time settings are intentional and have not expired unexpectedly.
- Hand over any open escalations to the incoming operator or supervisor.
- Log out of GCXONE.
Key Capabilities
| Feature | Purpose |
|---|---|
| Video Search | Primary workspace for reviewing and classifying alarms |
| ZenMode | Combines multiple events from the same sensor into one clip |
| Auto Stream | Automatically opens live feeds when an intrusion alarm triggers |
| Video Viewer | Multi-camera live monitoring with grid layout options |
| Maps | Geospatial overview of all sites with camera and zone positions |
Real-World Use Cases
- An operator starts a busy shift and immediately activates ZenMode to clear a backlog of 200 events in half the normal time.
- An intrusion alarm triggers and Auto Stream instantly opens the relevant cameras — the operator sees the live feed without searching manually.
- An operator enables Multi-Monitor to pair Maps with Alarm Handling — when an alarm arrives, the map automatically pans to the affected site.
Best Practices
- Use ZenMode at the start of busy shifts or after a break to quickly clear a backlog.
- Set your customer/site filters at the beginning of the shift to avoid reviewing unrelated alarms.
- Pair Maps with Alarm Handling using Multi-Monitor for instant site context during alarm response.
- If Auto Stream does not trigger on an alarm, check with your administrator that zone mappings are correctly configured in Talos.
- Save a Video Viewer layout for your shift to reload it instantly each day.
- Always hand over open escalations before logging out — never leave them unassigned.